DIY Table Saw Stand With Folding Outfeed Table
Learn how to make a DIY table saw stand with a folding outfeed table. This simple portable table saw stand is perfect for a small shop! Get the plans and detailed video tutorial.
Psssttt: Get that t-shirt here.
I had stayed away from a table saw for a long time! But finally, it was time to step up my woodworking game!
Before I could buy and use a table saw, I tried to read everything I could about using it and about table saw safety.
The most important thing was to not use it on a floor – to have a proper stand for the table saw.
I mostly cut and make sawdust in the driveway, so I needed something mobile. Plus, we are short on space in the garage (who isn’t?), so I wanted as small a footprint as I could have.
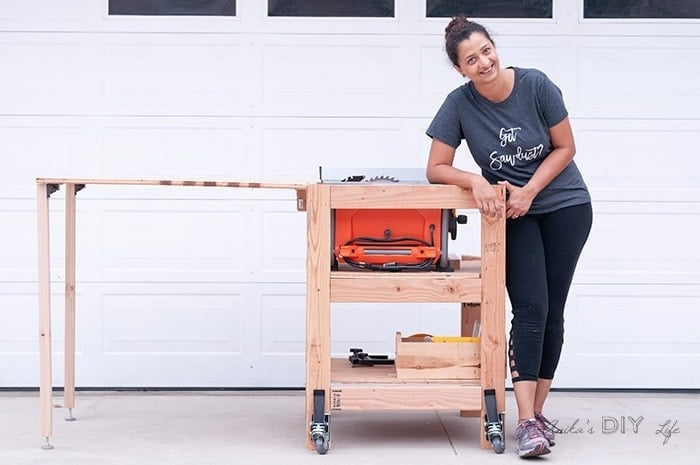
Enter my DIY table saw stand with a folding outfeed table.
***Thanks to Rockler Woodworking and Hardware providing hardware to make this project possible. ***
Portable DIY Table Saw Stand With Outfeed Table
I designed this table saw stand with my workbench in mind so I could use it as my outfeed table.
This is what it looked like for about 6 months.
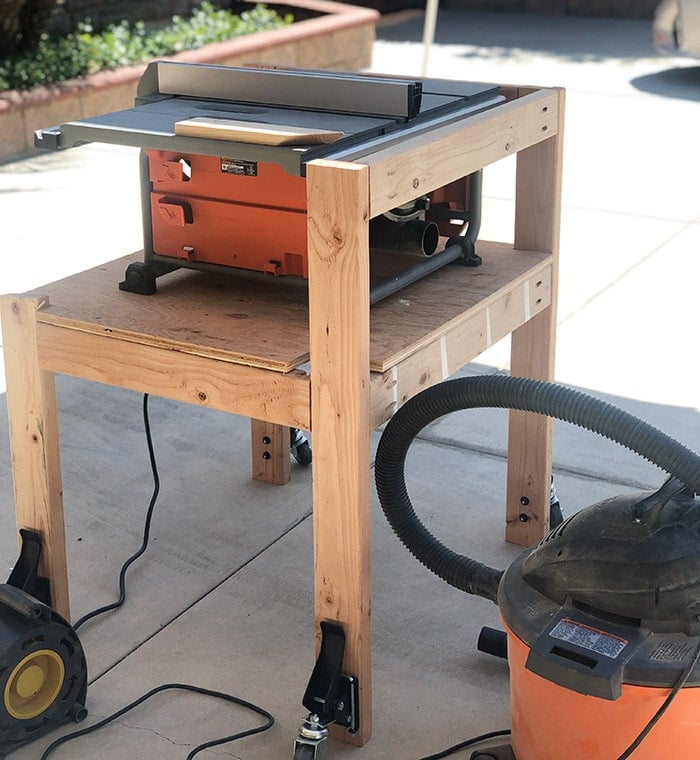
But with time, I realized I needed a simpler solution so I didn’t have to pull out both the benches.
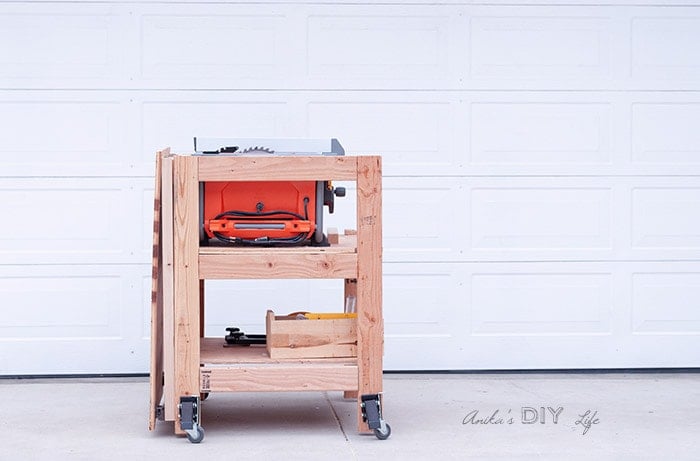
I decided to add a folding outfeed table to the table saw stand.
The design evolved over time as I got more comfortable with my table saw and understood the features and needs better.
But now I am SO happy with how it turned out. It is compact and easy to pull out and set up!
RELATED: Check out my Sandpaper and sander storage and my DIY planer stand with storage.
***This post contains referral or affiliate links. It is a way for this site to earn advertising fees by advertising or linking to certain products and/or services. Please read my full disclosure here ***
Material Needed
- Lumber per the plans
- Folding table leg brackets
- Dropdown casters
- Furniture levelers
- Circular saw
- Kreg Rip cut (optional but recommended)
- Kreg Jig (See my full guide on how to use a Kreg Jig for beginners)
- Miter Saw
- 2½” pocket hole screws
- Face clamps and right angle clamps
- Power Drill
- Heavy-duty door hinges
DIY Table Saw Stand Plans
I have the printable plans available to you so you can build your own table saw stand.
Important—This stand is designed for my height, which is 5’9″. Be sure to adjust the height so the table saw is at your waist height.

DIY Folding Table Saw Stand Video
Here is a full video of how I built the table saw stand
The design evolved a little over time, so you will see it looking slightly different during the beginning stages.
But the printable plans give you the final design.
Full step by step instructions follow.
Click here to subscribe to my YouTube Channel for more great videos!
How to Build a Portable Table Saw Stand
Step 1- Make the Cuts and Prep
- Follow the printable plans and make all your cuts.
- Review the plans and make pocket holes needed.
Step 2 – Build the Frame of the Table Saw Stand
- Build the frame of the table saw stand by attaching the 2x4s using 2-1/2″ pocket hole screws and wood glue.
- I came back and added a shelf to this but I recommend adding the shelf at this step. The printable plans show you exactly how to do that.
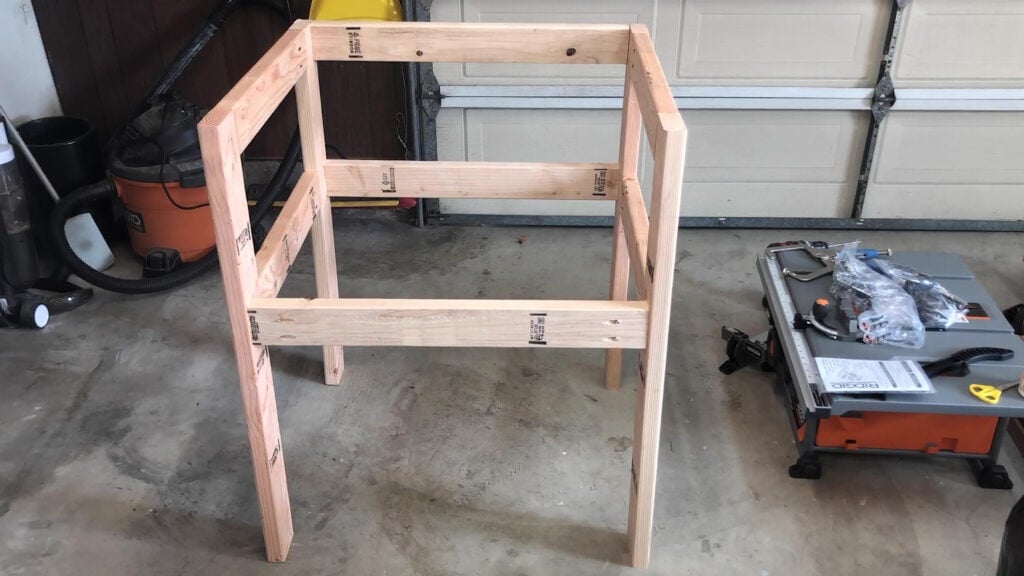
Tip – It is important to make sure everything is square and level so the table saw sits on an even surface.
Step 3 – Add Shelves
- Cut the plywood to size and screw it in using 1-1/4″ wood screws. I recommend using a straight edge jig or a Kreg Rip cut for this.
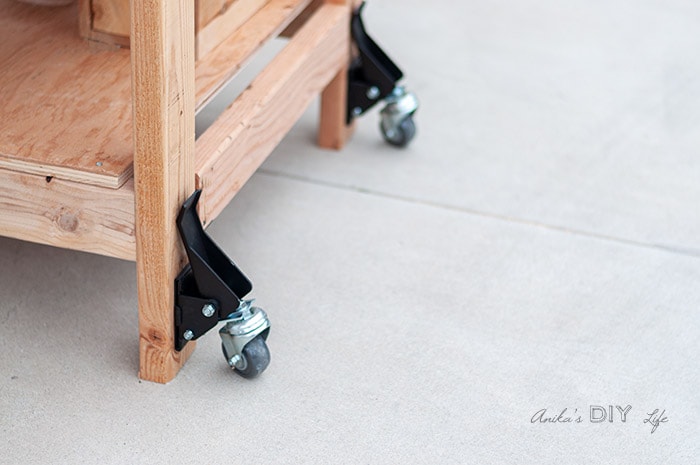
Step 4 – Attach Casters
- This is a good time to attach casters because it is easy to turn the stand sideways as needed.
- I decided to add dropdown casters so the stand sits sturdy on the floor when I am using the table saw.
Step 5 – Attach Folding Outfeed Table
- Attach a 2×4 brace to the table saw stand using 2-1/2″ wood screws.
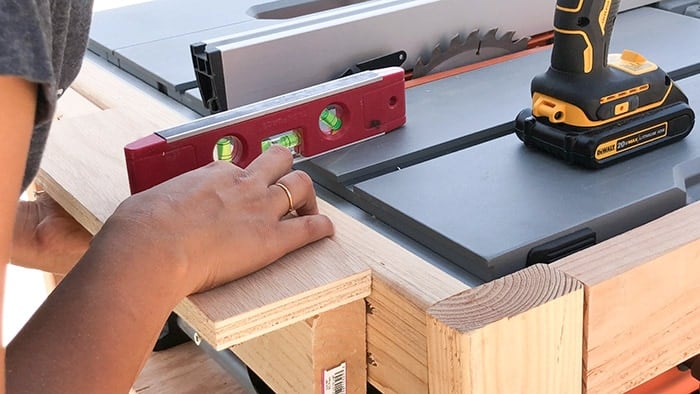
Important – It is essential that the outfeed table be at the same level as the table saw surface.
Before attaching the brace, use a scrap piece of plywood and a level to make sure that the plywood surface level with the table saw. See video for how I did this.
- Place the plywood for the outfeed table on top of the brace and attach heavy-duty hinges from underneath.

I like to support my plywood using a rolling stand.
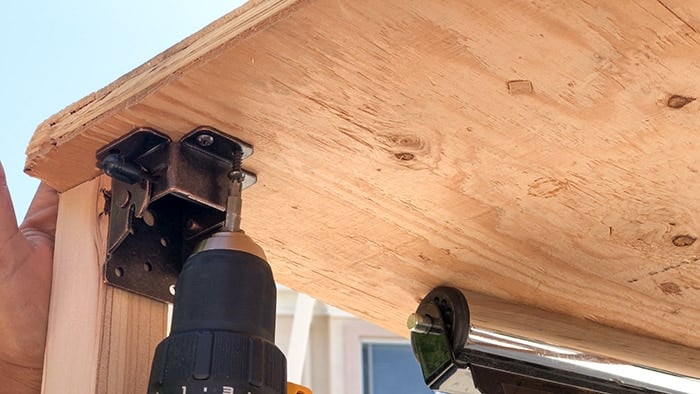
Step 6 – Attach Folding Legs
- Attach folding leg brackets to the outfeed table underneath. I made sure that they were as close to the edge as possible.
- Attach the 2×2 legs to the folding leg brackets
Step 7 – Attach Furniture Levelers
- At the bottom of the legs, attach furniture levelers. This will help account for the uneven floors in the garage or driveway.

That is it!
I love having this easily portable table saw stand.
Now there is one thing though, I need to remove the furniture levelers when I fold the legs due to the size of the legs. Otherwise, they do not fold in completely.
But it is a small step to remove and attach the levelers as needed. It doesn’t beat the convenience of having the portable and compact table saw stand.

The shelf underneath stores all my table saw accessories and safety equipment – the list of which is growing really fast.
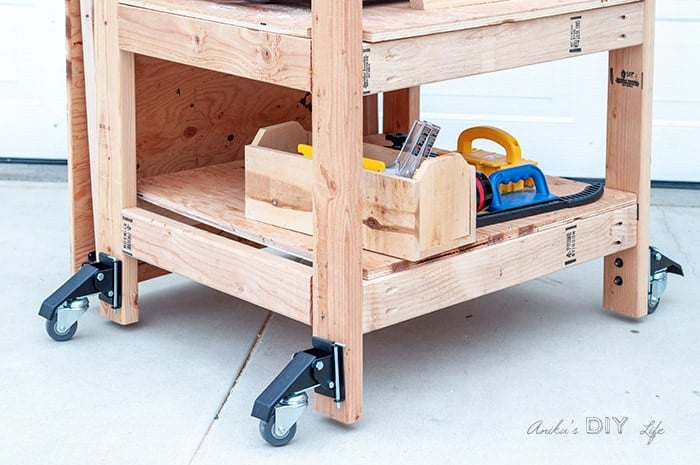
Table Saw Safety Accessories
At some point, I want to install a drawer underneath so it doesn’t get covered in sawdust all the time.
But for now, this compact rolling table saw stand is perfect for my shop!
Don’t forget to grab the printable plans by clicking below –
If you decide to build it, I’d love to see it! Feel free to email photos to me at [email protected] or tag me on Instagram @anikasdiylife for a chance to be featured on social media!
RELATED: 24 simple and amazing 2×4 project ideas, Easy 2×4 Workbench Plans for Beginners
You may also like:
- How To Build An Easy DIY Workbench With Storage
- DIY Small Mobile Workbench With Storage
- How to Use a Table Saw for Beginners
Anika's goal is to inspire and empower beginners with woodworking, DIY, home improvement, and home decor ideas.
She wants everyone to unlock their creative potential and experience the feeling that comes with making something. Nothing feels better better than seeing something and saying "I can make that!"


This is an amazing project! I definitely need to make one for my table saw so that I use it more!
Great project, I so need so figure out an outfeed option for my portable saw. But I love that yours is all in one easy to use rolling cabinet. I bet you work so much faster now!
Aha! You now have your own Pinterest board on my feed. I wanted build and it said pick a different name so I chose you and moved all your projects to your board. Quite a few now. I am 5 ft now and shrinking. My son suggested a Barbie house should be made for me to live in. But am moving to Austin. Goal is to come back here so I can be the greatest grandma ever.
I am not on Facebook but would really like to learn about the DIY projects that are on the FB page is there any other way to get them? I have Instragram if you can do that with that. Pls let me know
I showed this to my hubby, maybe we will get a table saw so I can make one!! Great project!!
Very nice post. I just stumbled upon your weblog and wanted to say that I’ve truly enjoyed browsing your
blog posts. After all I will be subscribing to your rss feed
and I hope you write again soon!