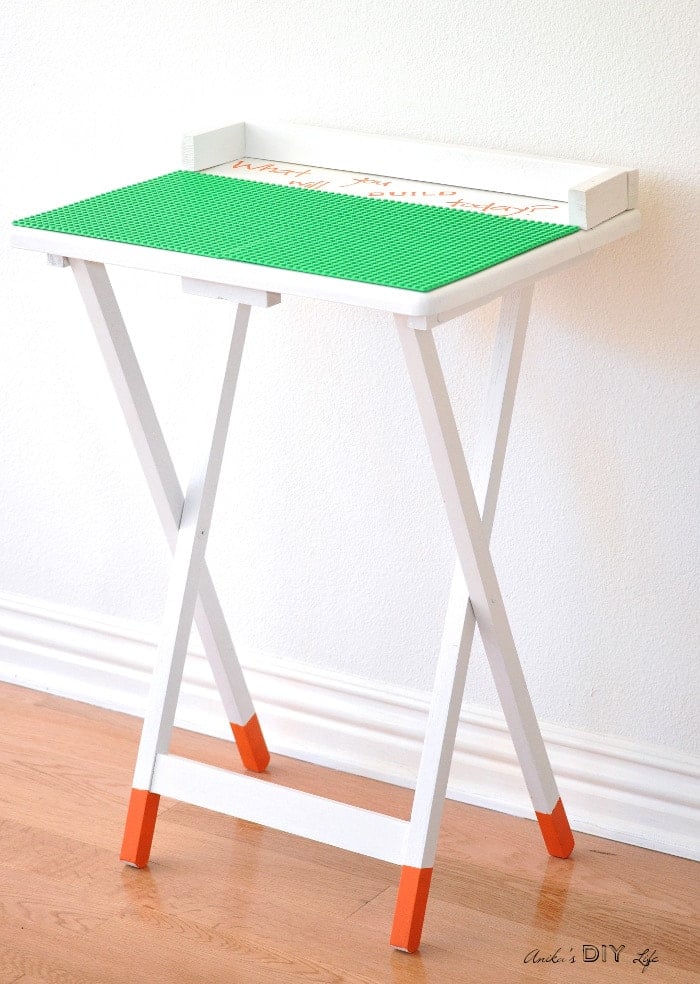
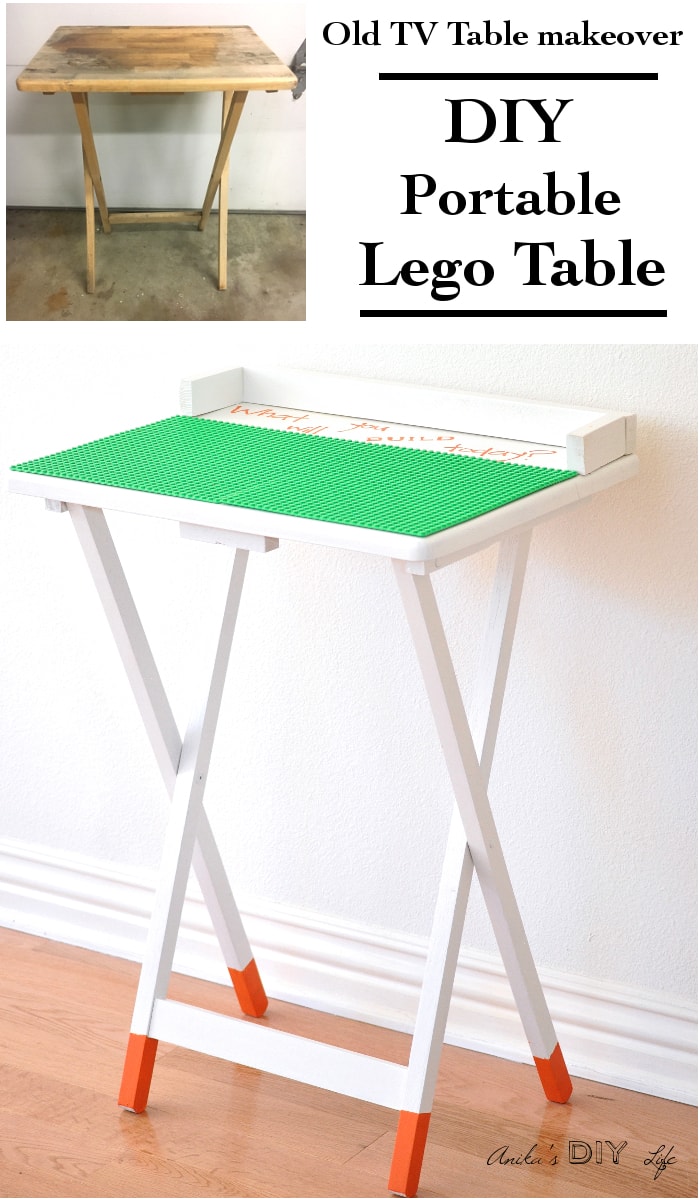
Portable DIY Lego Table from an old TV Table
Need a quick and simple space for your kids to build their Lego creations? Grab a folding TV Table and give it a quick makeover to make a Portable DIY Lego Table.
Sometimes when you pick up a piece of (free) furniture, you have absolutely no idea what you will do with it! You just hang on to it till inspiration strikes. That is the story behind my portable DIY Lego table which is a TV table makeover.
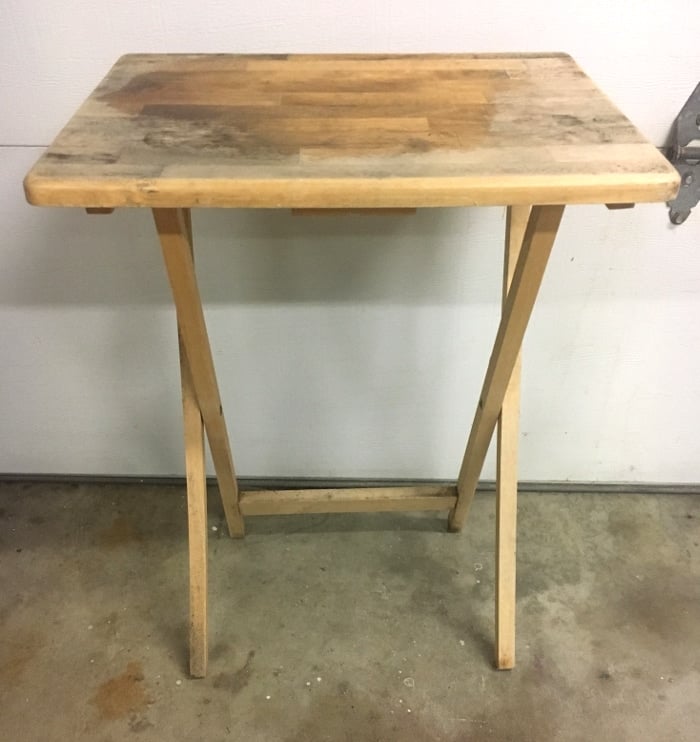
This story started when my friend called and asked if I wanted some of the stuff she was throwing away. There was TV table and whole bunch of 2 x 4 boards. I was like “Hello!! Of course!! I will take all of it!” So, this table came home and sat in my garage. It was super nasty! Apart from all the dirt and grime, it also had mold on it…. yes, it was fun picking it up and bringing it with me!

Now the story behind the TV table makeover – my 6 year old is all into Legos right now! She makes them on her desk or on the dining table and when it is time to clean up, they kept put in random places! We have a whole bunch of Lego creations hanging around all over the house! When her little brother gets into them (which is EVERY time) and messes them up, you can only imagine what ensues! So I decided to make her a special spot between the magnetic chalkboard and play kitchen in the playroom to make and save all her creations. Having them all in one place will hopefully help a bit with the little one randomly finding things to mess up. Plus, it makes a very nice spot to showcase all the Lego builds!

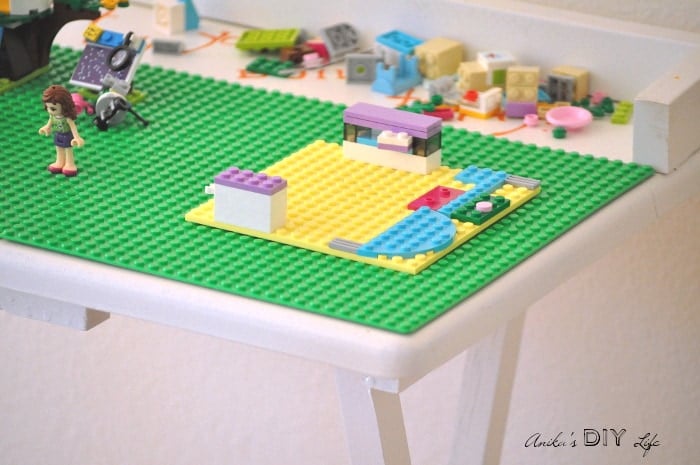
I also added a lip on one end. That way, during any Lego project, Legos can be stored there and they don’t fall off the table. You know how fun it is when a little tiny piece of Lego decides to show up under your bare feet!
How to make a portable DIY Lego table –
***This post contains referral or affiliate links. It is a way for this site to earn advertising fees by advertising or linking to certain products and/or services. Please read my full disclosure here ***
Materials needed
- An old table (I used the old TV table. This makes it portable but you could use any table or build one yourself!)
- Water based Primer
- Paint of your choice
- Lego base plates
- E6000 adhesive
- 1″ x 2″ boards
- Paint sprayer
- Large Spray shelter
- 1 1/4″ spax screws – I love these because they are self drilling
First thing’s first – Clean the table!
How to clean mold from wood
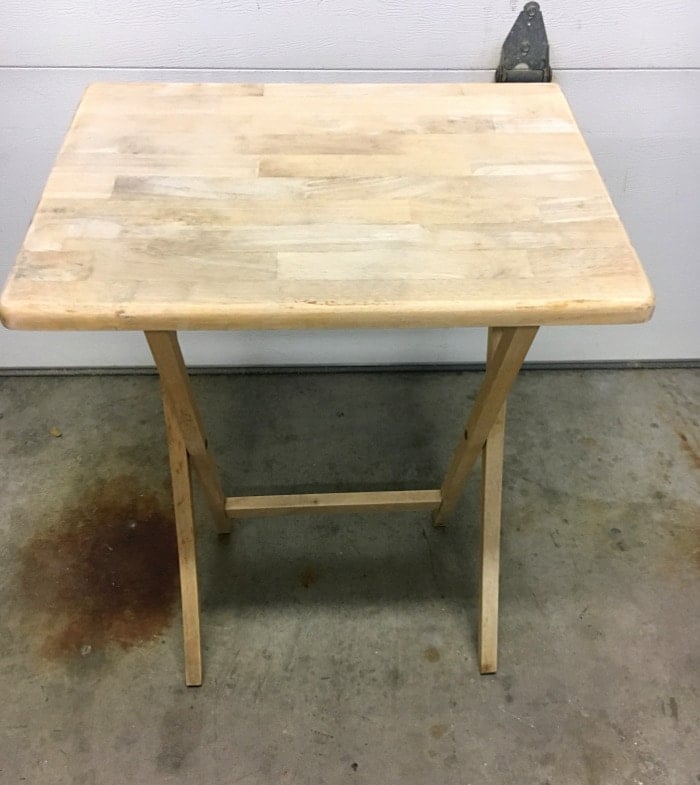
You know by now that my table was nasty! I did a bunch of research on how I could clean this table. I decided to use vinegar and bleach and scrubbed the entire table down. Once that was dry, I gave it a sanding for good measure. Meet the nice and clean TV table ready for its makeover.
How to build a Lego Table
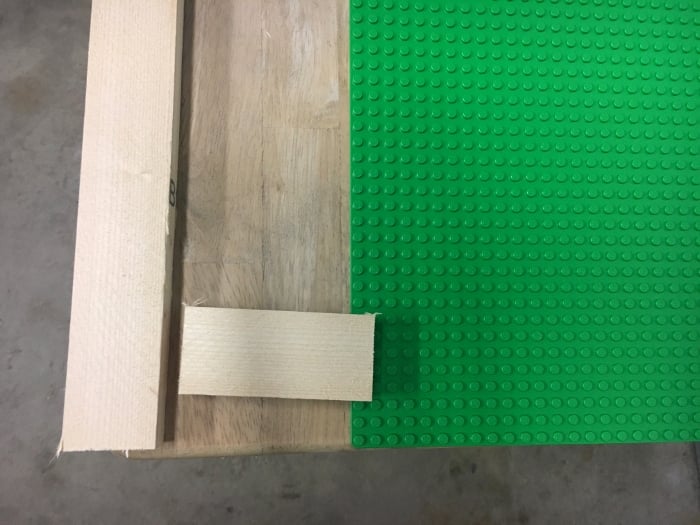
Step 1 – Cut the 1″ x 2″ board to size to create a rail on one side of the lego table to hold the loose legos while the creations are being built.
Step 2 – Attach the boards to the top from the back using the 1 1/4″ spax screws.
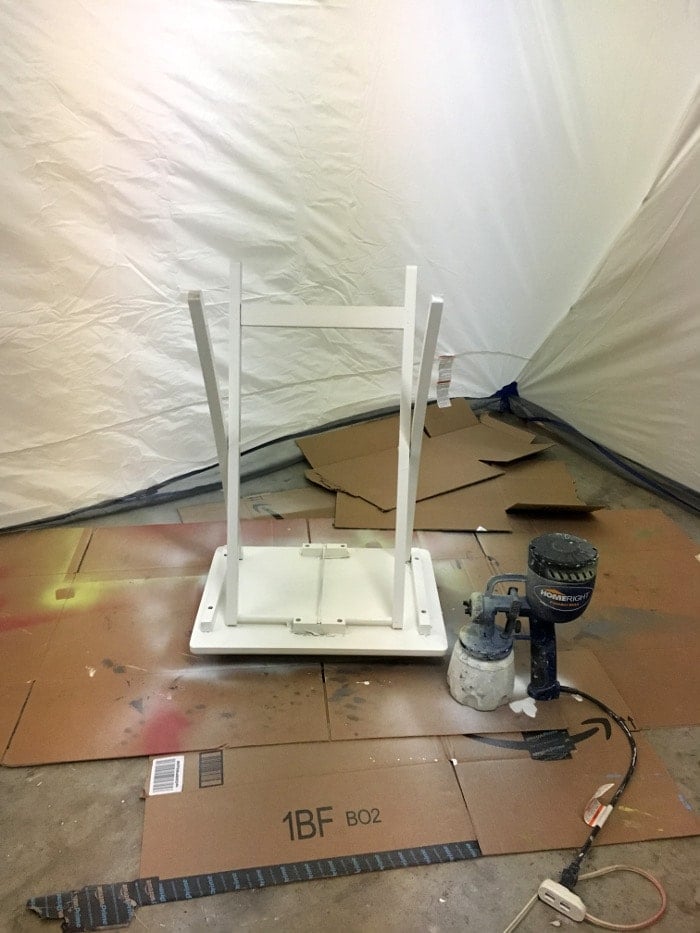
Step 3 – Paint the table! I used 2 coats of primer and 3 coats of paint. My favorite painting tool – the Homeright paint sprayer made it so easy to do this. It took my exactly 37 minutes to set up the sprayer, do the 3 coats on the backside (waiting about 10 minutes between each coat) and clean out the sprayer! Yes I timed myself… sometimes I can be a bit geeky 🙂
The large spray shelter was a life saver! It was super windy and rainy outside so I just set it up in the garage without having to worry about getting paint on things in the garage. (I had about 3 other projects in the garage at that time which would not have liked a white overspray!)
Step 4 – Figure out how you want to attach the lego base plates. I needed to cut off about 2″ from one base plate to fit it on the table.
How to cut a lego base plate
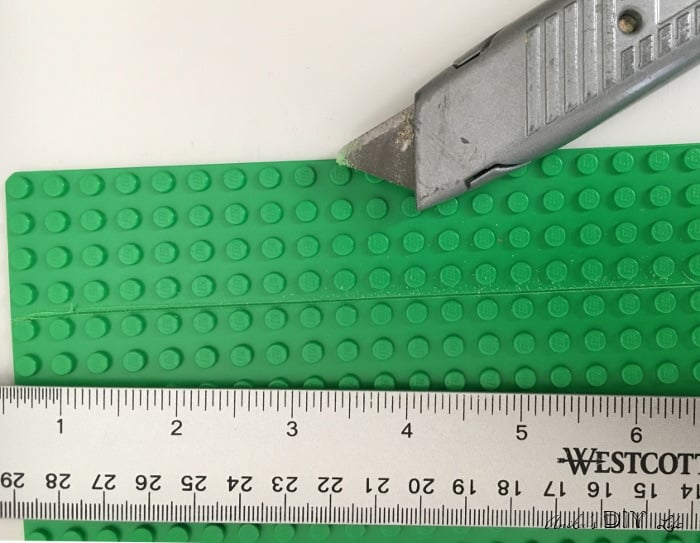
To cut the lego base plate, I used a sharp box cutter and a steel ruler and gave a couple of passes where I wanted to cut the plate.
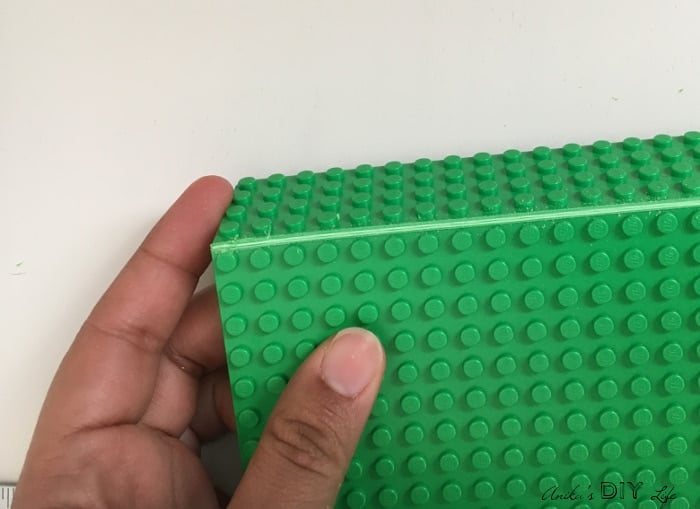
Then I just bent it both ways with my hands until it came apart!
Step 5 – Glue the lego base plates to the table using E6000. I glued the sharp edge towards the inside so the original well rounded edges are on the outside. Make sure to use a few legos near the joint to make sure the spacing is optimum.
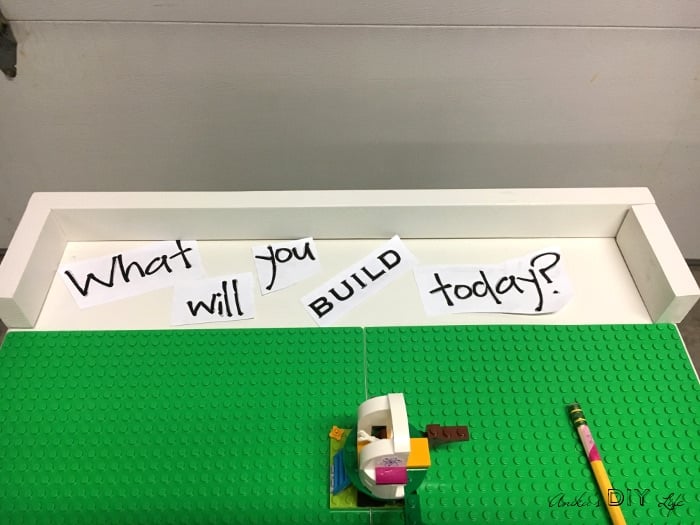
Step 6 – Trace and paint a message if you like. I used the same transfer method I showed you in this Valentine’s Day sign.

Step 7 – Add more color – make paint dipped legs!
The Portable DIY lego table is ready!! It was a nice surprise for the daughter! It has been getting lots of use already!

Using the old TV table to make this also made it portable and easy to put away when not in use!

If you are wondering if it helped with the conflict over the Legos, it’s only been used for a couple of days and so far it seems to be working. In fact, I now have a request to make one for the little one to build his Lego Duplo on… so you may in fact see another Lego table in the future 🙂

Anika's goal is to inspire and empower beginners with woodworking, DIY, home improvement, and home decor ideas.
She wants everyone to unlock their creative potential and experience the feeling that comes with making something. Nothing feels better better than seeing something and saying "I can make that!"


I love what you did with this little table! It’s so functional and the kiddos will love it!! I now need one. LOL
Thank you Kim!! 🙂
This is an awesome project Anika! I love how it folds up for easy storage so it’s not in the way. Great job!
Thank you Pam!! 🙂
i was about to buy my kids a lego table for my kids for Christmas however if i won i would help my husband make one
Hi Amanda, Make one anyway! I am sure the kids will love the table you make with your husband!
It’s beautiful and convenient. Great job, Anika. I have no doubt that your children love it. Thanks for sharing with us.