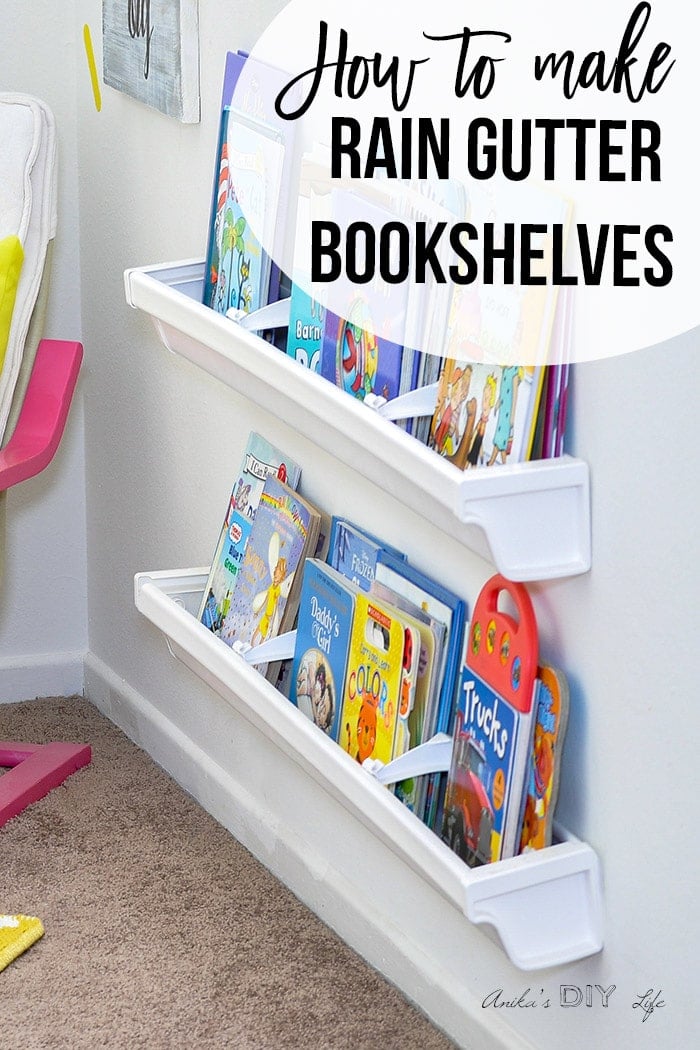
Easy DIY Rain Gutter Bookshelves
Full step by step tutorial to install rain gutter bookshelves. It makes a perfect addition to any kid’s room.
Rain gutter bookshelves have been a staple in our kids’ rooms and playroom for almost 7 years now.
I discovered them when I was looking for a solution to my 15-month old’s ever-growing collection of books.
After a whole bunch of research, and looking into the pros and cons of many other ideas, I decided to use rain gutters as bookshelves because they are so so easy and cheap to install.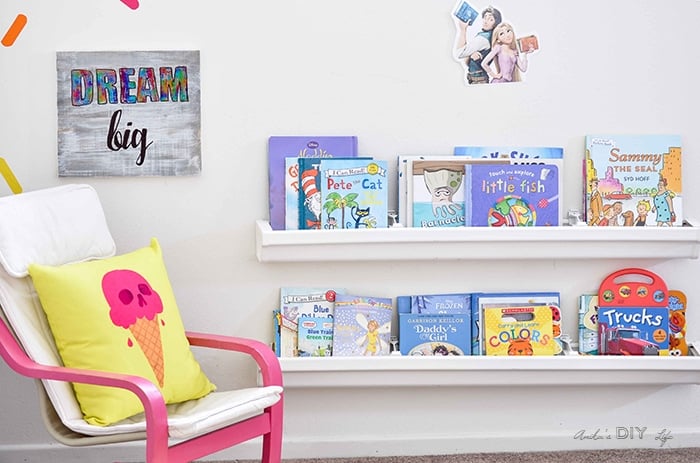
PS: these also make cute ways to display toys or pictures.
RELATED: Check out the entire playroom reading nook and all the projects and products in this space!
Why use rain gutter bookshelves –
- It is well known that the best way to encourage little kids to read books is to have the front of books visible to little readers to peak their curiosity.
- They are super easy to install
- Nothing beats the price!
***This post contains affiliate or referral links. It is a way for this site to earn advertising fees by advertising or linking to certain products and/or services. Please read my full disclosure here ***
DIY Rain gutter bookshelves
Materials for vinyl rain gutter bookshelves:
- Vinyl rain gutters
- Vinyl rain gutter hangers
- K-type vinyl end caps
- Hand saw
- Stud finder (my favorite stud finder!)
- Level
- Long straight edge – yardstick or pine board
- #8 – 1 ½” screws
- Pencil
- Sandpaper
- Tape measure
- Drill
Where to buy vinyl rain gutter bookshelves –
I got my vinyl rain gutters and all other needed accessories at Home Depot. They are found in the roofing section and come in 10 ft lengths.
Apart from the rain gutters, you also need to get a few of the rain gutter hangers, end caps and screws. The hanger and end caps are shown below.
Rain gutter bookshelf tutorial –
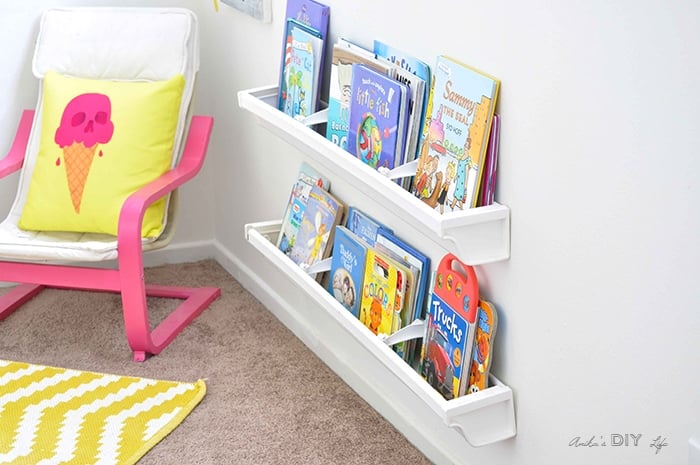
Start by deciding the configuration and length of your bookshelves. I have used a variety of configurations through the years in various homes and rooms.
Stacking them up on the wall is one option (like I did this time), but you could also stagger them to create visual interest.
You could also have smaller versions of them next to your kids’ beds like Raising Olives does.
I decided to make two 40″ long bookshelves under the window stacked about 16″ apart. I found that this spacing is sufficient height to accommodate most picture books we own.
Step 1 – Cut the vinyl gutters to the lengths you need and sand the rough edges using some sandpaper.
How to cut vinyl rain gutters –
Cutting vinyl rain gutters is super easy! Once you have the lengths determined, you can cut them up easily with a handsaw. In fact, I had to cut them down at Home Depot in the molding section to be able to fit them into my car.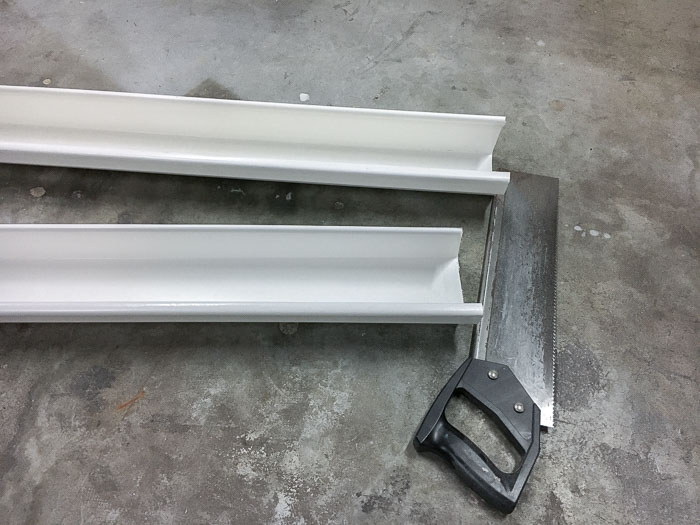
How to Install rain gutter bookshelves
Step 2 –Find the studs in the wall using the stud finder and mark them with a pencil. 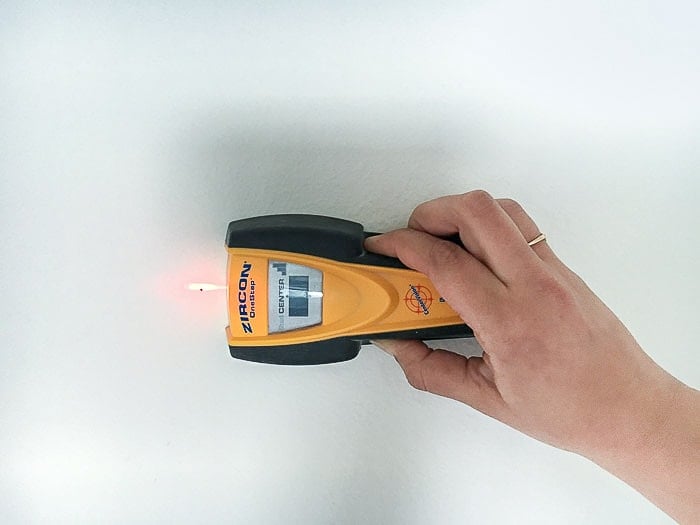
Wall studs are typically 16″ apart, so for the 40″ shelves I anchored two anchors at 32″ apart. For shelves longer than 48″ you might need more hangars.
(Don’t have a stud finder? Here are 5 Ways to find Studs without one.)
Step 3 – Use a level mounted on a straight edge while you mark the locations for the hangars. This will ensure straight shelves.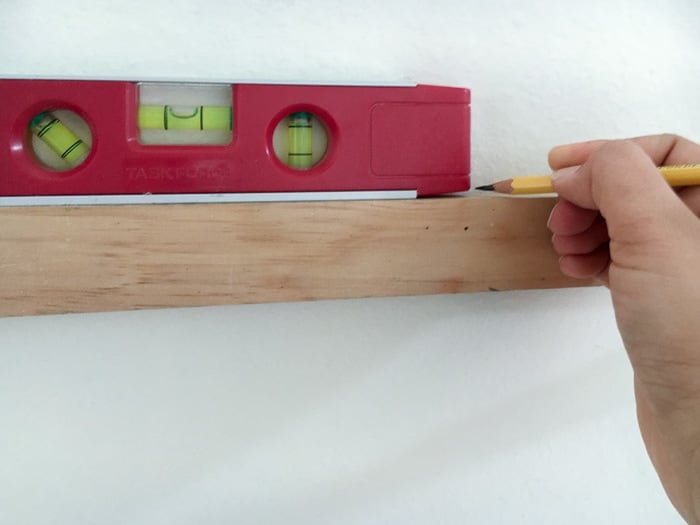
Step 4 – Install the hangers using the 1 ½” screws. The screws go in at an angle directly into the studs. 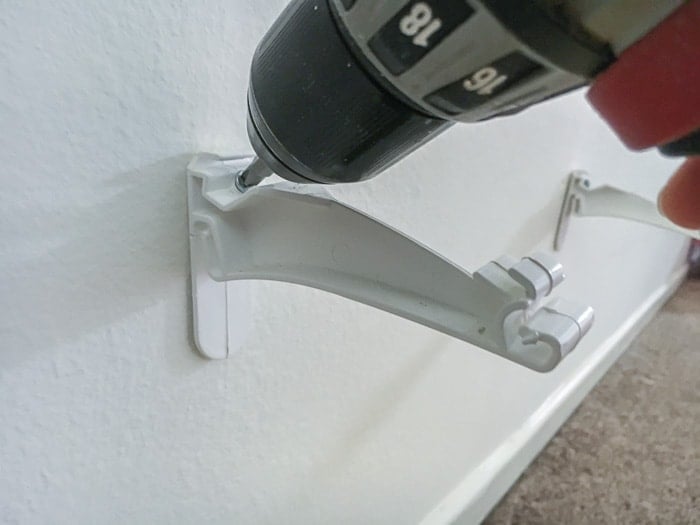
Important – Since the screws go in at an angle, you can not use wall anchors. Therefore, tt is important to drive the screws into studs.
Step 5 – Carefully slide the rain gutter through the hangers. 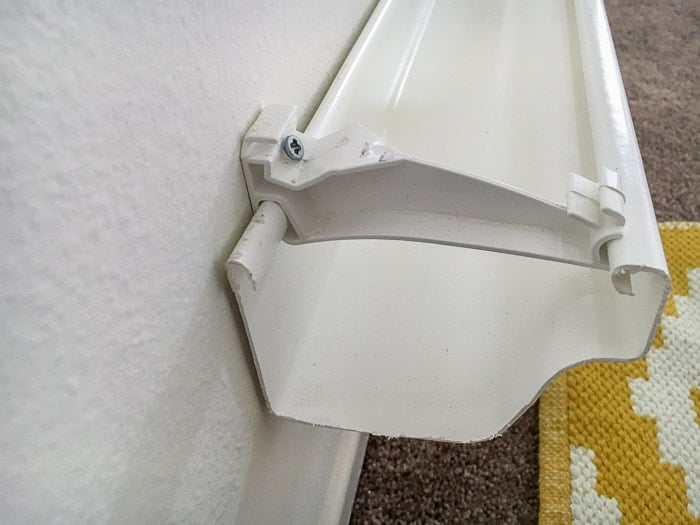
Step 6 – Install the end caps.
They can be a bit tricky to get on and may need a little “persuasion”. Once you get them on, they should stay on nice and tight.
Fill with books and watch the little ones discover the joys of reading!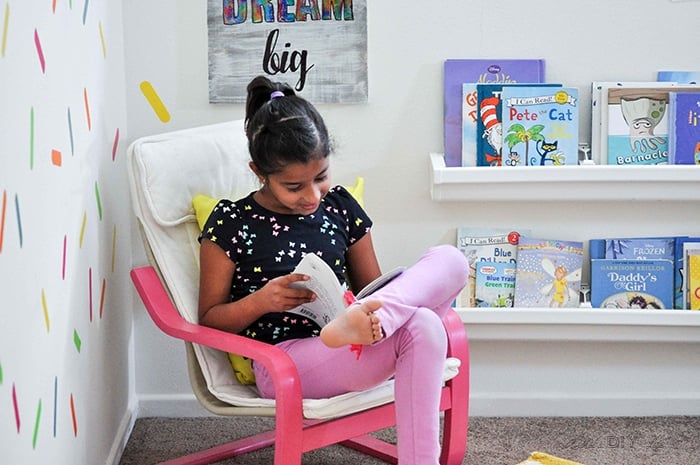
Rain Gutter bookshelves cost:
Let’s break down the cost of these bookshelves. Each Bookshelf cost me –
- Rain gutters – $3.98 for 10 ft so approx. $1.32 per shelf
- Gutter hangers – $2.45 each so approx $5 per shelf.
- End caps – $8.34 a pair
That is a total of about $14 per shelf! I had all the other tools and hardware on hand.
Simple, cheap, and functional solution! Also, don’t forget the advantages of having the book covers facing out and how much they help increase interest in reading!
Plus, if you ever run out of space on these shelves, it is easy to just add shelves on the sides.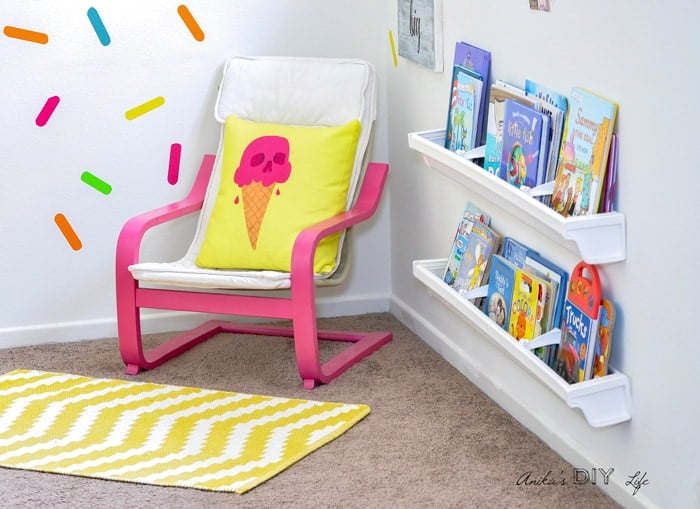
How sturdy are the rain gutter bookshelves
In one word – VERY! We have loaded it up with lots of books and have never had any issues with the stability of the shelves.
Be sure to use hangers at least every 32″ apart and into the studs and they will be attached nice and strong.
Uninstalling rain gutter bookshelves
Over the last few years, we have moved a whole bunch of times and every single time, I have taken the bookshelves off.
The bookshelves are screwed into the wall with 1 screw, so it is as simple as patching up that one hole and repainting!


Anika's goal is to inspire and empower beginners with woodworking, DIY, home improvement, and home decor ideas.
She wants everyone to unlock their creative potential and experience the feeling that comes with making something. Nothing feels better better than seeing something and saying "I can make that!"


Wonderful idea to give kids a special space to read! Happy Summer, Kippi
This is just about the coolest project that I have seen lately! This is so practical for young readers.
Thank you for sharing your clever ideas on Friday Features last week, this week you are being featured, hope you will stop by and share again.
Your post has been Pinned and will be shared on Instagram!
Please be sure to share the party!!
Have a great weekend!
Karren
Love this idea to organize books! I’ll be featuring this tonight at Merry Monday.