DIY Custom Picture Frame (Using Half-Lap Cuts)
Learn how to make a wall-mounted custom picture frame of any size using half-lap cuts with this detailed step-by-step guide.
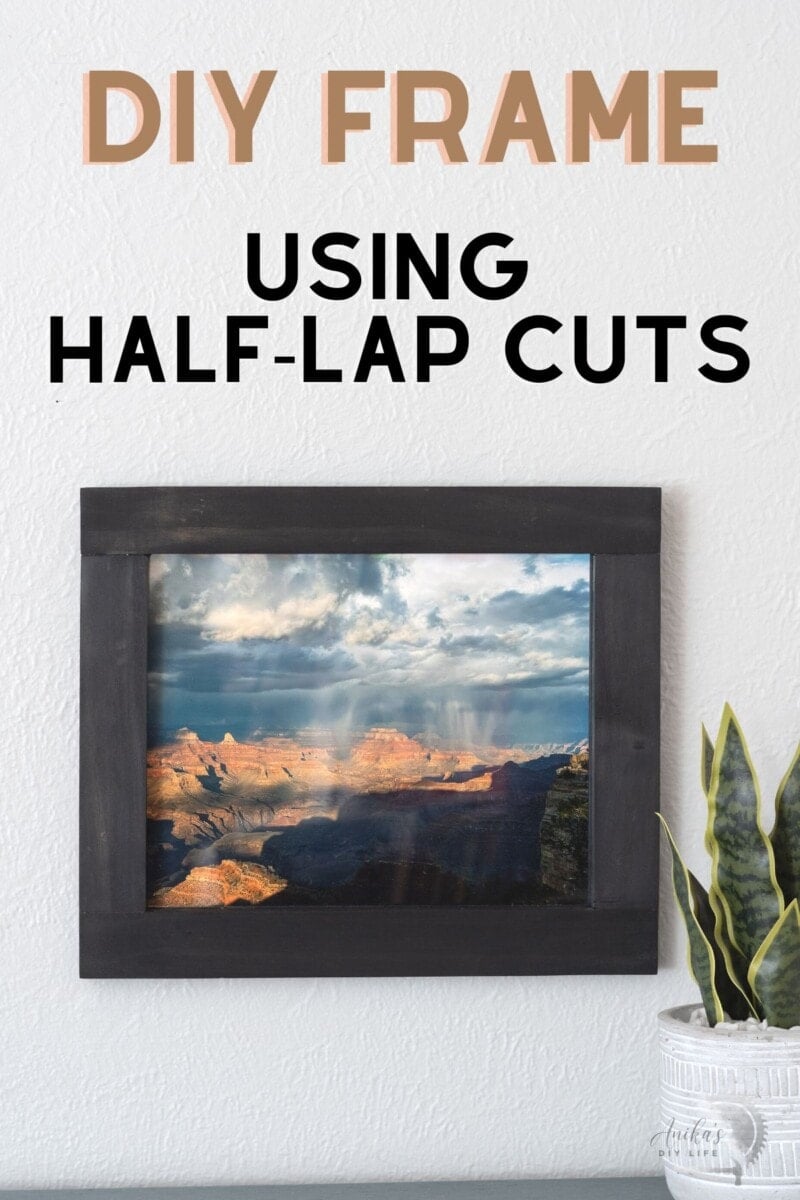
We recently came back from a trip to the Grand Canyon and even though, I forgot to take my DSLR (which I regret so much!), I was able to capture a lot of the beauty with my iPhone.
I printed out some of my favorite pictures and decided it was time to build some picture frames using a technique I have wanted to try for a while.
There are many ways to build picture frames but I wanted to try making these with half-lap cuts.
Half-lap cuts can feel intimidating but trust me, once you get a hang of the measurement, they are very easy to make.
There are also many ways to make half-lap cuts-
- with a table saw jig
- a circular saw
- a chisel.
I decided I was going to try my hand with an oscillating tool – which is essentially a power chisel right?
Did it work? You will see!
***This post is sponsored by The Home Depot as part of the #THDProSpective program. All opinions are my own. Thank you for supporting the brands that help me bring you new projects.***
***This post contains referral or affiliate links. It is a way for this site to earn advertising fees by advertising or linking to certain products and/or services. Please read my full disclosure here ***
Material Needed
- Lumber of your choice. I used 1×2 boards but you can use 1×3 or 1×4 depending on how chunky you want the frame to be.
- Diablo 1-1/4 in. Universal Fit Bi-Metal Oscillating Blades for Clean Wood (3-Pack)
- Diablo Hand Sanding Block with Assorted SandNET Reusable Sheets (80, 120, 220 Grit)
- Stain or paint in the color of your choice
- Rabbeting bit
- Plexiglass or real glass for the picture.
- Backing clips
- Sawtooth hanger.
- Wood Glue
- Tape measure
Tools Needed
Step-By-Step Tutorial
When making this project, please be sure to wear all safety equipment – eye protection, airway protection, and hearing protection. There is a lot of dust generated in this project – especially with the oscillating tool and the router.
Step 1: Measure and Make the Cuts
- Make the cuts you need using a miter saw or circular saw.
Determining the size of the cuts for the frame:
- The size of your cuts is based on the size of the picture you want to frame. Ideally, you want the opening to be about 1/8″ smaller than the picture itself.
I am framing an 8×10 picture, so my opening was 7 7/8″ and 9 7/8″. - Next, I am using 1×2 boards which are 1 1/2″ wide so the I added 2 x 1.5″= 3″ to the total lengths of the sides making the size of the boards 10 7/8″ and 12 7/8″.
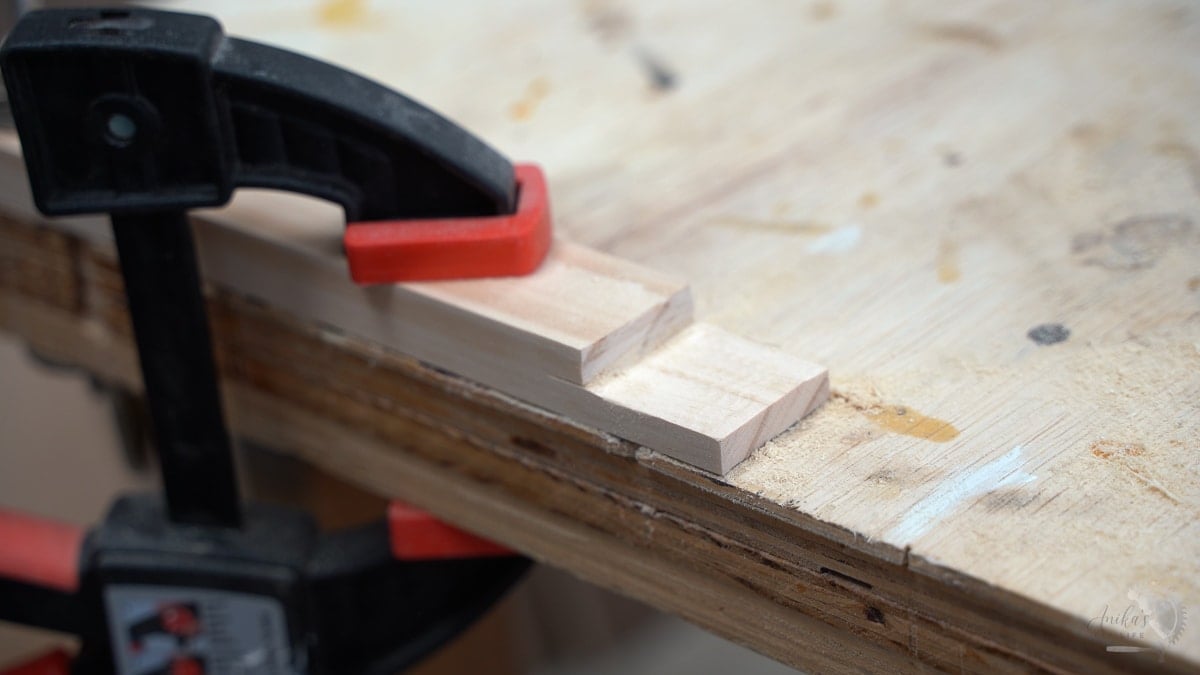
Step 2: Measure for the Half-Lap Cuts
Marking the half-lap cut is the most crucial for getting a tight-fitting joint.
- The width of the cut is exactly equal to the board that will be going into the joint. This can be easily marked using the existing boards.
- For the depth of the cut, you want to remove half the thickness of the board. Measure and mark this thickness carefully.
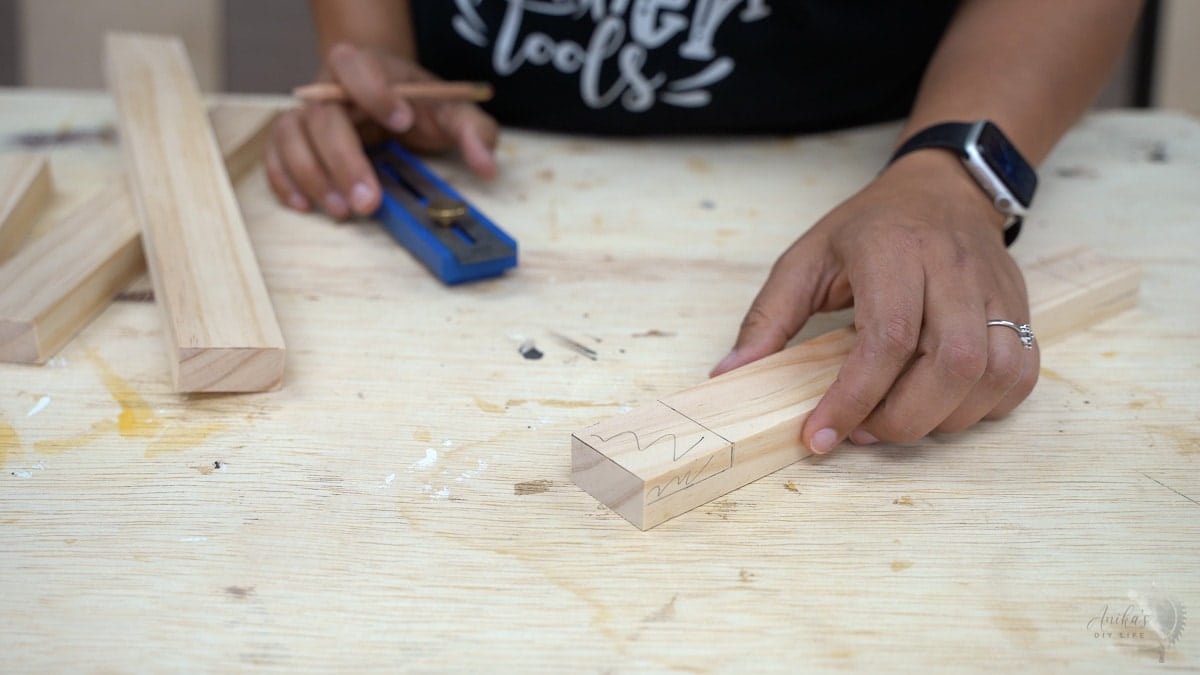
I highly recommend marking the exact area that needs to be removed so you can keep track.
Step 3: Make the Half-Lap Cuts
To make the half-laps, carefully remove the material from the marked area. There are many ways of doing this. I used my oscillating tool fitted with the Diablo Clean Wood blade.

These Diablo Clean Wood blades have multiple features that make them perfect for this application:
- They have a curve contact edge design for precise, clean plunge cuts with less vibration.
- They have a 2″ depth of cut
- They result in an extremely clean cut.
- Black I.C.E. coated teeth for heat resistance, long life and superior chip evacuation.
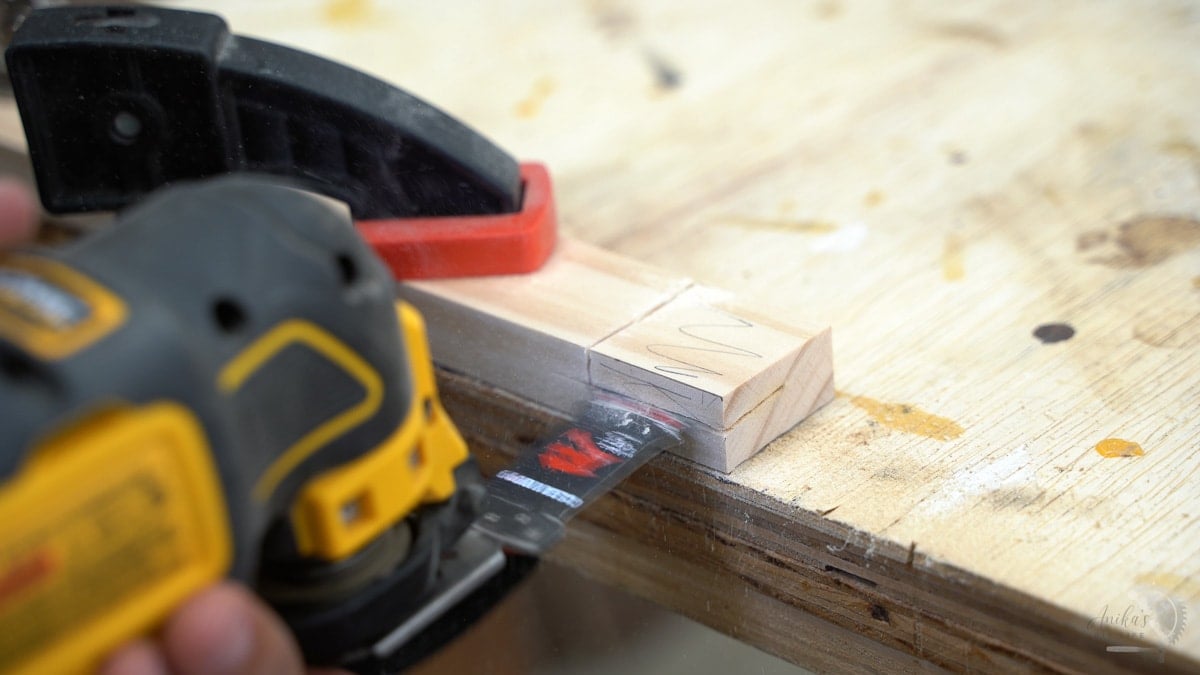
It took me a little bit of practice to get reproducibly clean cuts. A few tips I learned in the process:
- Start the tool before bringing it in contact with the surface to cut so you can control where it starts to cut.
- Account for the width of the blade i.e., kerf.
- Create a groove along the cut lines first before plunging.
- Hold the oscillating level while cutting.
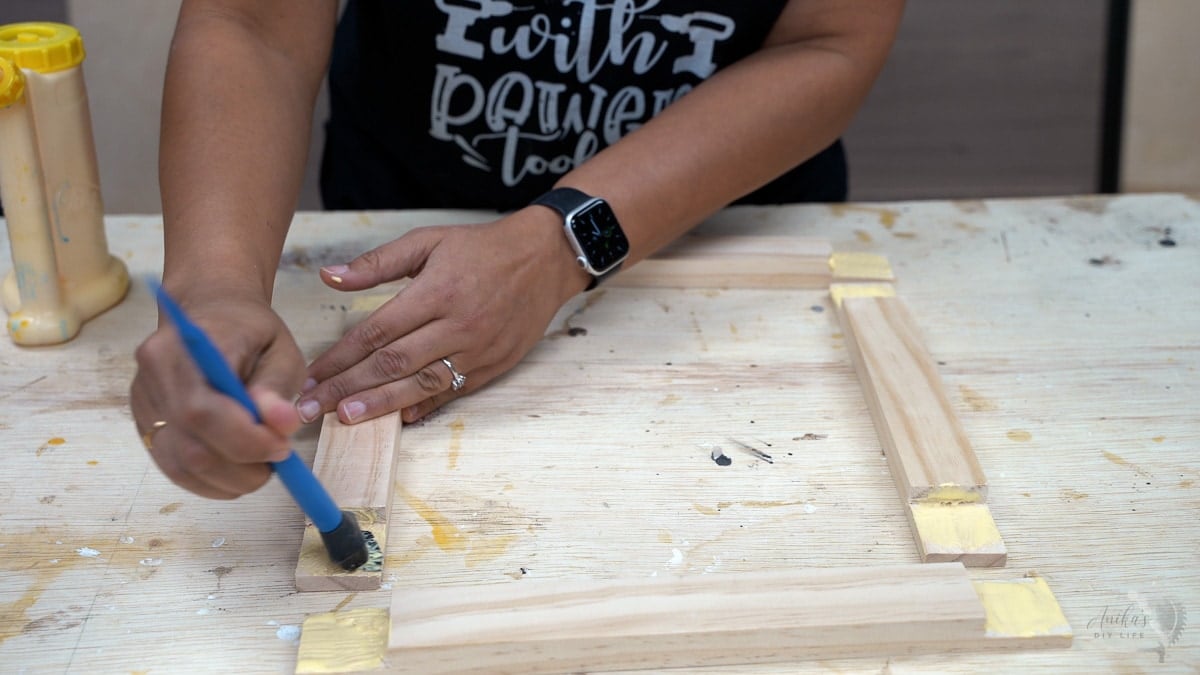
Step 4: Glue-up
Once the cuts are done, apply a generous amount of glue and clamp them in place to dry overnight.
The frame build is complete. Now we need to make a groove to seat the glass in.
Step 5: Route Groove
Using a rabbeting bit, create a step all around the frame for the glass, photo, and cardboard to sit in.
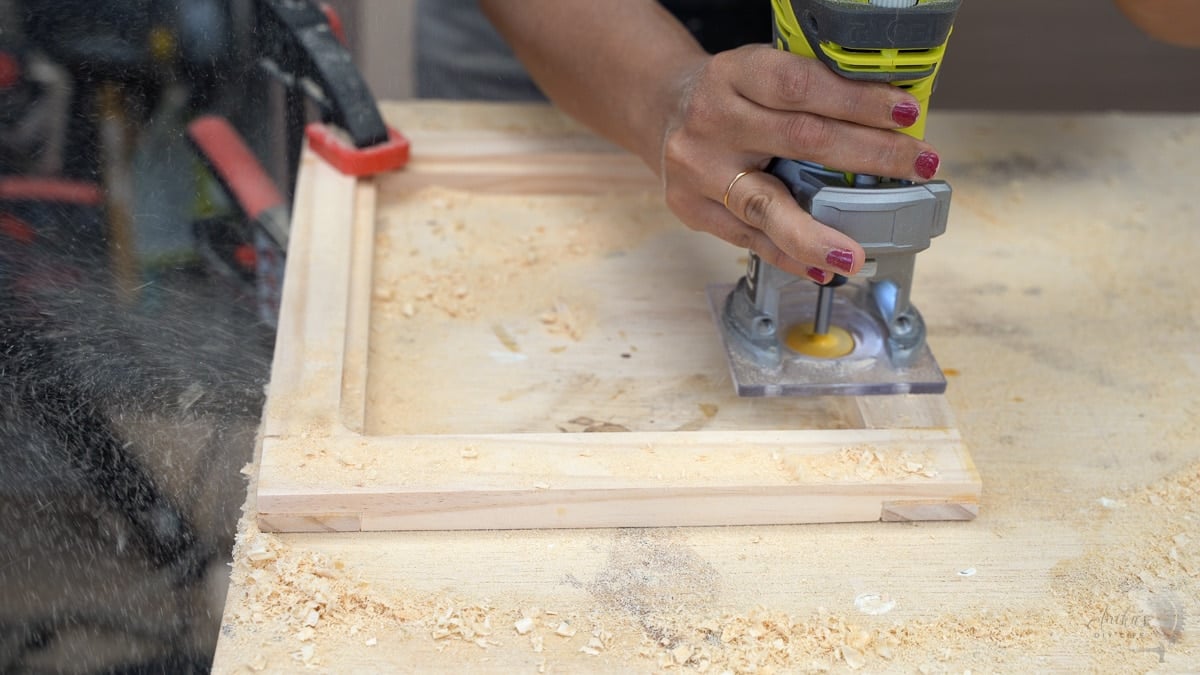
The corners of the groove will be round because the router bit is round. Clean these up and make them square using a chisel. (I did try to do this with my oscillating tool but it was a pretty tight corner to get the precision needed to clean it out).
RELATED: How to Use a Router: For Beginner Woodworkers, Types of Router Bits and Their Uses
Step 6: Sand and Stain
It is time to apply stain. But before that, it is important to prep the wood.
The most important step in prepping wood for staining is sanding. It is important because:
- it removes any glue residue
- it helps remove blemishes
- it opens up the pores of the wood to accept stain more evenly.
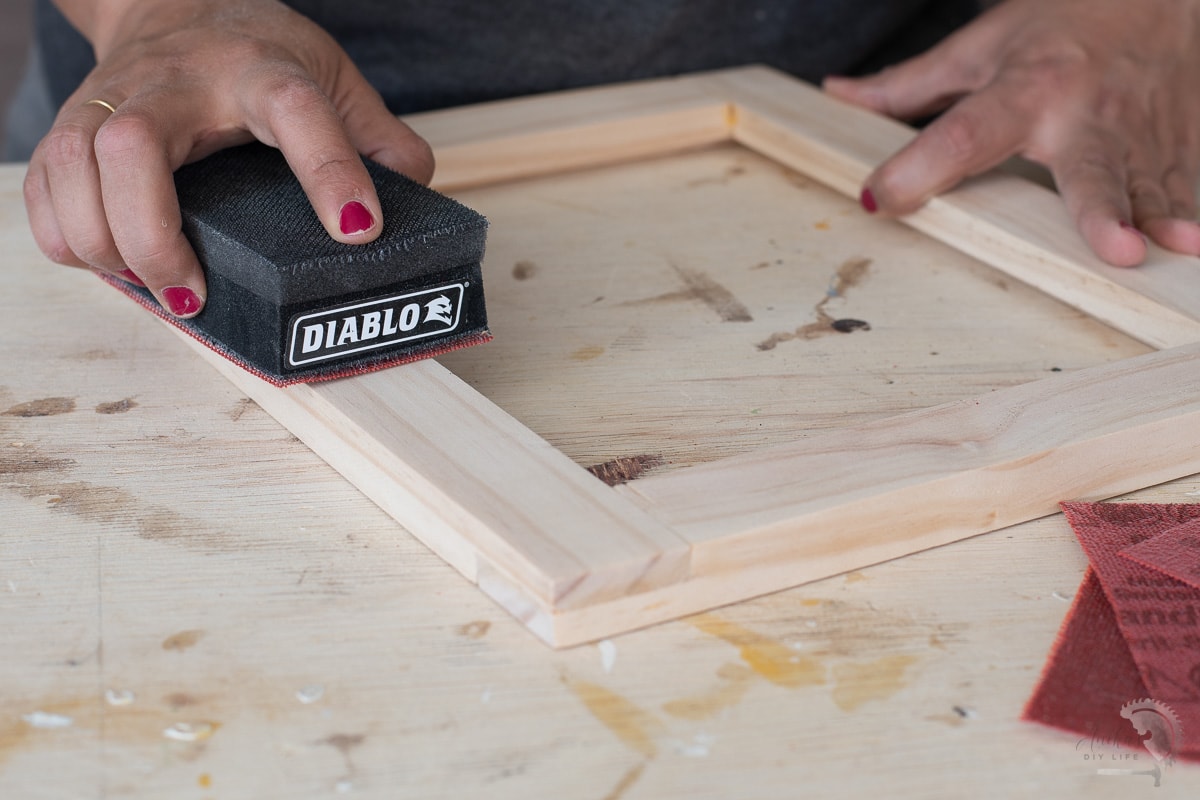
I used the reusable Diablo Hand Sanding Block with Assorted SandNET Reusable Sheets (80, 120, 220 Grit) for this.
- Start by using 80 Grit to clean out any major blemishes and glue residue.
- Give the entire frame a sand with the 120 Grit in the direction of the grain.
The Diablo hand sanding block has two sides – for both flat & contour sanding making it easy to sand the edges of the frame as well as the faces.
Did you know that these sanding sheets are reusable?! You can simply wash them, dry them and reuse them!
After sanding, apply pre-stain conditioner and wood stain OR primer and paint in the color of your choice.

Step 8: Add Pictures
- Add the glass. You can add real glass or like me, you can cut and add plexiglass. The size is equal to the size of the opening plus the width of the rabbet.
- Add the photo or your artwork
- Add a cardboard backer.
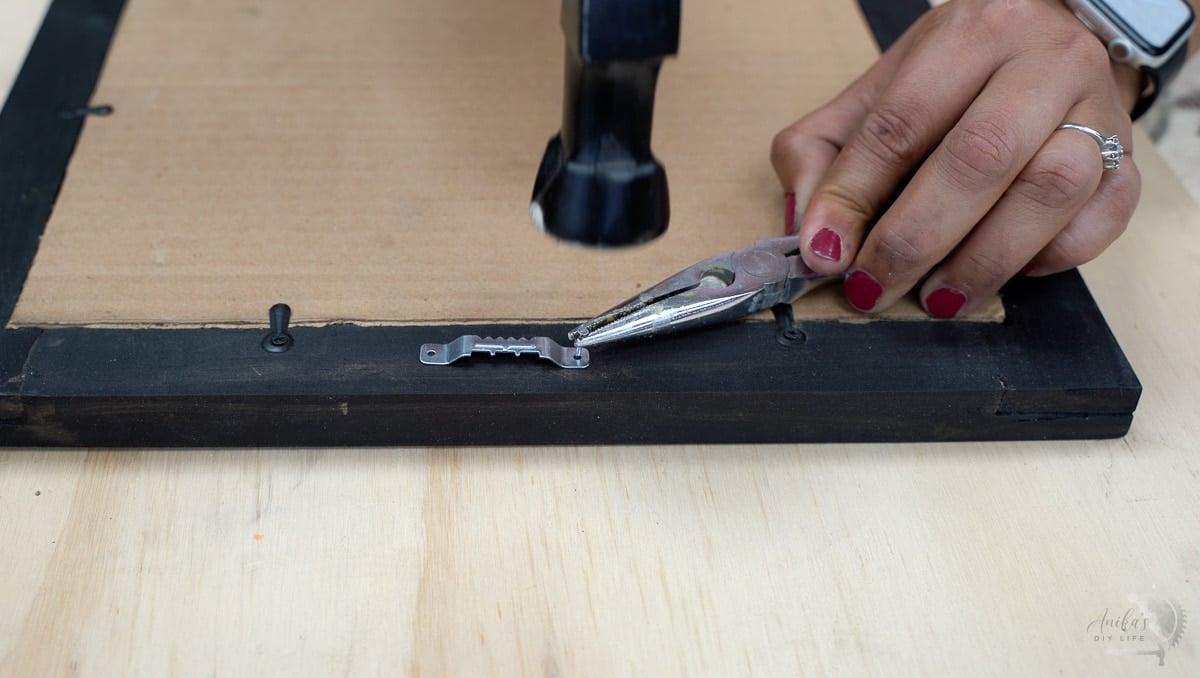
- Add the backing clips.
- Add a sawtooth hanger to hang it up!
And that is it!
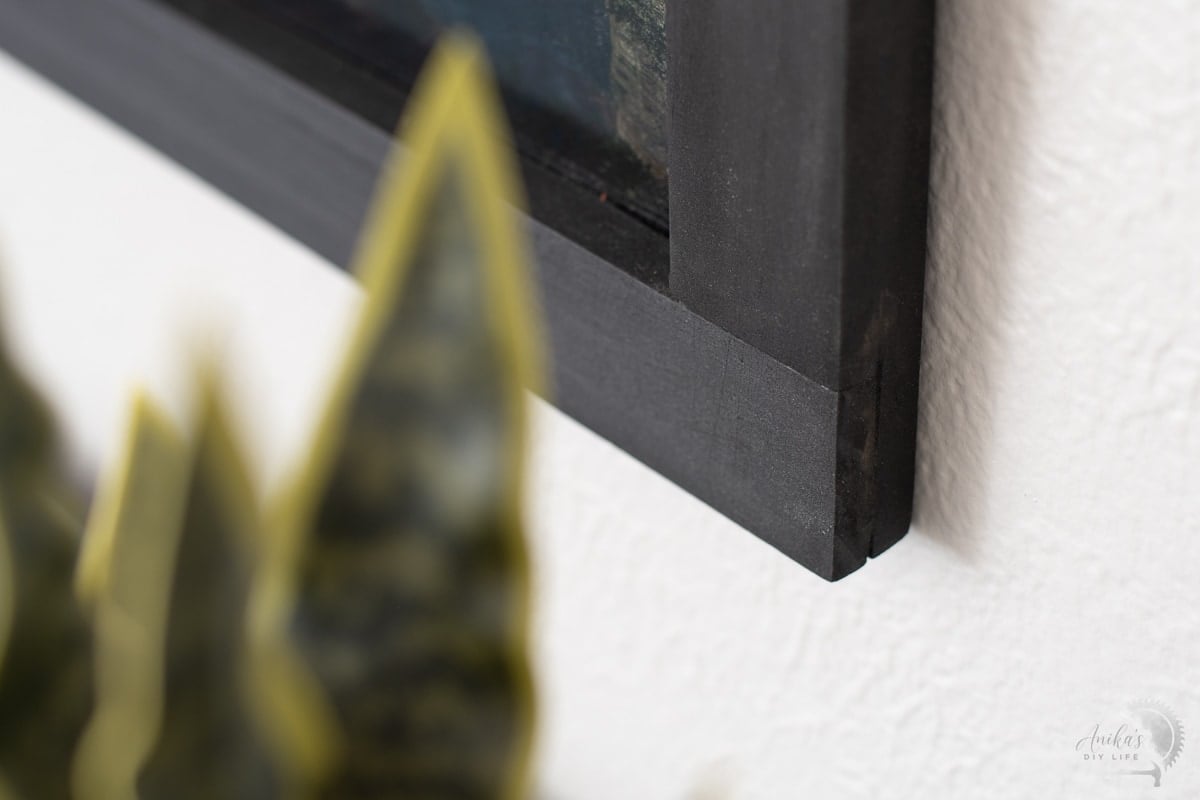
The photo frame with half-lap joints worked out quite well. The joints are pretty nice and tight (except for one of them where I messed up the location of the cut line).
The cuts got a lot easier with practice.
I actually tried making miter half-lap cuts as well. They didn’t turn out as well and will probably need A LOT more practice.
But the half-lap picture frame turned out really well.
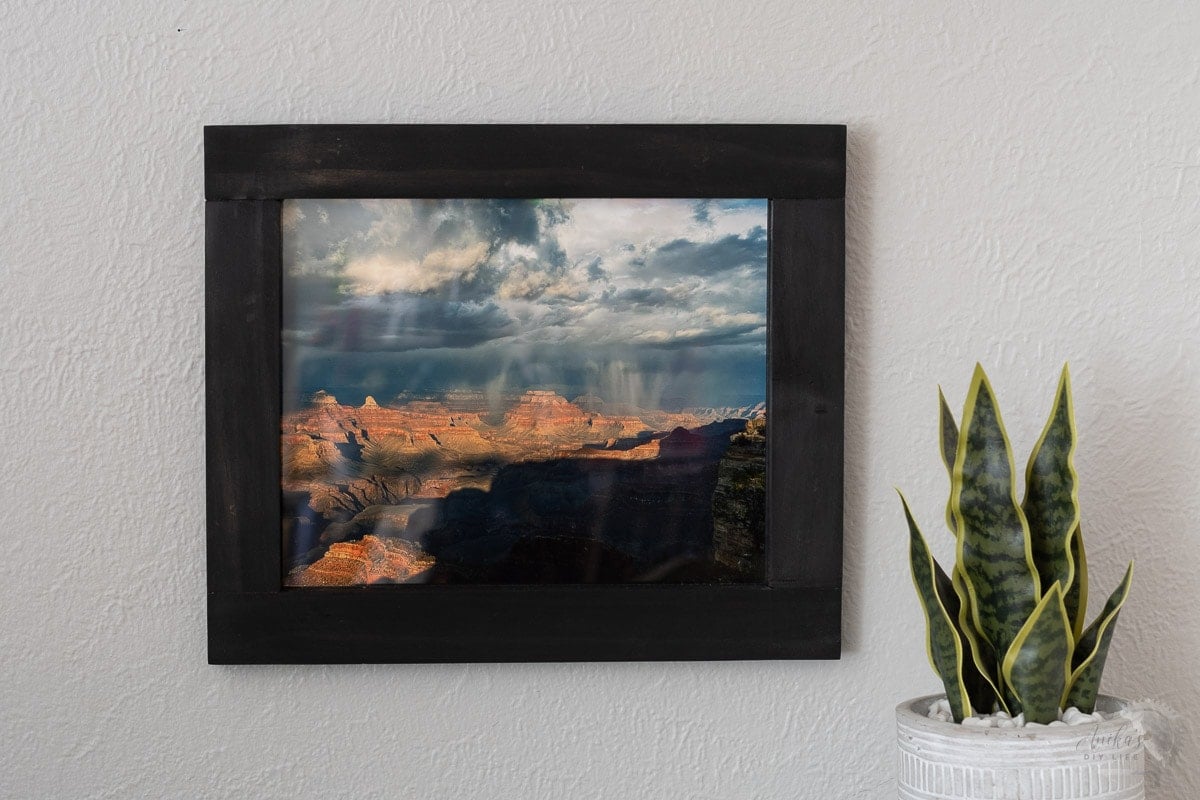
Using an oscillating tool is definitely a great alternative for making a half-lap cut. And you have a simple, beautiful place to display your favorite picture.
You might also like:


Anika's goal is to inspire and empower beginners with woodworking, DIY, home improvement, and home decor ideas.
She wants everyone to unlock their creative potential and experience the feeling that comes with making something. Nothing feels better better than seeing something and saying "I can make that!"