DIY Record Player Stand With Storage
Learn how to build an amazing DIY record player stand with space for speakers and storage for vinyl records with detailed tutorial and plans.

This project right here is my favorite of all time! There is a new movement happening in the music scene with people rediscovering vinyl records .
When my friend asked if I could build his new obsession – a turntable stand complete with a space for speakers and storage for vinyl, I had to say yes!
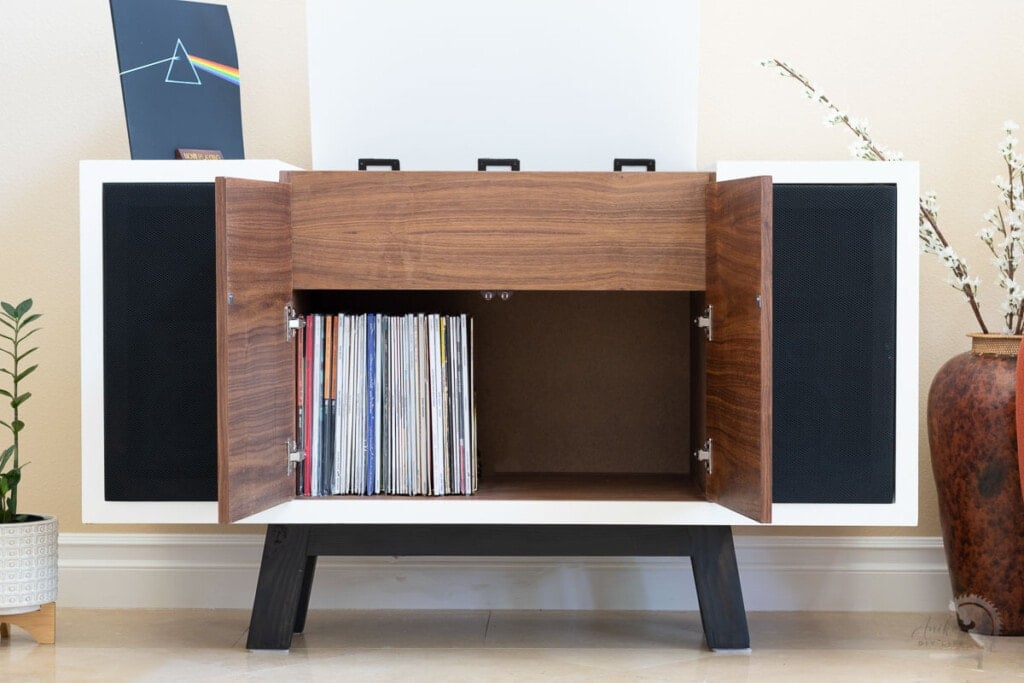
The inspiration for this project – a record player stand console that retails for $10,000! (Yes, you read that right!). I built it with a little over $600 in material – and that is because I used Walnut. With regular plywood, you could shave off a couple of hundred dollars.

Features of this record player stand –
- Top center panel opens to reveal a compartment for a record player
- Push to open front door for record storage compartment
- Magnetic speaker covers for access to speakers if needed

This project has actually been almost 10 months in the making – I built it and made mistakes – scraped the entire project – learned from those mistakes, and started again from scratch – this time using walnut. We will get into that story down below. Let’s get building!
How Hard Is It to Build?
It is actually not hard to build. I kept the overall process quite simple. There are a few parts of the project that need to be aligned and that is where you can run into problems.
Like I mentioned – I built it, scraped it, and then built it all over again from scratch. The second tie around, I learned from my mistakes and made tweaks to the process as I went. I have you covered with the complete mistake-proof plans to build it below.

Do You Need a Lot of Tools to Build It?
This is a more involved build and it does need a table saw in addition to the usual basic tools like a drill, miter saw, and Kreg Jig. But that’s about it!
RELATED: How to make accurate cuts with a miter saw.
What Kind of Wood Do You Need?
This console is made primarily of plywood. There are two layers of plywood – the wood-tone and the painted one.
For the wood tone layer, I recommend picking a nicer plywood that looks great once it’s stained like oak or walnut. I went with the more expensive walnut for it’s really rich color.
For the painted layer, you can save some money and use birch – which is what I used. You can also use sanded plywood and prepare it for painting following my tutorial on how to paint plywood.
In addition to plywood, there are a few 1×2 boards for the trim and 2×4 for the stand.
Let’s get to building!
***This post contains referral or affiliate links. It is a way for this site to earn advertising fees by advertising or linking to certain products and/or services. Please read my full disclosure here ***
Material Needed
- Lumber per the plans
- 1-1/4″ pocket hole screws
- 2-1/2″ pocket hole screws
- 1-1/4″ finish nails
- wood glue
- 5/16″ staples
- Lid support hinges. I used 3 of the 40 -inch-pound hinges.
- Lid support hinge jig
- magnetic push latch
- Soft-close hinges
- Magnets
- Acoustically transparent cloth
- Edge-banding learn How to Cover Plywood Edges for a professional finish.
- Stain and paint of your choice – I used white paint, finishing oil, and Ebony stain.
- Strong glue
Tools Needed
- Table saw
- Miter saw
- Kreg Jig. I used the Kreg 720. Learn more about the Kreg Jig and pocket holes here.
- Power drill
- Kreg face clamp
- Kreg right angle clamp
- 1″ Forstner bit
- Drill bits in various sizes
- Clamps in various sizes
- Staple gun
- Nail gun
- Re-usable spacers
How to Build the Record Player Cabinet
I have a full step-by-step video showing you exactly how to build this vinyl record player console. Watch it below. The full written tutorial follows as well.
Click here to subscribe to my YouTube Channel for more great videos!
Step-By-Step Tutorial
This entire project can be divided into 3 phases – building the inner carcass (out of the nicer plywood because that will be visible), building the outer layer (out of plywood that will be painted), and the finishing touches – doors, legs, etc.
Step 1 – Build the Speaker Frames
- Cut the walnut 1×2 boards and glue them up to build the frames for the speaker compartment. Let them dry overnight.
I had used dowels the first time but decided to simply go with a glue-up since this would not be bearing any weight.

- Once dry, the frames will be strong. At the center of all 4 sides – make a hole halfway through the boards using a Forstner bit.
- Glue the magnets using a strong adhesive.

Important – as you glue the magnets, make sure they are facing in the same direction.
Step 2 – Build the Speaker Compartments
Build the speaker compartments around the speaker frames using the nicer plywood (walnut in my case). They are put together using wood glue and pocket hole screws.

Step 3 – Build the Inner Carcass
Attach the center compartments to each of the speaker compartments and complete the inner carcass.

Step 4 – Add the Trim and Edge Banding
- Apply edge banding to all the exposed plywood edges. I am using the Cricut Easy Press Mini here to apply the edge banding. It is easy to maneuver in tight spaces and gets as hot as any other iron.

Step 5 – Attach the Outer Shell
- Attach the top door first.
During my first attempt, I built everything then came back to add the door and the door would not line up with the sides. It was too late to make any modifications to the sides and one side was a off.
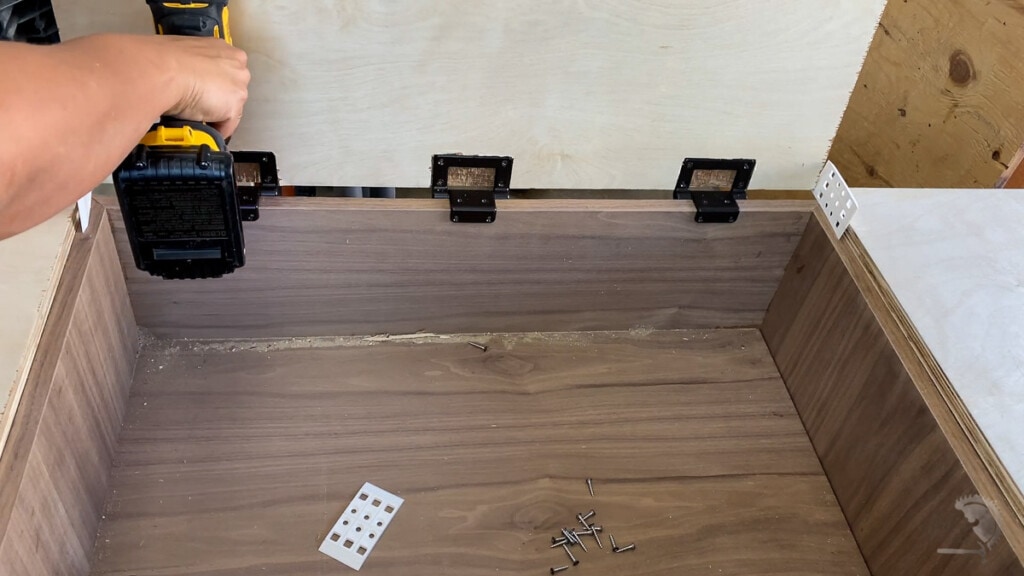
Also, it took me a while to figure out the perfect hinges to make this work, and that left the back of the turntable compartment bruised with holes that are impossible to camouflage with stain.
I finally settled on these lid support hinges but had to mortise them in the top to make the top flush with the sides.

The edges of the plywood are beveled at the joints to help create a sharp and clean corner.
- Once the door is attached with the lid-support hinges, the sides can be lined up and trimed accordingly to ensure that everything is well-aligned.
- Attach the plywood with wood glue and finish nails.

Step 6 – Apply Trim
- Once the top and outer layer of plywood is attached, add the 1×2 trim around the front of the console.

This is beveled on the sides and mitered at the corners for a sharp clean design.
Step 6 – Paint/Finish
- Tape off and cover the inner plywood to prepare the console for paint. Remove the lid.
This is very important and critical to achieve a nice sharp edge between the wood tone and the painted area.
Paint the console with either a paint sprayer or a paintbrush and roller. I would highly recommend a paint sprayer for the best flawless finish. The lid is painted separately on both sides.

Step 7 – Add Door and Hardware
- Cut door to size and apply edge banding to the exposed plywood edges.
I used a 2×4 sheet of walnut plywood and cut it so that the grain in the front was continuous.

- Attach the door using inset hinges leaving 1/8″ space all around.
- Attach the magnetic push latches for both the doors
- Attach the lid back on the top.
Step 8 – Make the Speaker Covers
- Build the speaker covers using 1×2 boards joined together with pocket hole screws and wood glue.
I could have gone for glue-up here, but I decided to use pocket hole screws instead so I didn’t have to wait for the glue to dry, and they would be hidden anyway.
- Drill holes halfway using a Forstner bit for the magnets as before. Be sure to check the orientation of the magnets to make sure they attract to the magnets embedded in the speaker compartments before attaching them with glue.
- Attach the acoustically transparent fabric to the frames using a staple gun.

Step 9 – Build the Stand
The stand is built out of 2x4s.
- I trimmed the 2x4s to remove the rounded edges before building them.
The design is very similar to the stand of the patterned veneer dresser. However, I tried to keep the pocket holes on the inside, which resulted in me having to pull out my right angle bit, and it was a lifesaver!

Once built, I stained it with ebony stain and attached them to the bottom of the console with 1-1/4″ pocket hole screws.
That’s it! Here is the console.
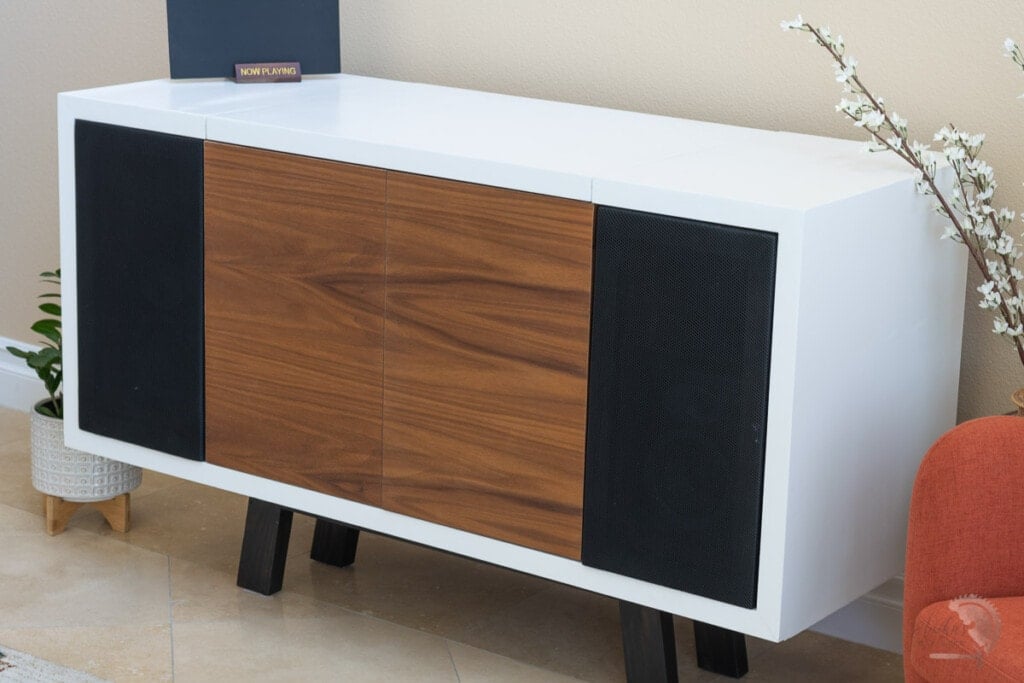
I can’t even begin to tell you how much I love how it turned out! The turntable console has a nice mid-century modern look to it.

Honestly, I am so happy I got a do-over because the walnut is perfect, and everything works exactly how I wanted it to.
DIY Record Player Stand Woodworking Plans
Click the link below to get the woodworking plans for this project. The plans have all the dimensions plus step-by-step instructions with illustrations to help you build the turntable stand.
More DIY Furniture Projects –
Anika's goal is to inspire and empower beginners with woodworking, DIY, home improvement, and home decor ideas.
She wants everyone to unlock their creative potential and experience the feeling that comes with making something. Nothing feels better better than seeing something and saying "I can make that!"



Wow, I see a future for you building one-of-a-kind furniture for the bespoke generation~!!!! Fabulous work! You have eclipsed even my imaginings with this project! I’m happy just to put up a shelf!
Thank you SO much Linda! 🙂