DIY Marble and Gold Coasters
Make easy DIY marble and gold coasters using contact paper and wood. This fun scrap wood project also makes a great gift!

These DIY hexagonal marble and gold coasters have a secret! Did you guess it yet?
It’s not really marble!
It’s contact paper!
I discovered the awesomeness of contact paper when I needed a solution to update the countertop in the kids’ bathroom of our rental. The contact paper held up perfectly over 10 months.
I had about half a roll left and as always, I save every little scrap of everything and try to find projects to use them up!
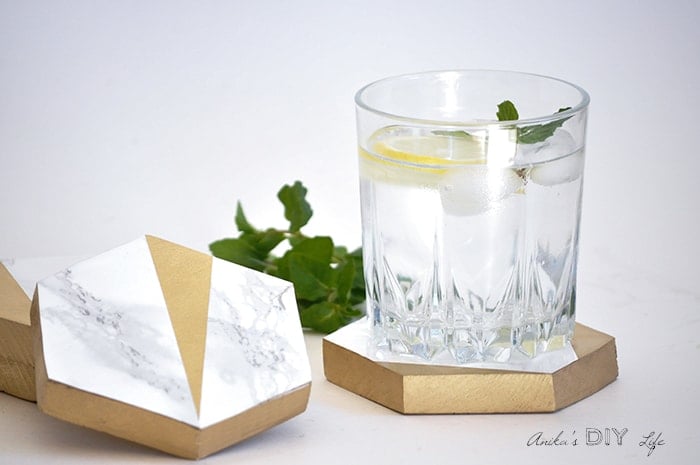
I made a fun “marble” tray a while ago and decided to make these fun DIY gold and marble coasters using the leftover contact paper.
***This post contains affiliate or referral links. It is a way for this site to earn advertising fees by advertising or linking to certain products and/or services. Please read my full disclosure here ***
Materials
- 4″ Hexagon template (I found a printable one online)
- Scrap wood or precut hexagonal wood tiles (optional)
- Marble contact paper
- Spray primer
- Gold spray paint
- Self-stick felt pads or scrap felt and super glue
- jigsaw
- X-Acto knife
- Sander
RELATED: See all the different ways to use contact paper in home decor and crafts!
How to Make Hexagonal Marble and Gold Coasters
These are super fun and easy to make! I have a video showing you exactly how to make them!! Written step by step tutorial follows.
Step 1 – Trace the Hexagons
If you are using precut wood tiles, you can skip directly to step 4.
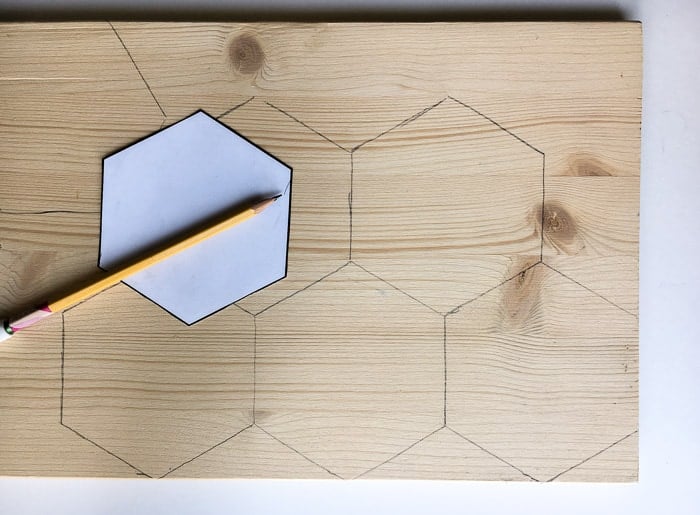
- If not cut out the hexagon template and use it to trace the hexagons on your piece of scrap wood.
Step 2 – Cut the Shapes
- Using a jigsaw, cut out the hexagon shapes.

Step 3 – Sand
- Sand the faces and edges smooth.

Tip – It is important to get rid of all the saw marks because you won’t like how they look on the edge of the coaster once painted.
Step 4 – Prime and Paint
- Give your coasters a coat of spray primer followed by a few coats of gold spray paint.
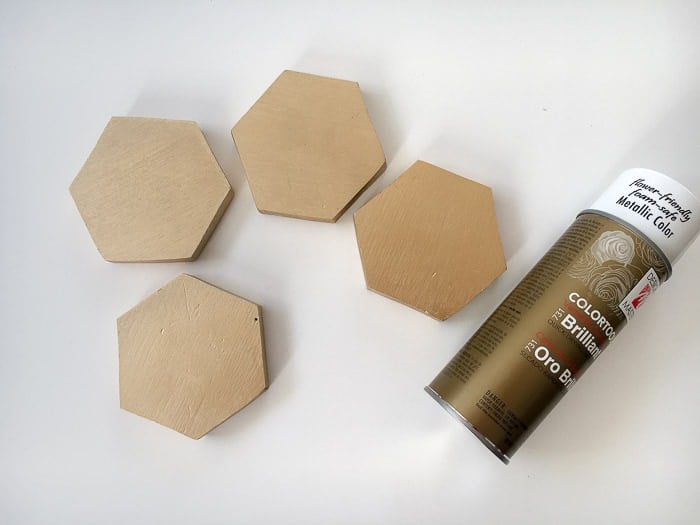
If you need help deciding which gold spray paint you need, I have a fantastic gold spray paint comparison guide for you!
Related: How to Spray Paint – Tips and Tricks you need to know!
Step 5 – Cut Contact Paper
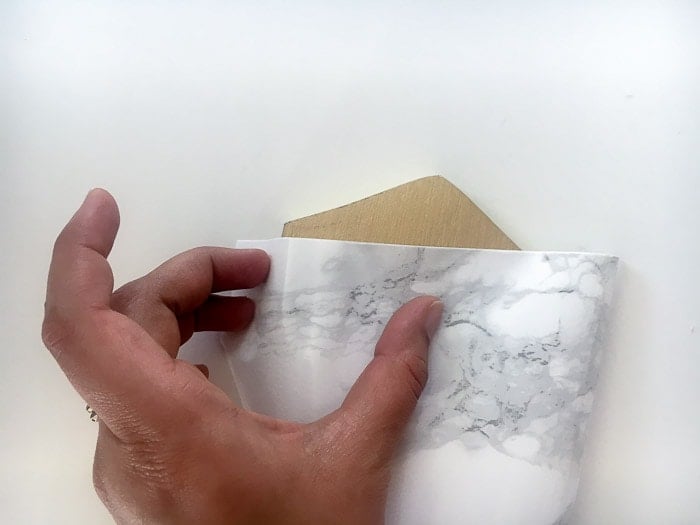
- Decide the placement of the “marble” and cut the contact paper pieces accordingly, leaving a bit of overhang on the sides.
- Slowly apply the contact paper while smoothing out any air bubbles.
Step 6 – Cut Excess Contact Paper
- Using the X-acto knife, cut off the excess contact paper from the edges.

Step 7 – Finishing
- Add non-stick felt pads to the back side.

Money saving tip: If you want to be totally frugal like me, you can use squares of scrap felt and super glue them to the back. (Pssst… see the back? that’s why you have to sand them really well!)
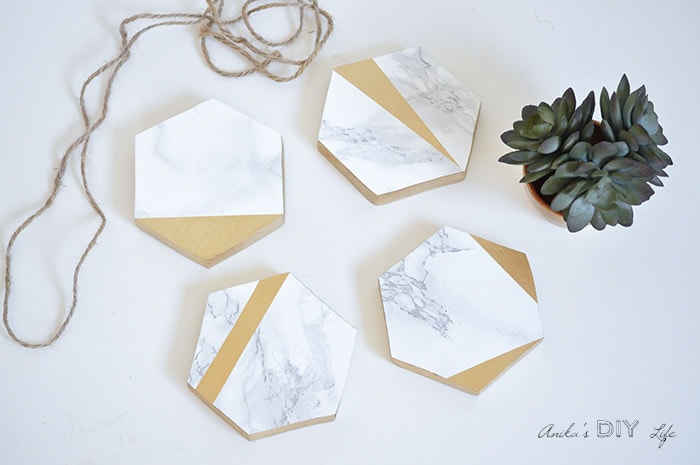
That’s it! You have a gold and marble coaster set.
I decided to get whimsical with the gold and marble pattern. You can get totally creative with the shapes of marble and gold on the coasters. Each one will be different yet eye-catching!
If you would rather just buy real marble coasters, here are a few of my favorite options –
More Related Projects –
Anika's goal is to inspire and empower beginners with woodworking, DIY, home improvement, and home decor ideas.
She wants everyone to unlock their creative potential and experience the feeling that comes with making something. Nothing feels better better than seeing something and saying "I can make that!"


I love this idea! There are so many things that you can do with these! I can’t wait to get this started, thank you for sharing!
Faux Sho
These are beautiful!