DIY Storage Ottoman Cube With Tray Top
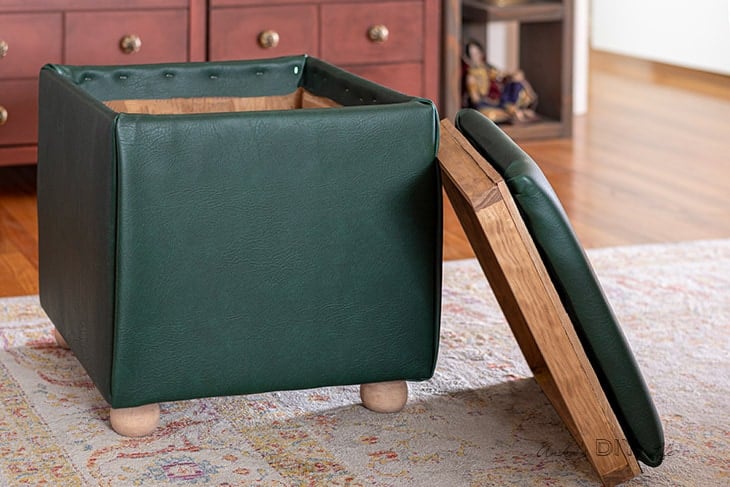
Learn how to build a DIY storage ottoman cube from scratch. The top has a reversible tray. The upholstered ottoman is a super easy build with no sewing involved!

Ever since we replaced our old DIY upholstered ottoman with a coffee table, we miss having a place to put our feet up.
Plus, we need extra seating in the living room.
This little storage ottoman cube is the perfect addition –
- It can be easily moved around
- It can be used for seating
- It has storage (who doesn’t need more of that?!)
- The top flips over for a nice tray too!
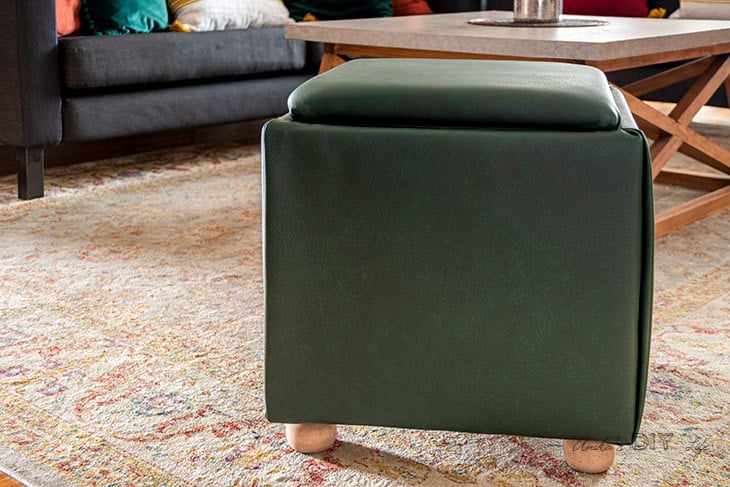
The best part about making this is that not only do I save $$. I also get to pick my own color for the fabric!
I will show you exactly how to build your own!
RELATED: 20 DIY Storage Ottoman Ideas
***This post is sponsored by Arrow Fastener. All opinions are my own. Thank you for supporting the brands that help me bring you fun projects***
Material Needed
- Lumber per the plans – 3/4″ and 1/2″ Plywood and a 1 x 2 board
- Arrow Fastener T50X TacMate Heavy Duty Staple Gun
- Arrow Fastener T50 staples (5/16″)
- Batting
- Fabric of your choice. I used dark green vinyl
- Foam – I used 1″ thick
- Table leg plates
- Bun feet
- Spray adhesive
- Power Drill
- Table Saw or Circular Saw
- Kreg Jig
- 1-1/4″ pocket holes screws
- Brad nailer and 1-1/4″ finish nails.
- Edge banding
How to Build
Below is the full video showing how to build. Written step-by-step instructions follow.
Step 1 – Make cuts and pocket holes
Cut all the plywood using a table saw or using a circular saw and straightedge guide. The plans show you the exact cut sizes.
Make pocket holes on 2 sides of the 3/4″ plywood. Be sure to check out the special settings for plywood on the Kreg Jig.

Step 2 – Build the box
Build the box by attaching the plywood using 1-1/4″ pocket hole screws. Be sure to use clamps to make sure all the joints are square and aligned.
Attach a 1/2″ plywood to the bottom using wood glue and finish nails.

Time to upholster!

I am excited to be partnering up with Arrow Fastener this year to bring you a few projects. They have a full line of manual, electric and cordless fasteners and tools.
Step 3 – Upholster box
Start by wrapping the sides of the box with batting using TacMate staple gun and 5/16″ staples. I like to staple one end first and then stretch it out and staple the other end.
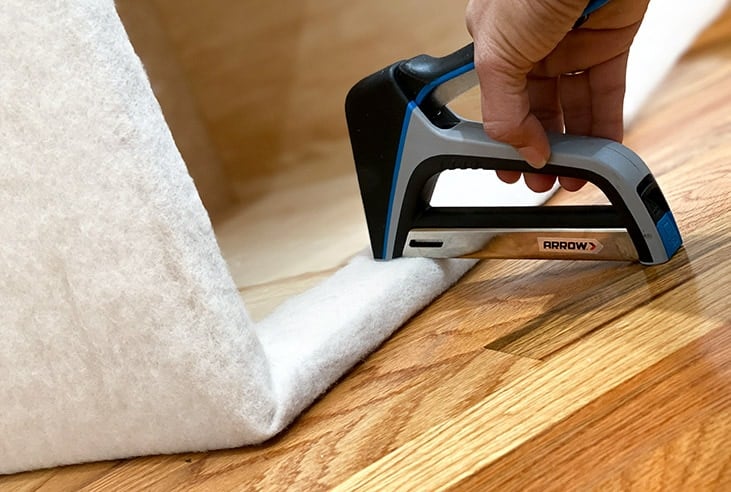
Next, Upholster the box in the fabric of your choice. I picked a dark green vinyl because I wanted it to be easy to wipe and the color works well in my living room.
To efficiently use the expensive vinyl, I cut up 4 pieces for each side and wrapped it such that there was a fold on each corner.
To do this – I stapled one end directly to the plywood.

Next, I stapled the inside of the next piece and folded it over to create the crease.
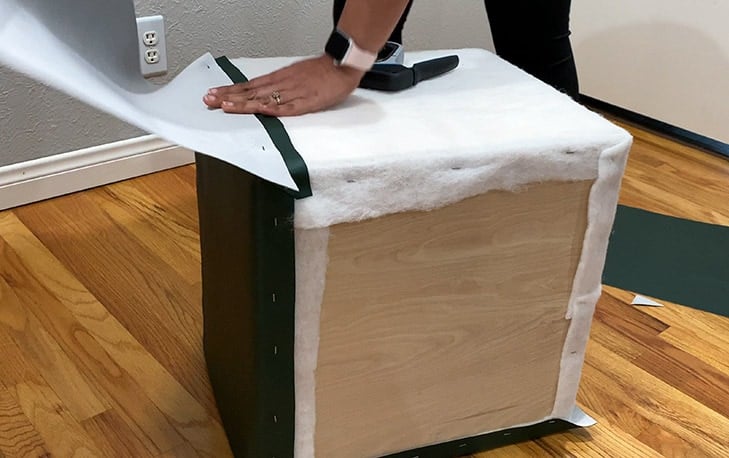
Then, I stapled the vinyl at the bottom and the top to keep it from moving.

Step 4 – Upholster top
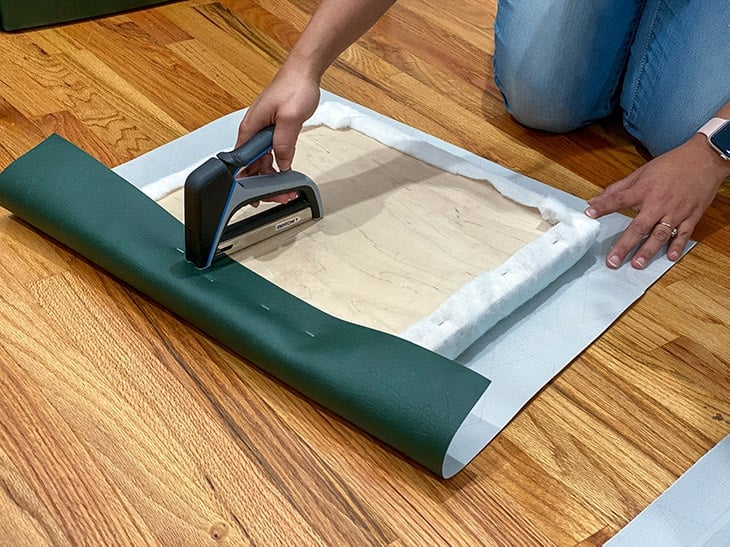
Upholster one of the top 1/2″ plywoods. Start by using spray adhesive to attach the foam. Then wrap batting and fabric using the TacMate staple gun.
Step 5 – Build tray
Build a tray using the other 1/2″ plywood and 1×2 boards attached using wood glue and finish nails.
Apply edge banding to the 1/2″ plywood to finish off the edges.

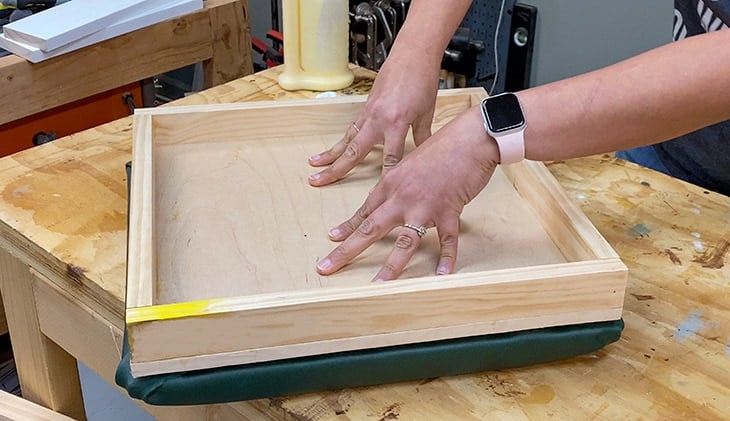
Step 6 – Join tray and top
Lay the tray onto the upholstered top and attach using wood glue and finish nails.
This can vary based on the thickness of your upholstery fabric.
Since I was using a pretty thick vinyl, I ended up having to add 1/2″ spacers between the tray and the upholstered top to get even thickness. This made the thickness 1-1/2″ and I could use 1-1/4″ finish nails.
You may need smaller finish nails if you use thinner fabric and hence spacers.
Step 7 – Add supports
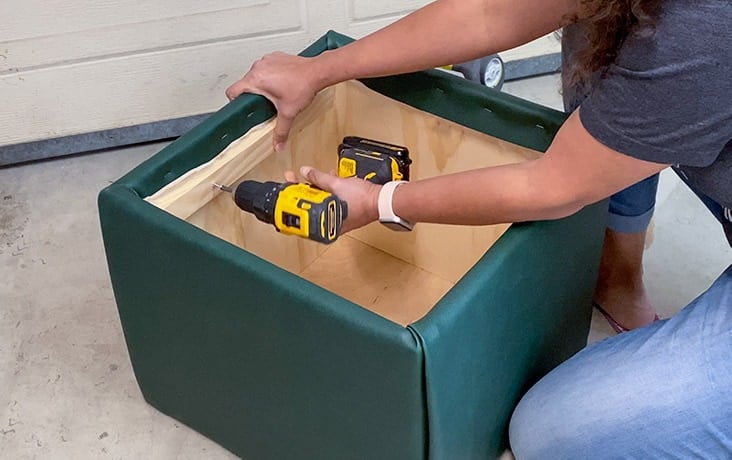
Measure the exact height of the tray to the upholstered top.
Attach two 1×2 boards on the inside of two sides of the box based on the height of the tray. Use wood glue and 1-1/4″ wood screws.
Step 8 – Add feet and finish
To raise the ottoman off the floor, add table leg plates and bun feet. I used round 1-1/2″ high bun feet.
Stain or paint the interior of the ottoman and the tray. I used a warm brown stain.
And that is it!
Storage Ottoman Building Plans
Please click the button below to download the building plans for this storage ottoman cube including the cut list and 3-D drawings. The step-by-step instructions follow below.
We love the new addition to our living room.
In fact, I think I need to build one more! I already cut up the plywood for that!
You Might Also Like –
- DIY upholstered X-leg bench
- DIY entryway bench with storage
- DIY nightstand with hidden storage compartment
If you don’t want to make one, here is a list of Affordable Storage Ottomans you can buy!
Anika's goal is to inspire and empower beginners with woodworking, DIY, home improvement, and home decor ideas.
She wants everyone to unlock their creative potential and experience the feeling that comes with making something. Nothing feels better better than seeing something and saying "I can make that!"


hi dont like to critic because I am not perfect myself . I would have sewn the seams ,made it tighter and added more stuffing to top and made top wide so that top went to sides instead of being smaller . Just suggessions
Thank you for the suggestions. Yes, you could certainly sew the seams and make the top wider! In this project I wanted it to be less intimidating and complex by making it no-sew. Also, the design was based on an ottoman I saw at the store but yes, I think making the top wider would look great