Easy DIY Wall Mail Organizer – No Power Tools Needed
This easy DIY wall mail organizer is the perfect beginner woodworking project. Make it with simple hand tools. No power tools needed. Step by step instructions and printable plans along with video tutorial.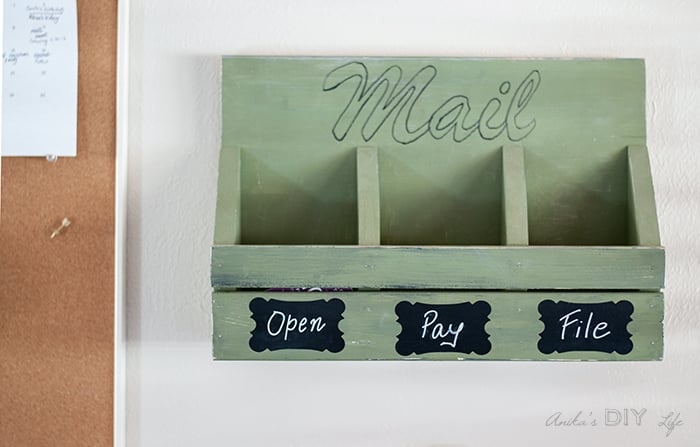
This easy DIY wall mail organizer has been such a savior in our entryway!
The one thing I struggled with for the longest time was the mail clutter! I tried many many solutions and organization hacks.
None of them seem to work… there was always that one paper that went missing… or got buried deep somewhere…
But sometimes the solution can be just a simple one…
Like this easy mail sorter which I built with scrap wood in under an hour.
I implemented this almost a year ago and it has worked really well. Every day, mail gets sorted by type and every 7-10 days, I go through and take care of everything – pay, file or trash.
I do normally use power tools… but if you are a beginner and don’t have any power tools, you can totally make this and I will show you exactly how in the video tutorial.
Related: Easy Scrap Wood Projects for Beginners
***This post contains affiliate or referral links. It is a way for this site to earn advertising fees by advertising or linking to certain products and/or services. Please read my full disclosure here ***
Materials Needed for the DIY Wood Mail Organizer-
- Lumber per plans
- Miter Box and Saw
- 1¼” finish nails and Hammer
- Wood Glue
- Paint of your choice
- Chalkboard labels (optional)
- Miter saw (if using power tools)
- Brad Nailer (if using power tools)
Before we get started, make sure to follow me on Instagram, Facebook, YouTube, and Pinterest to keep up with all my latest builds and projects!
Related: My Favorite Tools – Perfect for Beginners
How to Make the DIY Wall Mail Organizer –
You can get the printable plans of this mail organizer by clicking below.
Get the Printable Plans
For extremely detailed step by step instructions, here is the video… seriously, it is so detailed, you could build one with me as I show you how!
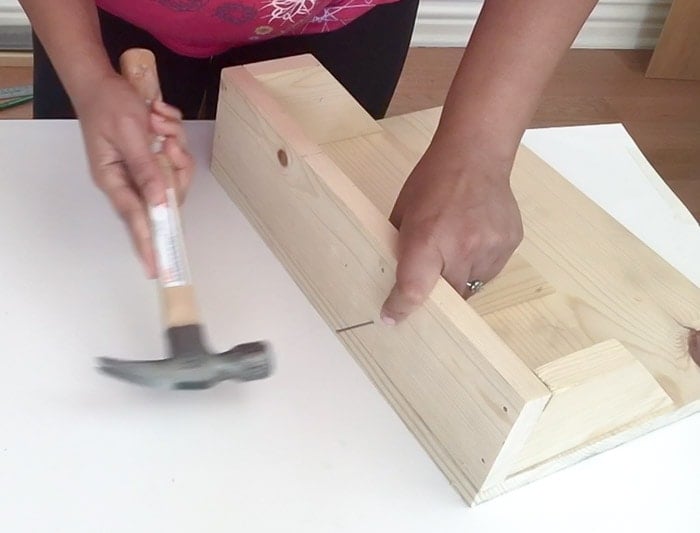
Step 1 – Cut all the boards according to the plans using your miter box. It is very easy to use. Check out the video for more details.
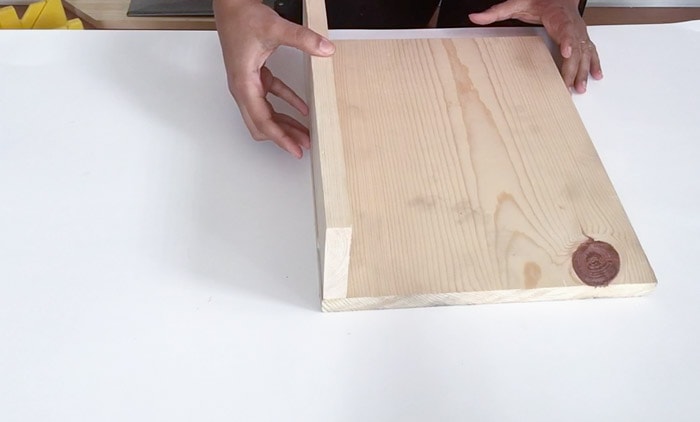
Step 2 – Align the bottom 1″ x 4″ board to back 1″x12″ board and attach using wood glue and finish nails.
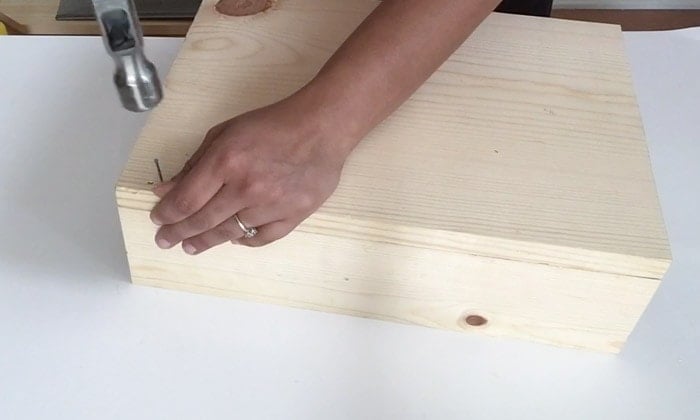
Step 3 – Attach the corner pieces using wood glue and finish nails.
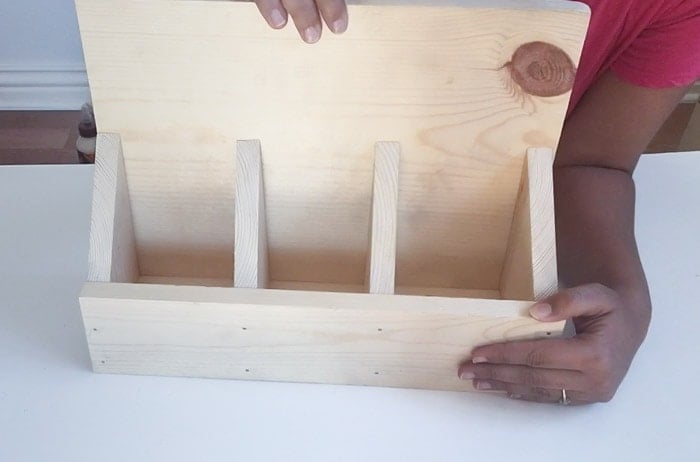
Step 4 – Measure the space between dividers and attach them using wood glue and finish nails.
Step 5 – Attach the front railing with wood glue and finish nails.
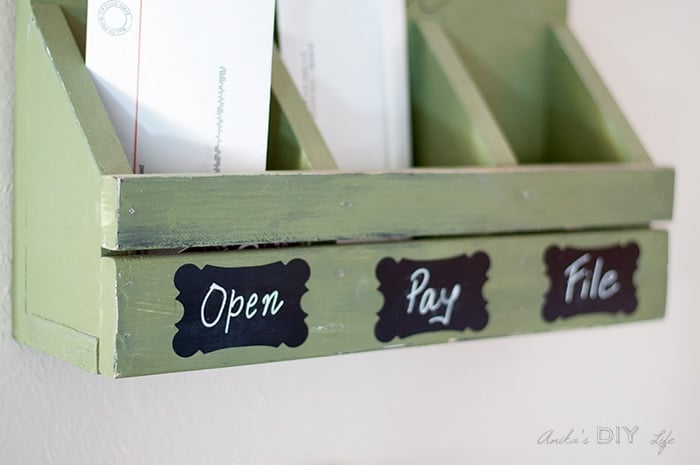
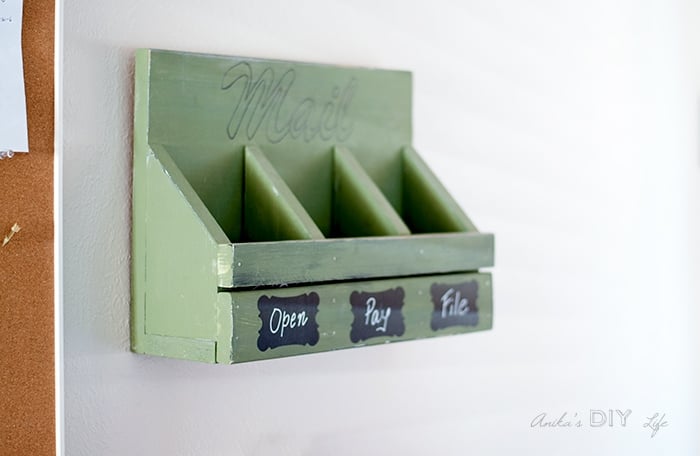
Adding finishing touches – Paint in the color of your choice. I used homemade chalk paint and distressed it. I also chose to add the word “mail” at the back with a black Sharpie. A monogram would work well too. The chalkboard labels add extra details. little hooks for keys can also be added.
So, that is my simple solution that has worked really well.
\And it wasn’t hard to put it together without any power tools!
Do you have any other organization solutions or hacks? What other organizing challenges do you struggle with?
I love easy and quick projects! If you do too, be sure to check out these easy woodworking projects. They are perfect for beginners!
My worst organization nightmare is the toys! I built this DIY toy organizer that has been such a blessing!
Anika's goal is to inspire and empower beginners with woodworking, DIY, home improvement, and home decor ideas.
She wants everyone to unlock their creative potential and experience the feeling that comes with making something. Nothing feels better better than seeing something and saying "I can make that!"





I’ve been itching to make something similar for a long time now. Maybe this will be my final motivation!
#shareitonemoretime
Katelynn, hampersandhiccups.com
Functional and adorable. Got to love those combinations. Thanks for linking up at #HomeMattersParty
Great organizer! I was wondering how much did it take you to finish this project? This project seems to be very easy and very practical!
Hi! Anika, do you have a template for the stickers? Thank you.
Hi Nigel,
The stickers are linked to in the post.
Thanks,
Anika
You gave me the perfect idea to create a small shelf and hide the light bellow I will place a mirror, do you like the idea?
Yes! That is a great idea!