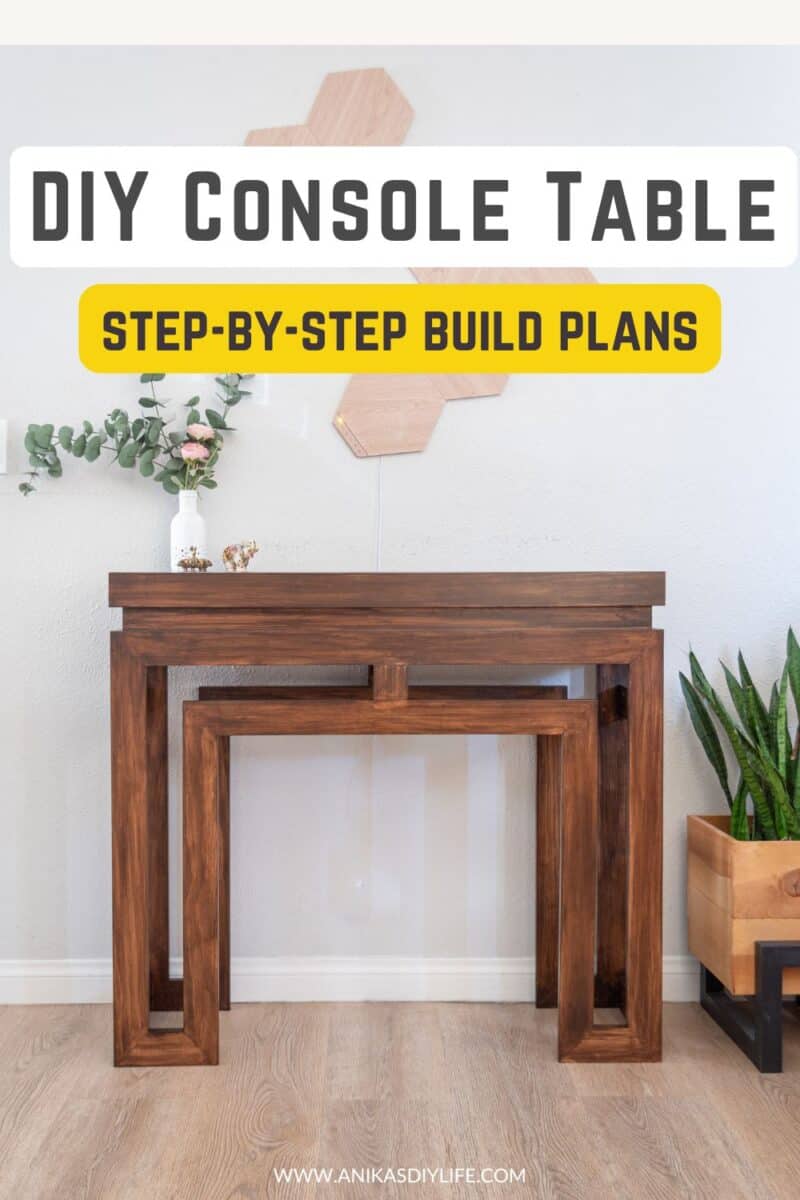
How to Build a Modern DIY Console Table
Build a stylish DIY console table for just $140! Learn step-by-step how to build a console table inspired by a $599 designer piece – easy & budget-friendly.
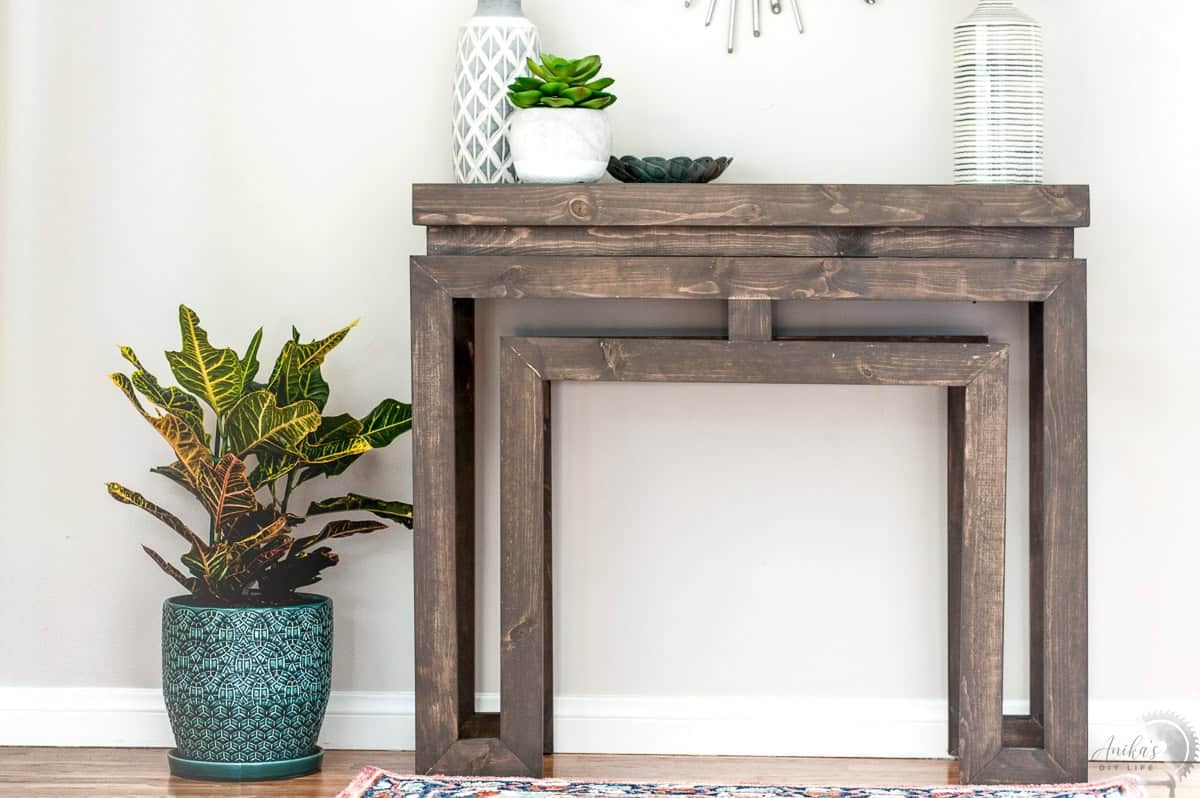
This DIY console table has been one of my favorite builds ever. And it is time for it to get back in the spotlight.
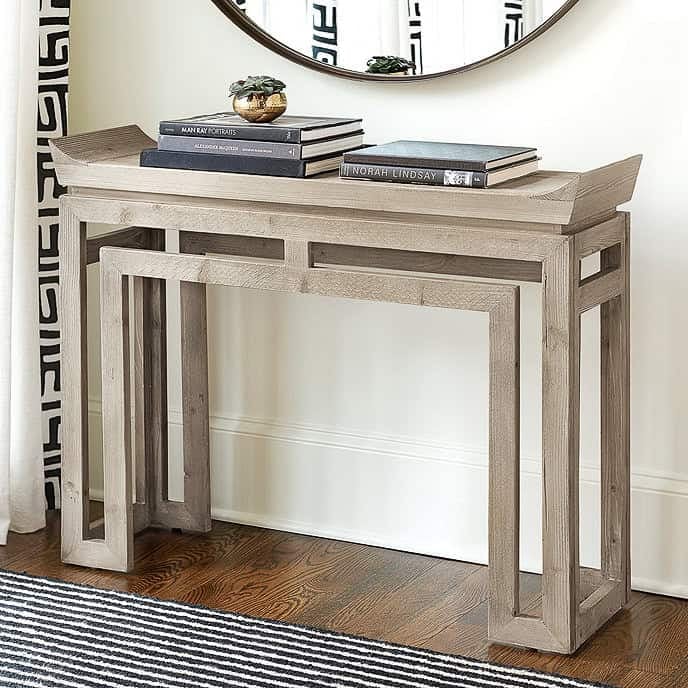
I first built this table back in 2019 after seeing a fancy one from Ballard Designs that cost $599 (it’s no longer available). The moment I saw it, I loved the legs. They were simple, clean, and full of style. The best part? I built mine for only $35 in wood (in 2019).
It’s perfect for an entryway, behind the sofa, or anywhere you want a stylish and useful piece of furniture.
Here’s what the original inspiration looked like:
I decided it was time to bring this project back with a fresh video and an updated tutorial to help you build your own.
This time around, the lumber cost $140 (I went with premium pine instead of whitewood) and to make things more fun and a little challenging, I used dowels for the mitered joints instead of pocket holes.
RELATED: How to build an easy DIY hexagon end table using one board
***This post contains referral or affiliate links. It is a way for this site to earn advertising fees by advertising or linking to certain products and/or services. Please read my full disclosure here ***
Materials Needed
- Lumber per the plans.
- Wood glue
- 1¼” pocket hole screws
- 3/8″ dowel pins
- Sandpaper in various grit from 80-220 grit.
- Stain or paint of your choice. I used this one on the old one and this one for this round.
- Top coat of choice. I used this one.
Tools Needed
How to Build the DIY Console Table
I shared the full step-by-step tutorial using pocket holes to build this console table in 2019 on Jen Woodhouse’s site – The House of Wood. Check out the full tutorial
Let’s dive into building the console table for this round!
Video Tutorial
As always, I have a detailed video showing how to build it. The step-by-step written tutorial follows below.
Step 1: Make the Cuts and Prepare the Lumber
- Make the cuts per the cut list in the plans.
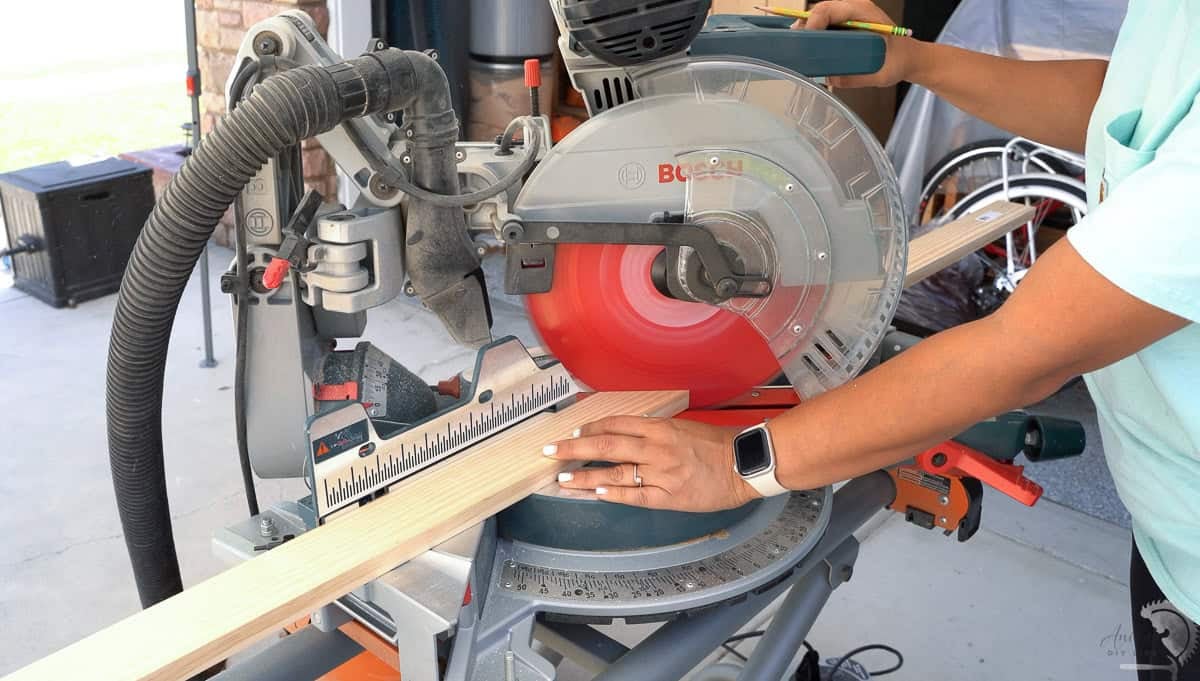
Note: I highly recommend cutting in phases as you go. Start with just the legs, then the spacers, and then the top. This will help you make any adjustments for variations that happen as you go.
Pro tip: For the angled cuts, I like to set my miter saw at the angle and make all the cuts at once to get a consistent angle.
- Sand the boards smooth starting with 80- grit to 220 grit sandpaper. See how to sand wood the right way here.
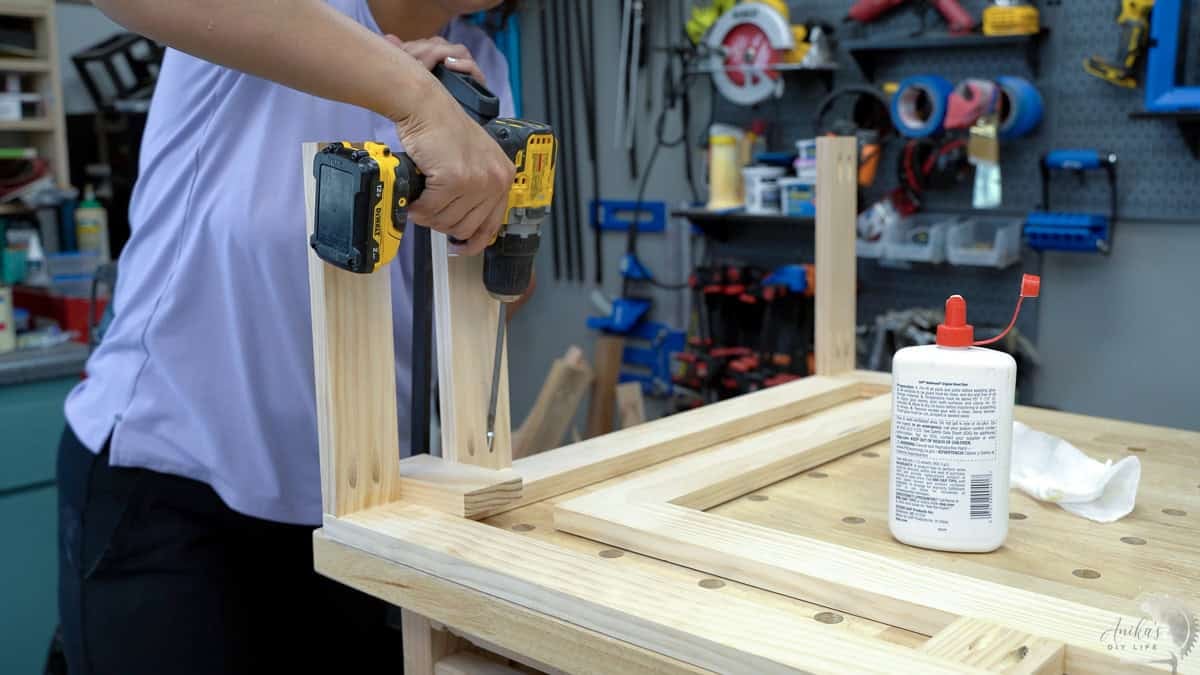
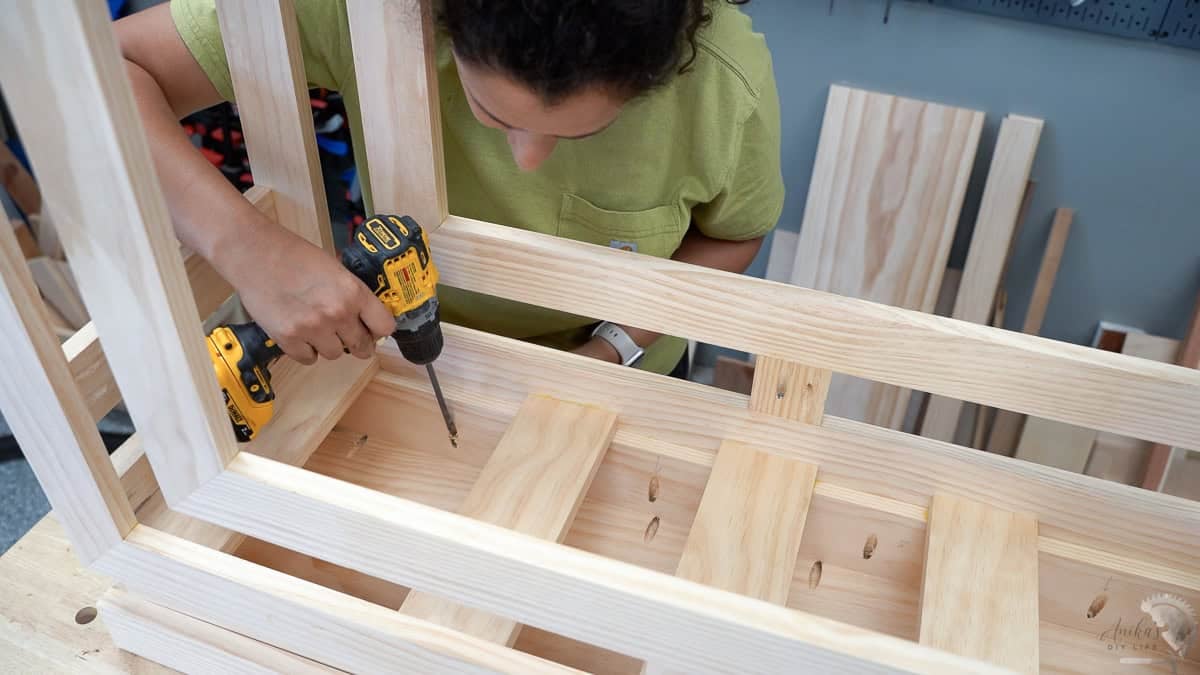
Step 2: Assemble the Legs
This is where the fun begins! Its time for the dowel joints.
- Make dowel holes on the ends of the boards that will join to form the legs.
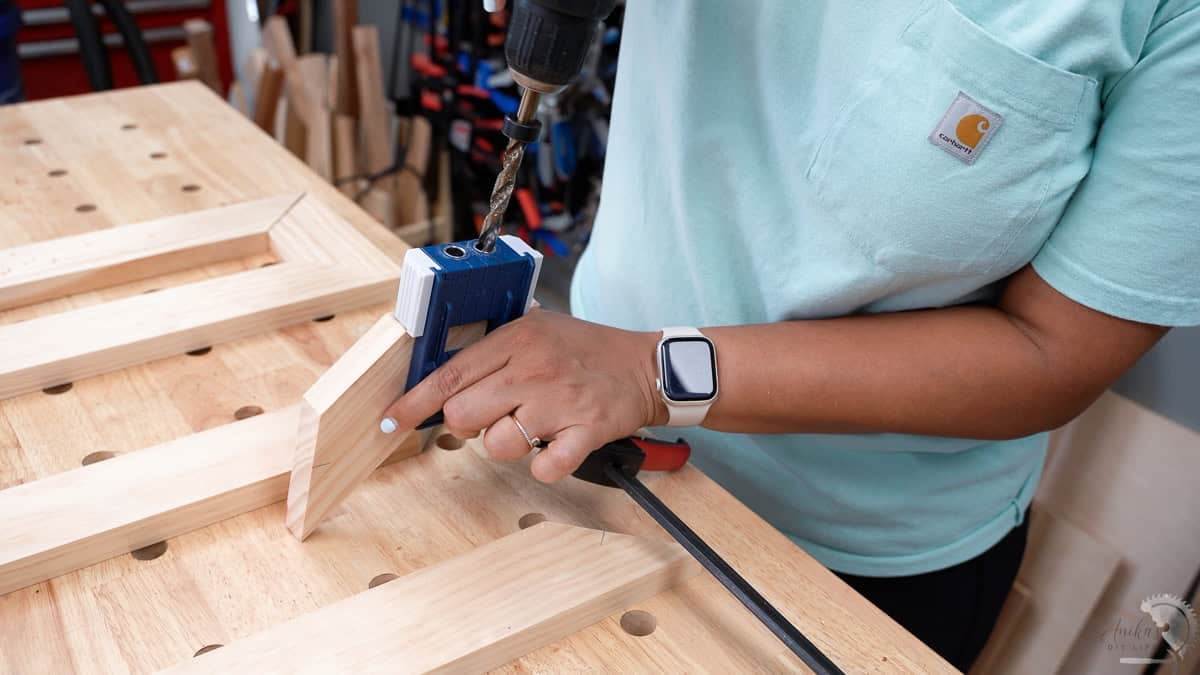
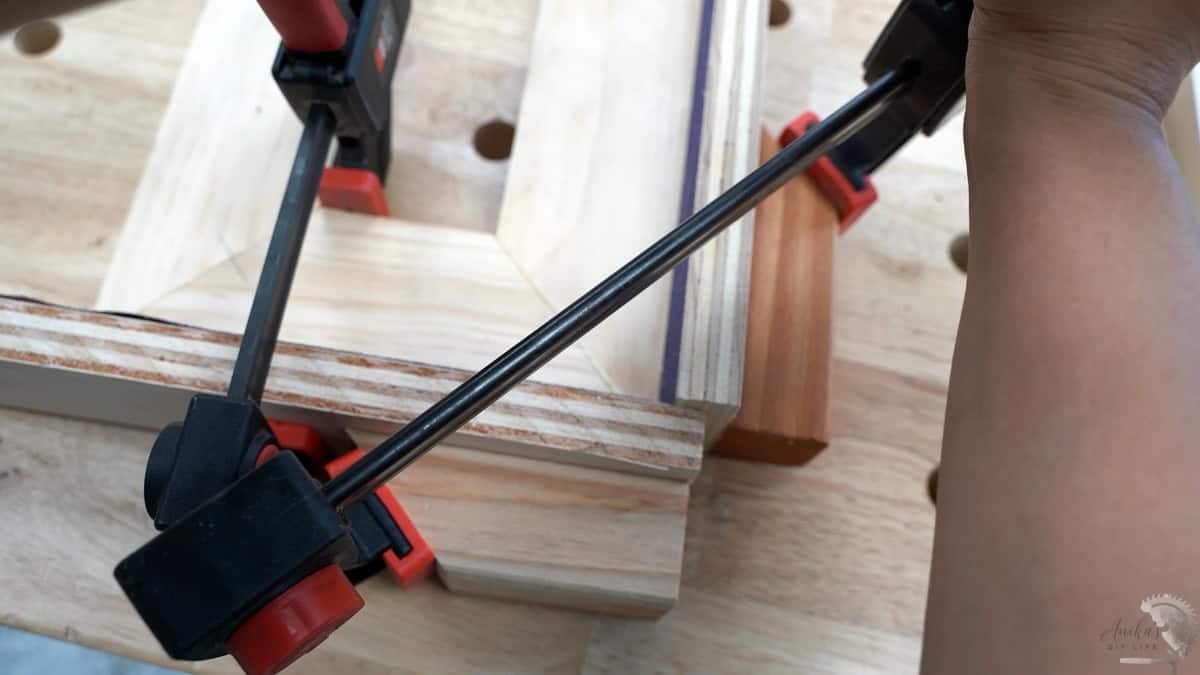
- Apply wood glue and add the dowels.
- Push the boards together and clamp them. I made a clamping jig for the 45-degree clamps based on a tutorial by The Wood Whisperer, and they worked like a charm.
I started with the four legs and then attached the horizontal braces.
I ended up adding the center spacer block using pocket holes.
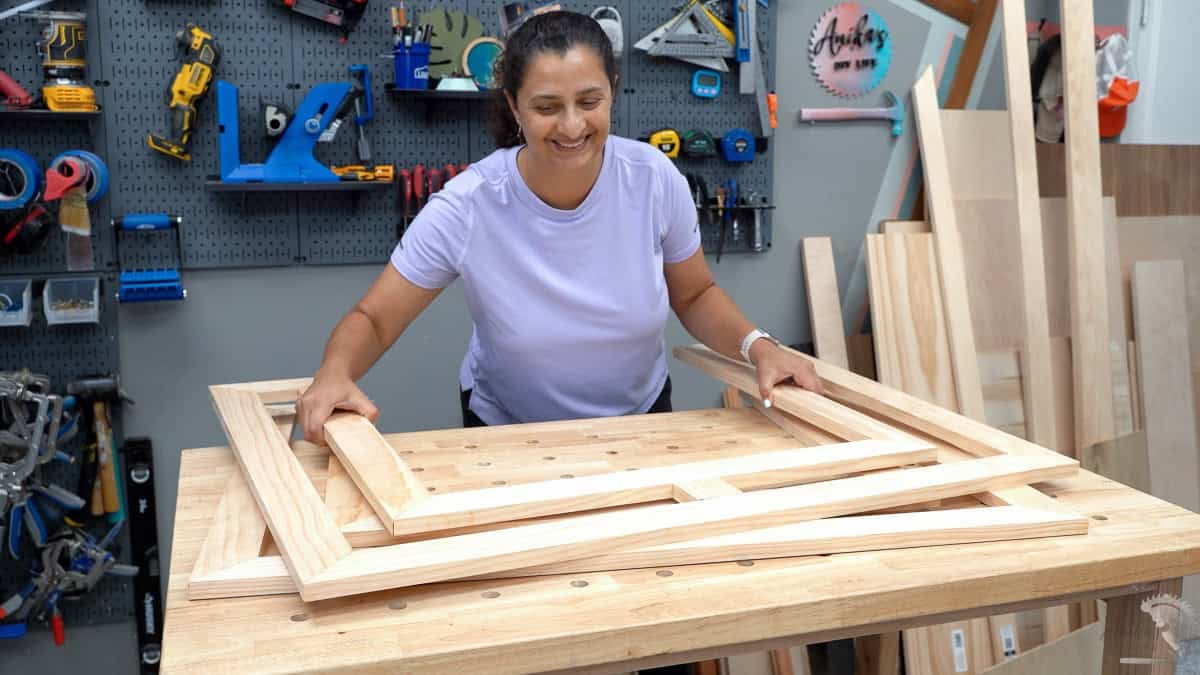
The next set of legs followed to build the entire frame for one side of the console table.
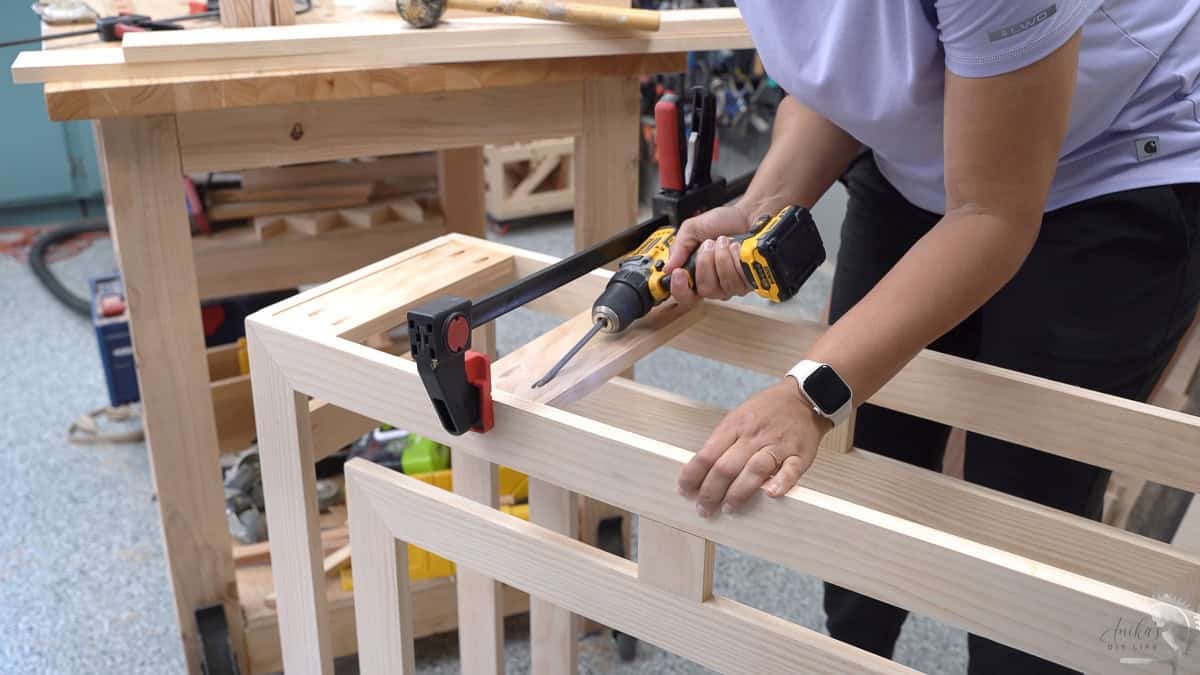
Step 3: Build the Leg Frame
- Make pocket holes in the side aprons with the pocket hole jig at 3/4″ setting.
- Attach the aprons to the legs to form the completed bottom leg frames.
Note that the pocket holes face inside. Use clamps to keep the boards in place as you attach.
Once the other set of legs is added, the leg frame is complete.
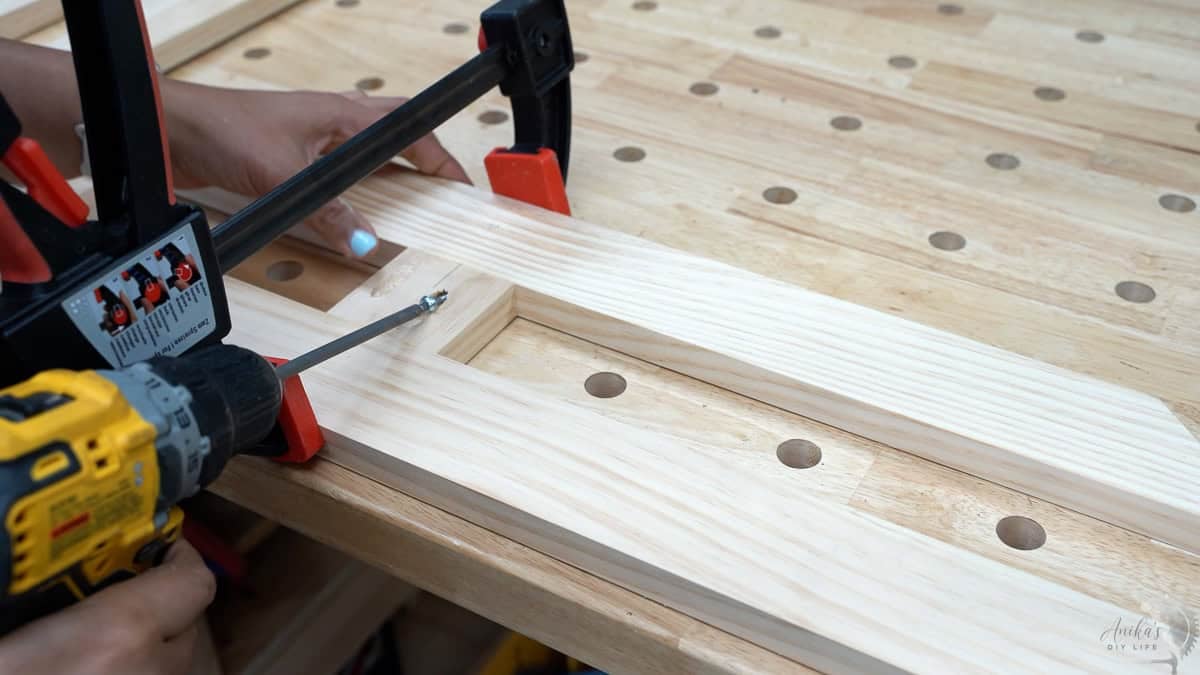
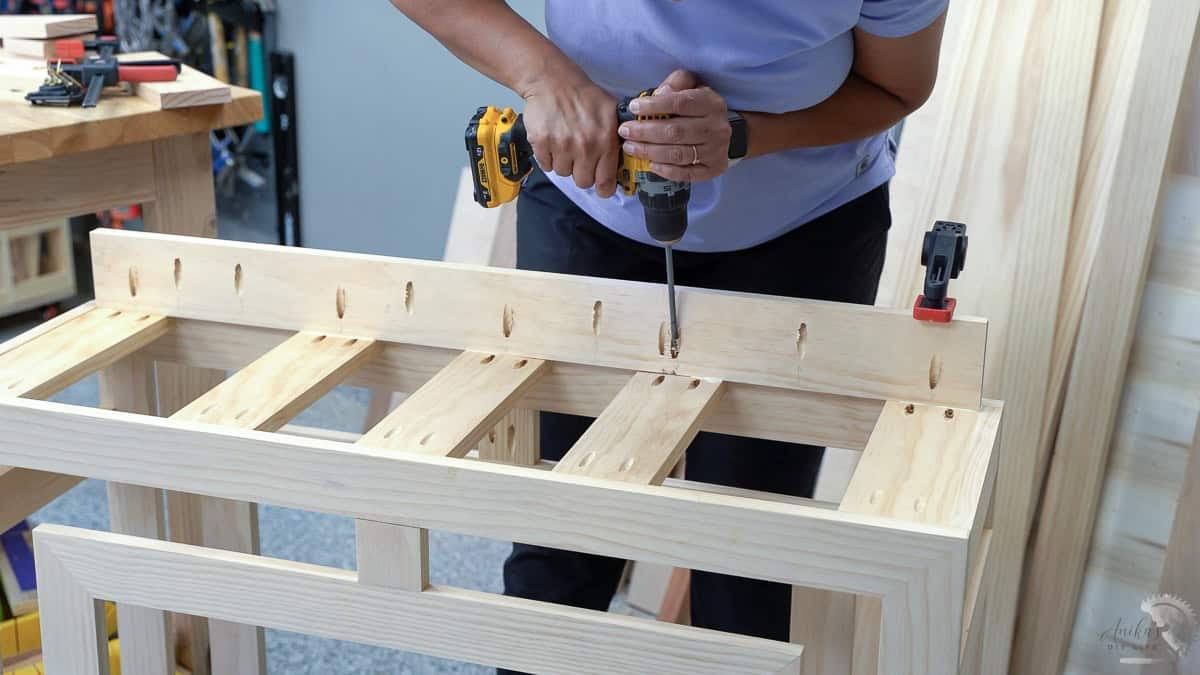
Step 4: Attach the Support Slats
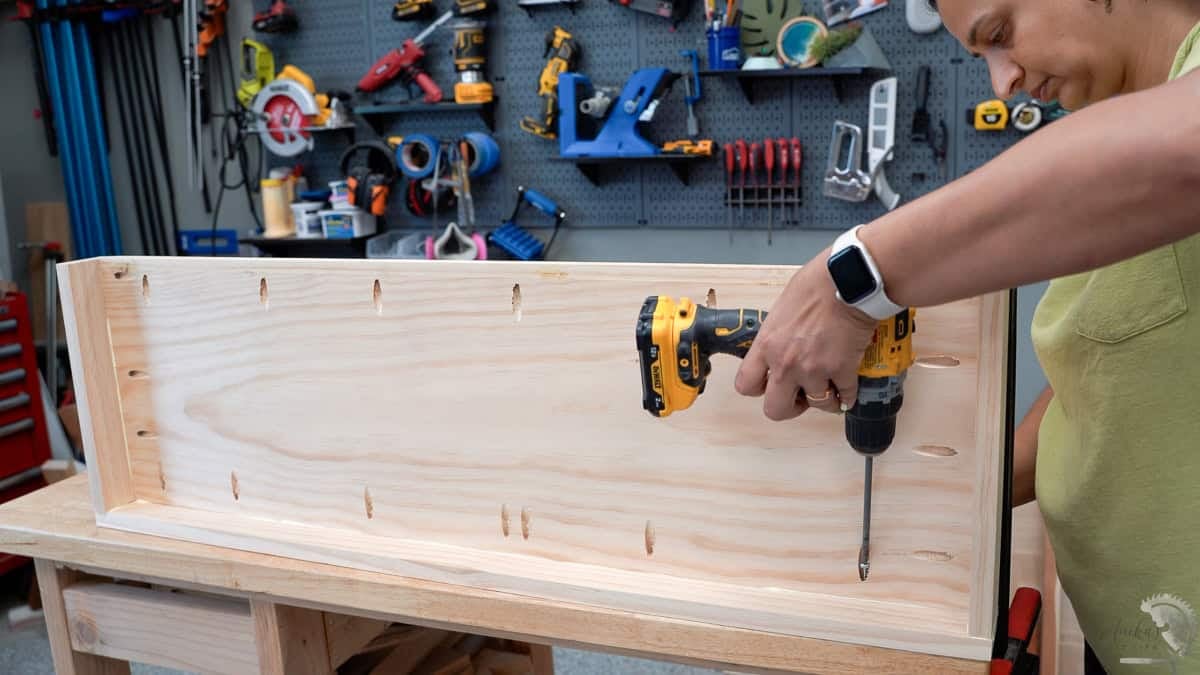
- Attach the top support slats using wood glue and pocket hole screws. There are a total of 5 slats. The spacing here is very important, and you will see why in the next step.
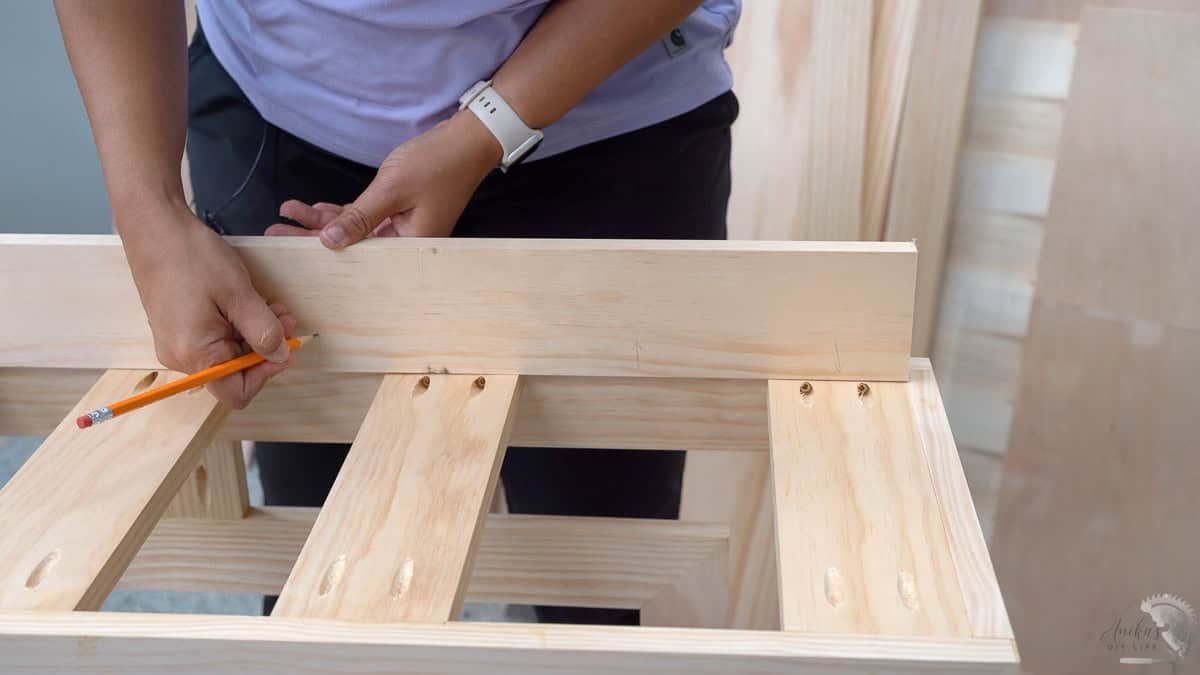
Step 5: Attach the Spacer
The spacer is attached using pocket holes to the support slats. The top will also attach to these spacers.
- Mark the location of pocket holes on the spacer for where they attach to the support slats and also mark the location of openings because the pocket hole screws to attach the top will be coming through it.
- Make the pocket holes on the spacer at the marked locations.
- Attach the spacer to the table frame using wood glue and pocket hole screws.
Step 6: Build and Attach the Top
The top is built using a 1×12 and 1×3 boards as trim.
- Attach the 1×3 boards to the 1×12 board using pocket hole screws and wood glue.
It is important to make sure that the boards are well aligned so that the top is smooth. To do this, use more clamps than you think you need and double and triple-check the alignment as you attach.
Once the top is built, it should fit nice and snug over the spacers.
- Add pocket hole screws from the inside of the spacer and attach the rest of the console table to the top.
Step 7: Final Finishes
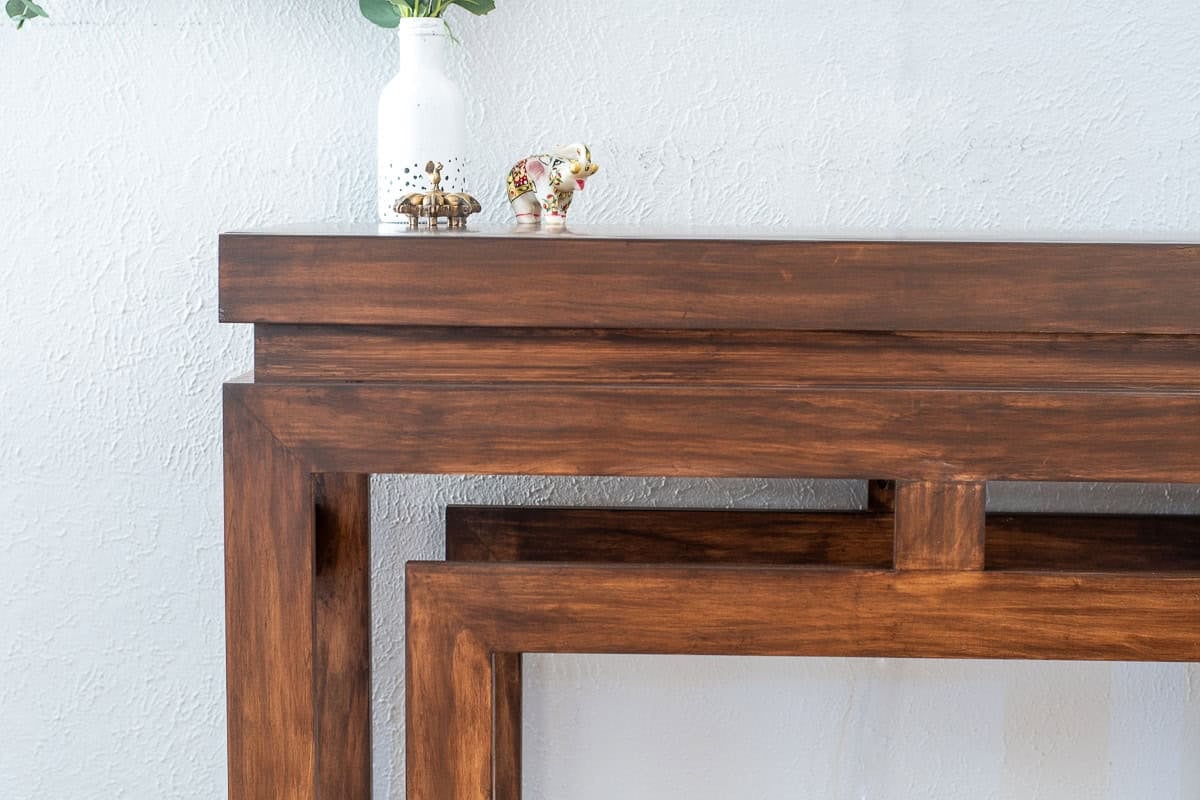
That is it! The table is built. At this point, you can fill in any pocket holes you see. I only had pocket holes on the side aprons and once they were stained, they were barely visible. If you would like a more seamless look, you can fill the pocket holes using dowels for the best results.
See how to fill pocket holes here.
- Apply a pre-stain conditioner and stain in the color of your choice. See how to stain wood.

I started applying a water-based stain. However, water-based stains dry really fast. There were drips on the inside of the console table that were not looking great. Given the design of this table, they would be very visible. So, I applied oil-based stain over it. Oil-based stain is more forgiving because it takes a while to dry, and you can easily blend it in if needed.
- Apply a top coat to protect your table. I used this top coat. See how to pick and apply the top coat.
I used my paint sprayer to spray on the water-based top coat, given the complexity of the design.
And that is it!
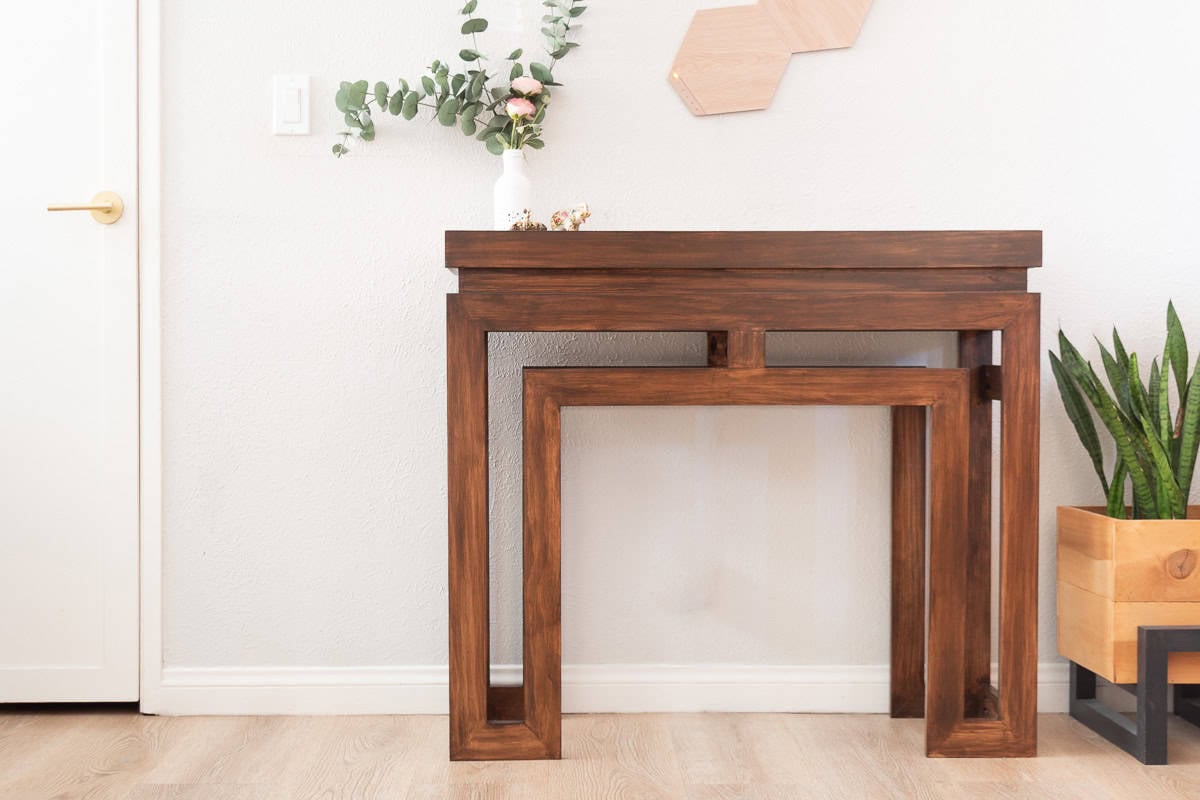
Here is the final console table.
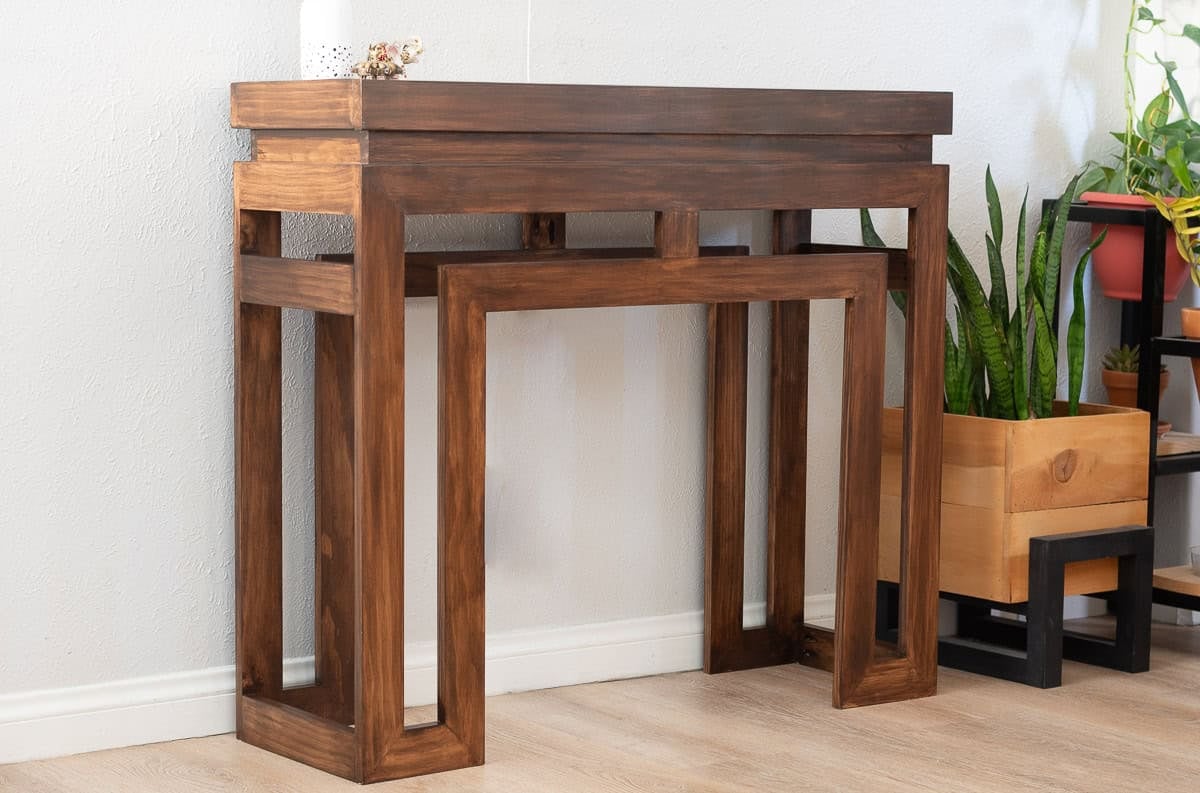
Now that it is done, I wish I had built it with real walnut… that would look so beautiful. But since I was trying the dowel joints in a mitered corners for the first time, I wasn’t quite sure I wanted to spend all that money on material. I am very proud of how the joints turned out!
But, now I know and you know and you can build it with nicer wood if you like! Be sure to share it with me. I can’t wait to see!
You might also like:


Shop My T-Shirt Designs

Anika's goal is to inspire and empower beginners with woodworking, DIY, home improvement, and home decor ideas.
She wants everyone to unlock their creative potential and experience the feeling that comes with making something. Nothing feels better better than seeing something and saying "I can make that!"


I got so excited when I saw this beautiful console table! I’ve been on the hunt for something narrow for a particular spot in my entry/living room. This looks perfect. I may need to give it a try when the weather warms up (we don’t have an indoor workspace for projects like this). Thank you!
Wow, Anika! I love this. I am going to save this for spring/summer and hopefully, make one for my home. Thanks so much for sharing at Project Inspired. Have an awesome day!