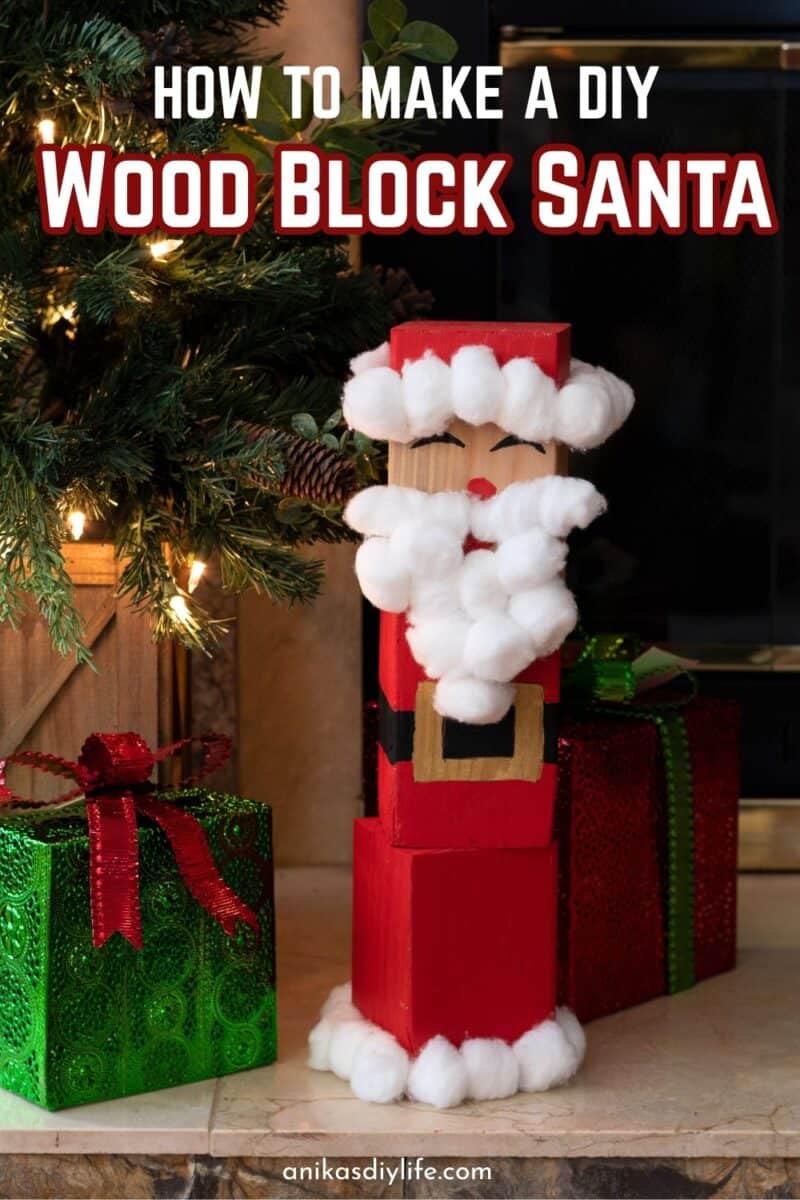
How to Make an Easy DIY Wood Block Santa (Scrap Wood Project)
Learn how to make a charming DIY 4×4 Wooden Block Santa with this easy step-by-step tutorial. A perfect Christmas craft using scrap wood!

Sometimes you just need a quick and fun project to add the perfect Holiday touch. Ever since I made the wood-block snowman and wood-block pumpkins, I have had this idea for a wood-block Santa. So here it is!
This DIY 4×4 Wooden Block Santa is easy to make and budget-friendly, and it’s actually a really fun project to make with the kids.
In fact, it is the perfect way to use up those leftover scrap wood pieces in your garage. Plus it needs almost no tools – just a saw to cut the wood and a sander or sanding block to clean up the splinters.
This Santa Claus is made from three separate blocks, making him stackable and easy to store once the holidays are over. Place him on your mantle, front porch, by your fireplace, or use him as a festive table centerpiece.
***This post contains referral or affiliate links. It is a way for this site to earn advertising fees by advertising or linking to certain products and/or services. Please read my full disclosure here ***
Materials Needed:
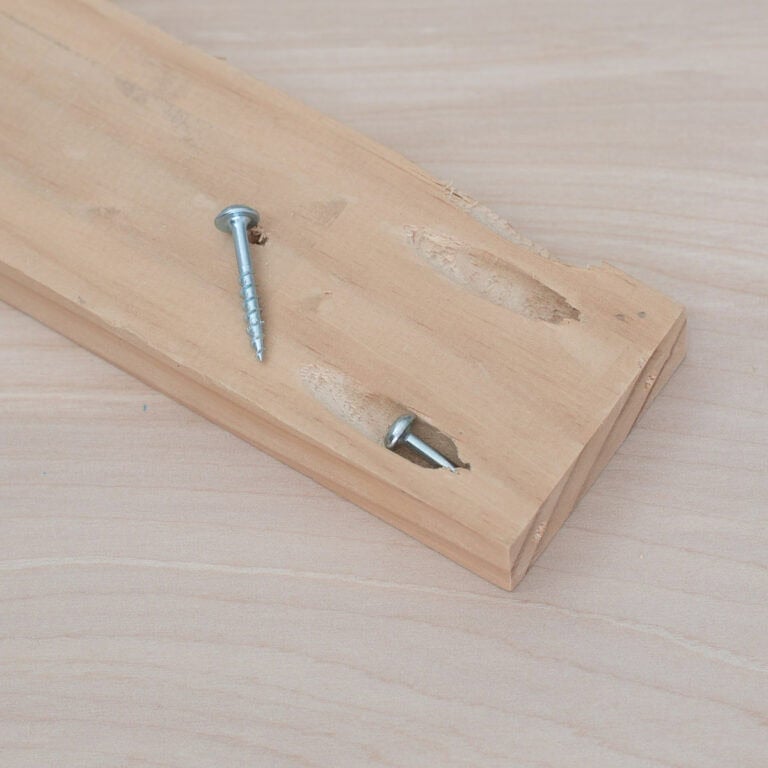
- 4×4 Wood Post: You will need approximately 18-20 inches total.
- Cotton Balls or Faux Fur: For the beard and hat trim.
- Paint – red, black, and yellow or gold. I used latex paint but you can also use craft paint.
- Wood Stain (Optional): Light brown or walnut for the face.
- Painter’s Tape or Masking Tape.
- Black permanent marker (optional)
- Paintbrushes in various sizes
- Hot glue gun and glue sticks
- Pencil
- Safety glasses
Tools Needed
- Miter saw. What I use | Beginner Option
- Sander – What I use – I have had this since 2015 and still going strong!
- Sanding block
How to Make a Wood Block Santa
Step 1: Cut the Boards
- Start by cutting your 4×4 post into three separate pieces using a miter saw or circular saw. You will need three blocks that are approximately 6 inches long each.
See how to use a miter saw.
See how to use a circular saw.
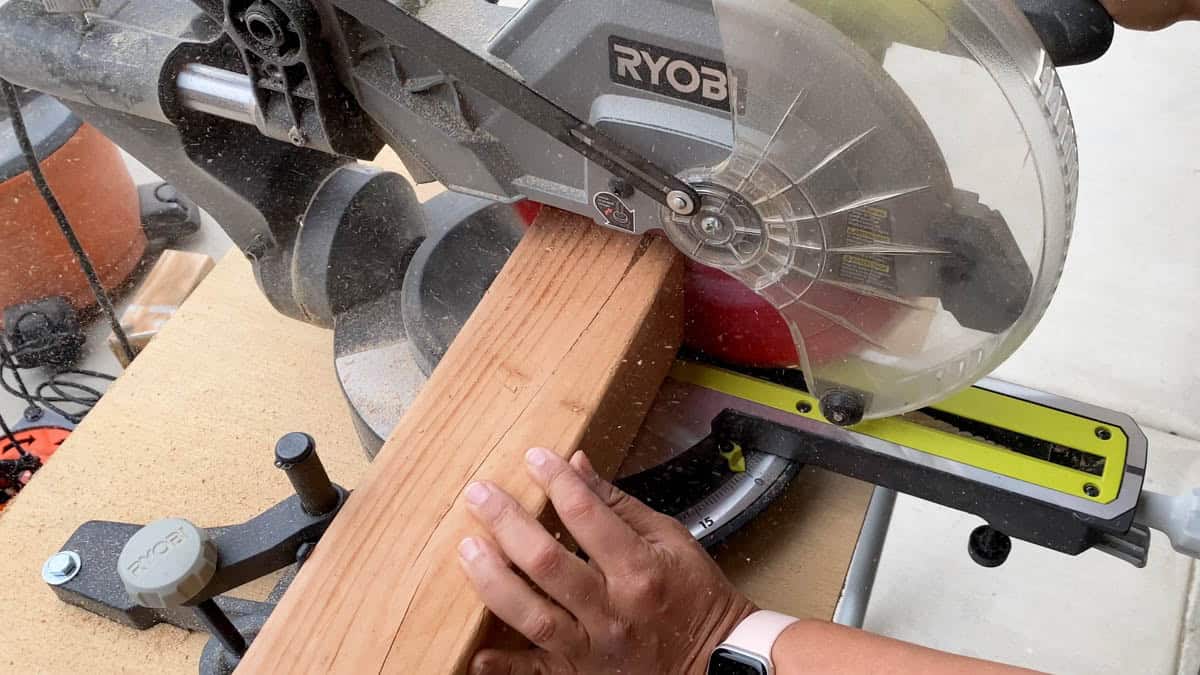
Tip: If you want a whimsical, uneven look, you can cut the pieces at slightly different lengths (e.g., 5″, 6″, and 7″).
- Use your sander or sanding block to smooth down the edges and faces of the blocks. Pay special attention to the corners to remove any sharp splinters. See how to sand for the best finish.
- Wipe the blocks clean of dust with a wet rag or tack cloths before painting.
Step 2: Sketch the Design
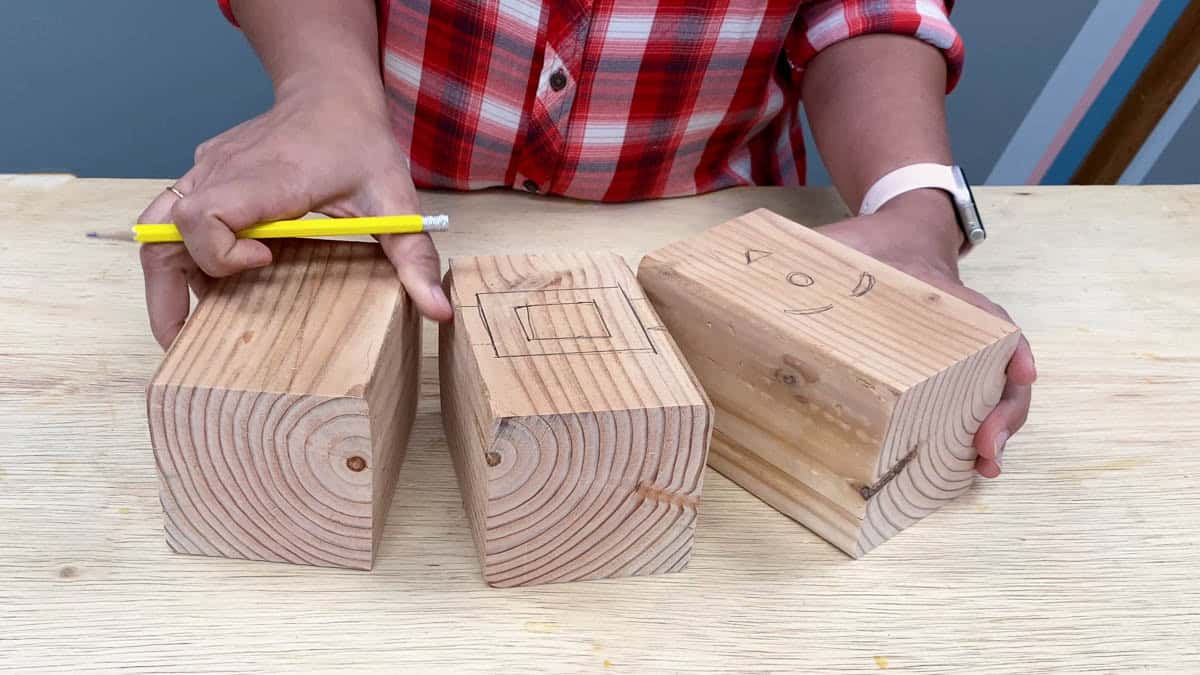
Before you break out the paint, sketch the design on the blocks to visualize what it will look like.
- Top Block (Face): Lightly sketch Santa’s eyes, nose, and where the hat line will be.
- Middle Block (Body): Use a ruler to sketch the belt and buckle in the center.
Step 3: Paint the Santa Suit (Middle and Bottom Blocks)
- The Body: Paint the middle block red around the belt and belt buckle.
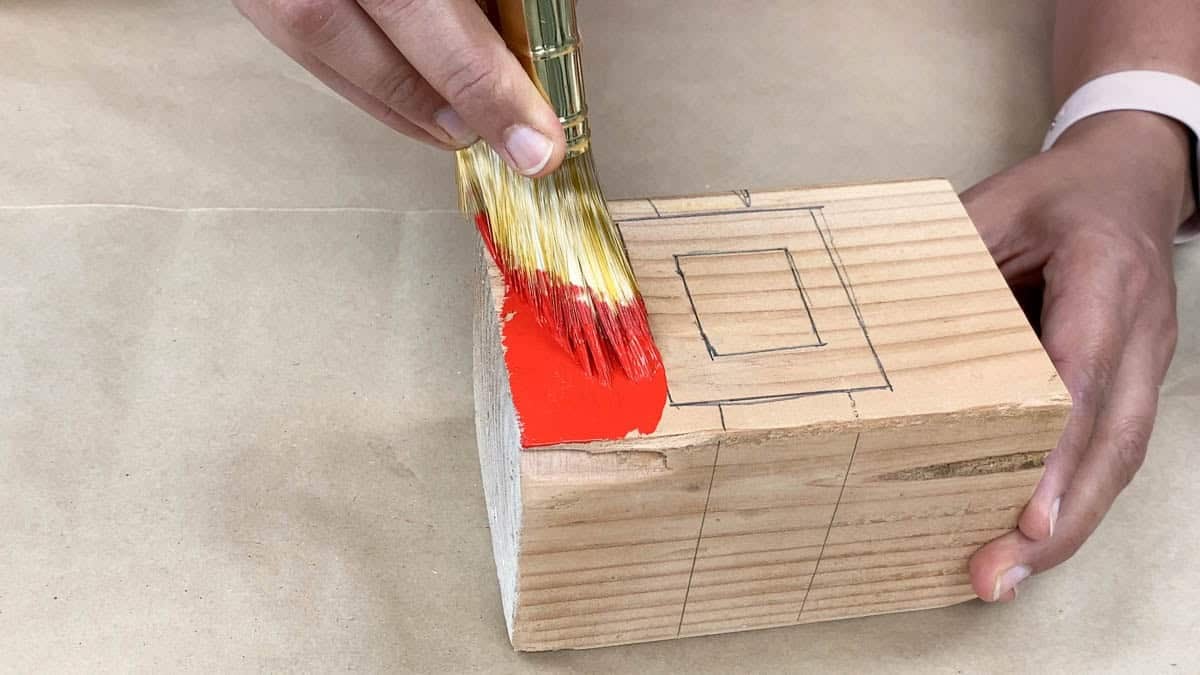
- The Pants: Paint the bottom block completely red and allow to dry.
Step 4: Paint the Face Block
For the top block, you have three options for the skin tone. You can leave it plain wood tone, paint it a flesh tone, or use a light wood stain.
- The Hat: Paint the top 1/3 of the block red to represent Santa’s hat.
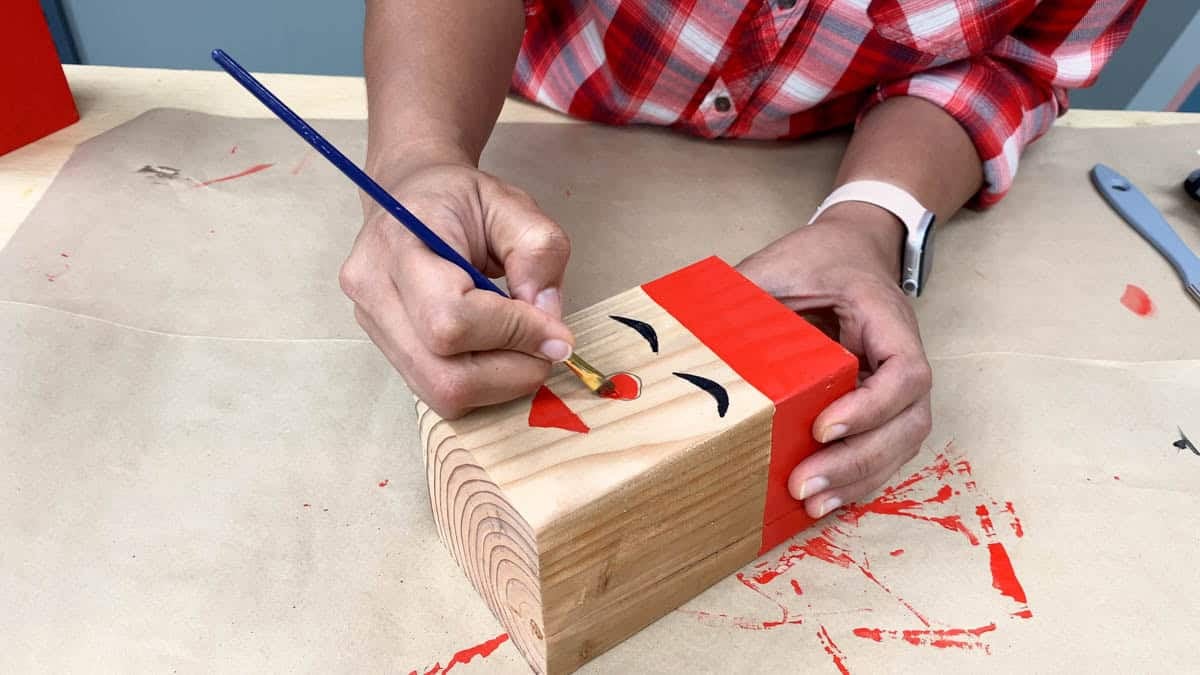
- The Face: Paint two black dots for eyes (or use a permanent marker) and a small red oval for the nose.
Step 5: Add the Belt and Buckle
Once the red paint on the middle block is completely dry, use masking tape to mark off a horizontal line for the belt to make sure it is straight. Or you can take the chance and freehand paint it like me.
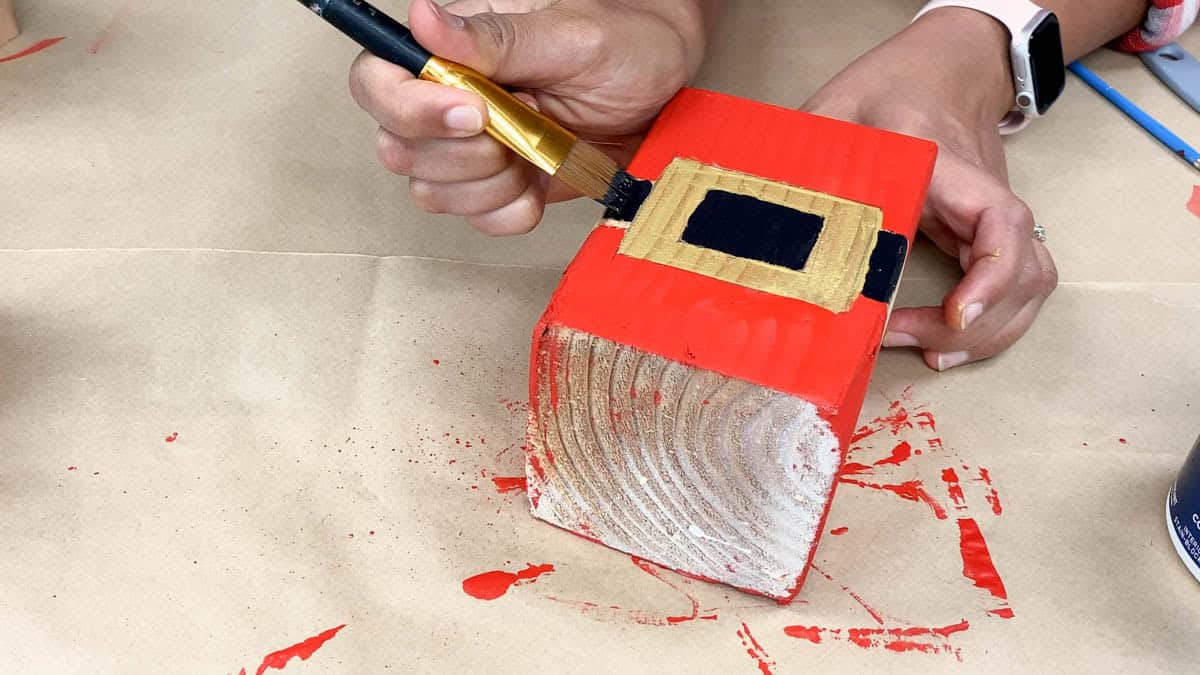
- Paint the belt black.
- Once the black is dry, paint a square gold or yellow buckle in the center.
Step 6: Attach the Hat Trim
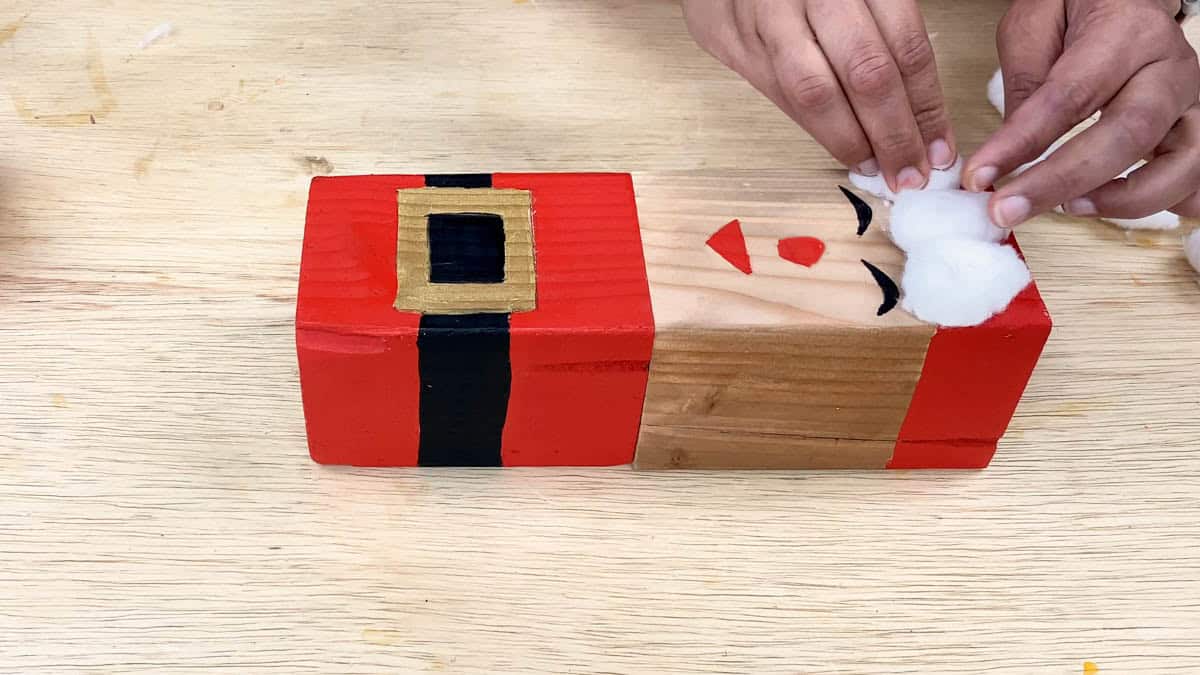
Heat up your hot glue gun. Take your cotton (or faux fur strip) and glue a row around the top block where the red “hat” paint meets the face.
You can wrap this all the way around the block for a 3D effect.
Step 7: Create the Beard and Mustache
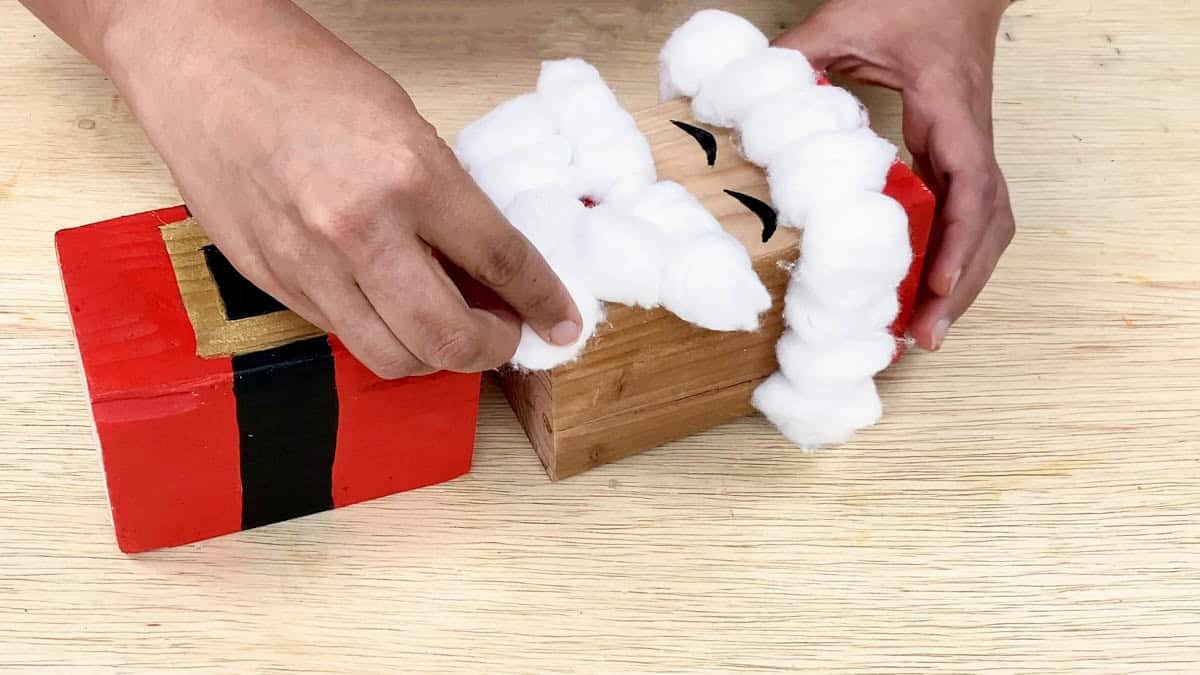
This is where Santa comes to life!
- Mustache: Shape a small piece of cotton into a handlebar shape and glue it under the nose.
- Beard: Attach a larger amount of cotton below the mouth.
Note: You can hold the middle block up to the face block to measure the beard length, but do not glue the blocks together. The beard should hang freely over the middle block so you can unstack them later.
Step 8: Finish the Pants
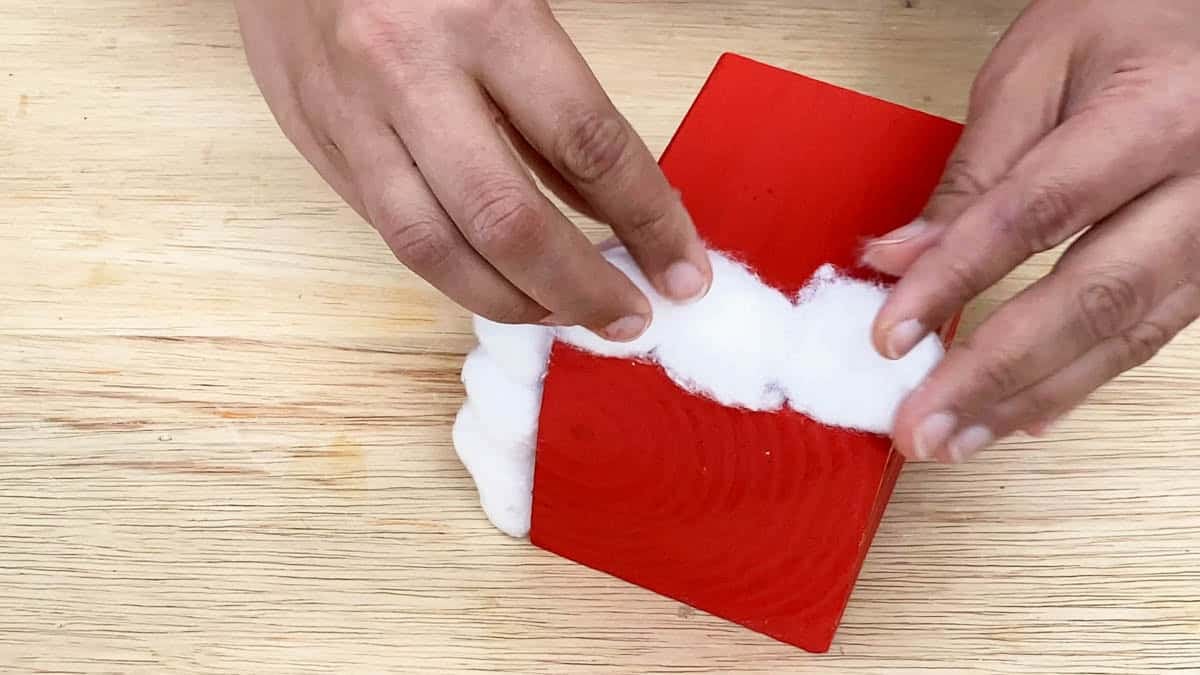
Add a row of cotton to the bottom edge of the bottom block. This acts as the white fur trim on Santa’s pants.
That is it!
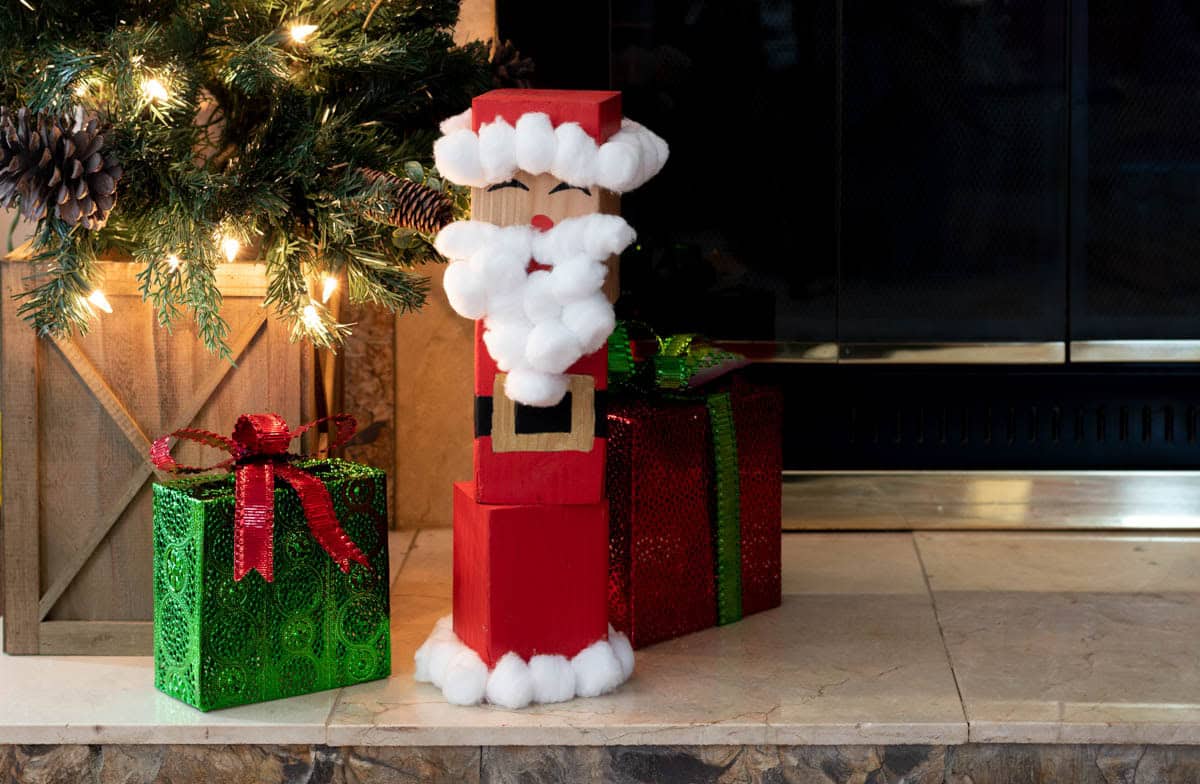
Stack your blocks: Pants on the bottom, belt in the middle, and face on top. And that’s it! You have a custom Wooden Santa Decoration ready for Christmas.
You may also like:


Anika's goal is to inspire and empower beginners with woodworking, DIY, home improvement, and home decor ideas.
She wants everyone to unlock their creative potential and experience the feeling that comes with making something. Nothing feels better better than seeing something and saying "I can make that!"