DIY Marble Contact Paper Countertop: The Best Rental-Friendly Makeover (Step-By-Step)
Tired of ugly rental counters? Learn how to install a DIY marble contact paper countertop for under $30! See my 10-month durability report and pro tips for a damage-free removal.
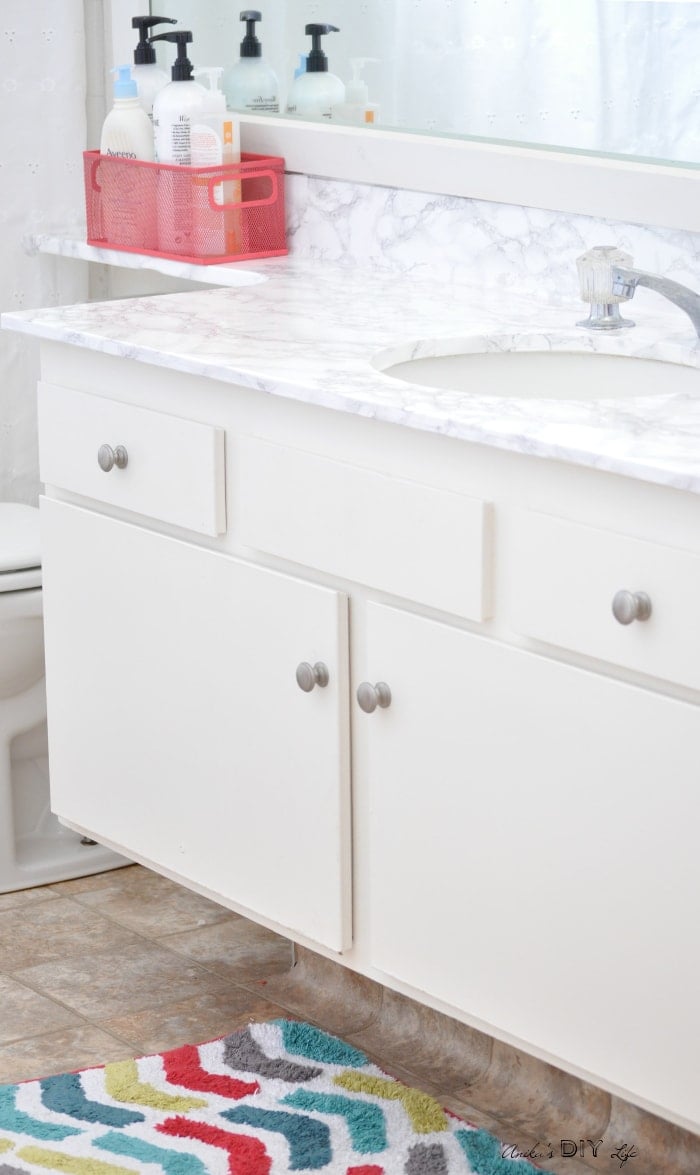
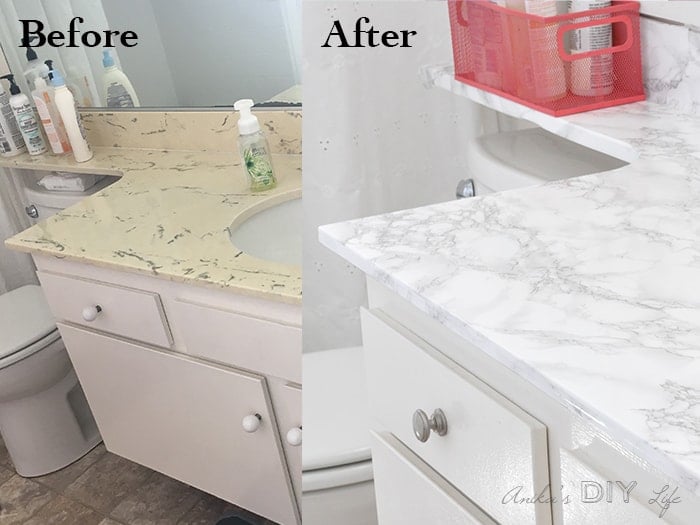
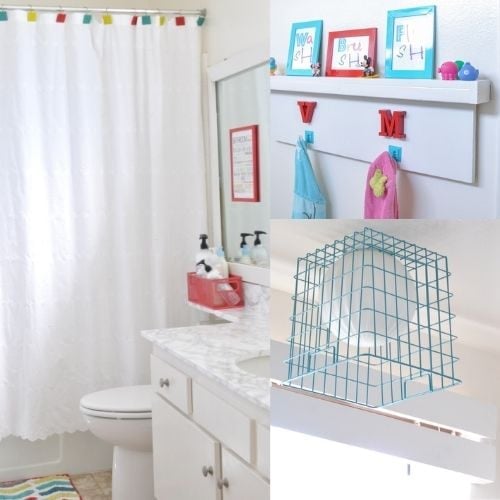
If you have been following my rental bath makeover, you know the biggest eyesore in there was the old yellow counter. It was stained, damaged, and no amount of elbow grease could save it.
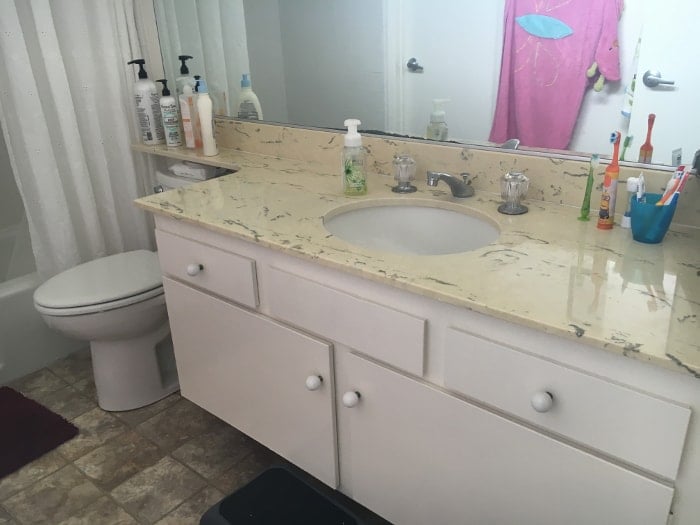
Since this is a rental, replacing it wasn’t an option. It had to be temporary, budget-friendly, and 100% removable.
When we leave, it will need to possibly go back to its former yellow glory.
My solution – a DIY marble contact paper countertop. It completely transformed the room for under $30, and honestly, it even fooled my landlord!
- Project Time: 1–2 hours
- Skill Level: Beginner
- Cost: ~$30
***This post contains referral or affiliate links. It is a way for this site to earn advertising fees by advertising or linking to certain products and/or services. Please read my full disclosure here ***
Material Needed
- Marble Contact paper. To get a high-end look that lasts, quality vinyl is key. (I used two 17.71″ x 76″ rolls, but check your counter depth!)
- Scissors & X-acto Knife (For precision trimming around the sink)
- Smoothing Tool (A credit card works perfectly!)
- Hair Dryer (My secret weapon for smooth corners)
- Transparent Silicone Caulking (Optional, to seal edges)
Before we get started, make sure to follow me on Instagram, Facebook, YouTube, and Pinterest to keep up with all my latest builds and projects!
How to Cover Countertops With Contact Paper
If you are a more visual person, here’s how I covered a kitchen countertop with black marble self-adhesive paper –
Step 1: Prep and Deep Clean
- Scrub the surface thoroughly with a degreaser or rubbing alcohol.
Contact paper will not stick to grime or soap scum. Any bumps or dried “stuff” will show through the vinyl, so make sure it is perfectly smooth.
Step 2: Measure and Cut
- Measure your countertop and cut a piece of contact paper that is 2–3 inches longer and wider than the surface.
If your counter is deeper than the roll, don’t worry, the marble pattern makes overlapping seams almost invisible.
Step 3: Apply and Smooth
- Slowly peel the backing little by little. Starting from one edge, smooth the paper onto the counter using your credit card.
Anika’s Pro Tip: Move from the center outward to push air bubbles to the edges. If you get a stubborn bubble, lift the paper slightly and reapply.
And if the air bubble is trapped in the middle of the paper, you can use a pin to release the air and smooth the paper around it. The little hole will barely be visible.
Step 4: The Hair Dryer Hack for Corners
Corners are the hardest part.
- Use a hair dryer on a low heat setting to warm the vinyl for a few seconds. This makes it pliable so you can stretch it tightly over the edges and corners without those annoying creases.
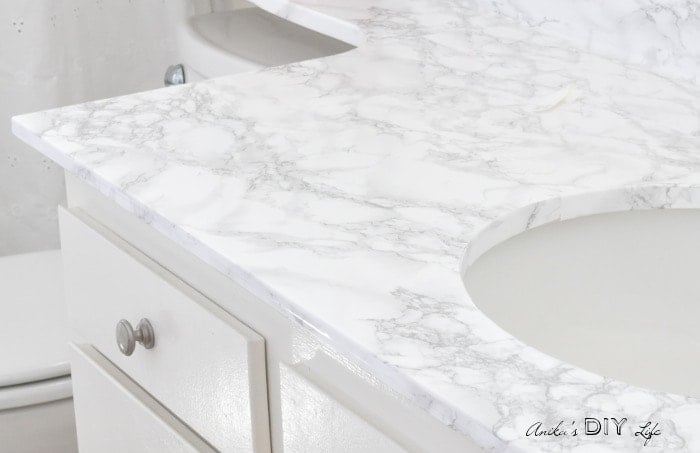
Step 5: Trim Around the Sink
- Use your X-acto knife to carefully cut around the faucet and sink rim. I found it easiest to cut a separate long, thin strip of contact paper to cover the inside edge of the sink backsplash for a seamless look. You can apply transparent caulking to seal the edges around the sink.

If you need more details on how to cover the edges and around the sink, here is a video I made showing how I covered a kitchen countertop with black marble self-adhesive paper –
And done!
It is time to admire your beautiful “new” countertops.
Durability Report: Does It Actually Last?
I get this question constantly: “Does contact paper hold up in a bathroom?”
The short answer: Yes! After 10 months of daily use in a kids’ bathroom (think toothpaste, water splashes, and cleaning sprays), it still looks as good as it did on day one. I am amazed at how well they are holding up. It is 100% waterproof.
The only thing to watch out for is heat. Since this is vinyl, it will melt if you place a hot curling iron directly on it. Always use a heat-safe mat!
Once again, here is a before and after because I can’t stop admiring them!
How to Remove Contact Paper (Damage-Free)
The best part for renters? When it’s time to move, this comes off without a trace.
- Add Heat: Use your hair dryer to warm the surface. This softens the adhesive.
- Peel Slowly: Start at a corner and pull back gently.
- The Result: The original yellow laminate was pristine underneath. In fact, the contact paper protected it from further staining for the whole year!
Frequently Asked Questions (FAQs)
Can you see the seams?
Only if you are looking for them! Because the marble pattern is busy and organic, the seams blend in beautifully.
Is it waterproof?
Yes. However, I recommend using a bead of clear silicone caulk around the sink edges to prevent water from seeping under the paper over time.
Can I use this in a kitchen?
Absolutely! I covered a kitchen countertop with black marble self-adhesive paper . They also have contact paper available in granite and a whole bunch of colors! Just be sure to use trivets for hot pans and avoid cutting directly on the surface with knives.
See all the ways you can use Contact Paper for decor!
What to With Leftover Contact Paper
If you have leftover marble contact paper, here are a few creative ideas for you


See 21 more DIY project ideas using marble contact paper here.
Renter-Friendly Bathroom Makeover Ideas


Anika's goal is to inspire and empower beginners with woodworking, DIY, home improvement, and home decor ideas.
She wants everyone to unlock their creative potential and experience the feeling that comes with making something. Nothing feels better better than seeing something and saying "I can make that!"


What a transformation!!! I am so impressed! Thanks for sharing at #HomeMattersParty!
You inspired me! I’m a homeowner but my budget doesn’t alllow for a new vanity right now. I gave this a try and it looks 100% better than it did before. I did have some problems around my sink as mine is elevated but figured it out. I also ended up with more seams than I wanted but again, it’s hard to tell unless you know it’s contact paper and are looking for the seams. Thanks for the great idea!
Hi Natalie!! That is awesome! I am so glad that it worked out well for you. I would love to see a picture. If you don’t mind, you can email me one at [email protected]
Thank you!! Anika
Just wondering how much contact paper you ended up needing for the entire project. How many rolls? Thank you!
Hi Jill, For my project, I used just over 2 rolls. Of course the quantity needed will depend on how large your worksurface is.
Hello, I also am in love with the marble contact paper on the kitchen counter.
I wondered for longer term, is it possible to seal it with “something” for long wear, etc.?
Yes, definitely!
You can use a transparent caulking on the edges and also a polyurethane coating if you like. But the truth is, it is really very durable by itself.
This looks awesome! I see you used a little over 2 rolls. What dimensions were the rolls? Your countertops look roughly about the same dimensions as mine. (Of course I’ve measured to be sure!) Thx!
Hi Alli, I used the 17.71″ x76″ roll. Now they also have a 26″ deep roll. If it would have been available then, I wouldn’t have a seam on the countertop.
Perfect. Just what I needed to know. Thanks!