Do You Need to Drill Pilot Holes for Wood Screws? A Beginner’s Guide
Learn what pilot holes are, why they matter for wood screws, and when to pre-drill. This step-by-step guide shows you how to drill pilot holes for screws without splitting wood.
Pilot holes are one of the most common confusions when building projects, especially for beginners.
I can understand where the confusion comes from. Some makers tell you – “Always drill a pilot hole” yet you see so many makers not use a pilot hole at all!
So, “Do I really need to predrill a pilot hole before driving a screw?”
The short answer is: yes, in many cases.
If you’ve ever driven a screw and watched the wood split, you know how frustrating it can be. This is can be prevented by pre-drilling a pilot hole for the screw.
Drilling pilot holes can prevent damage, make your project stronger, and help you get a cleaner, more professional finish.
Let’s break it all down so you know when and how to use pilot holes for screws.
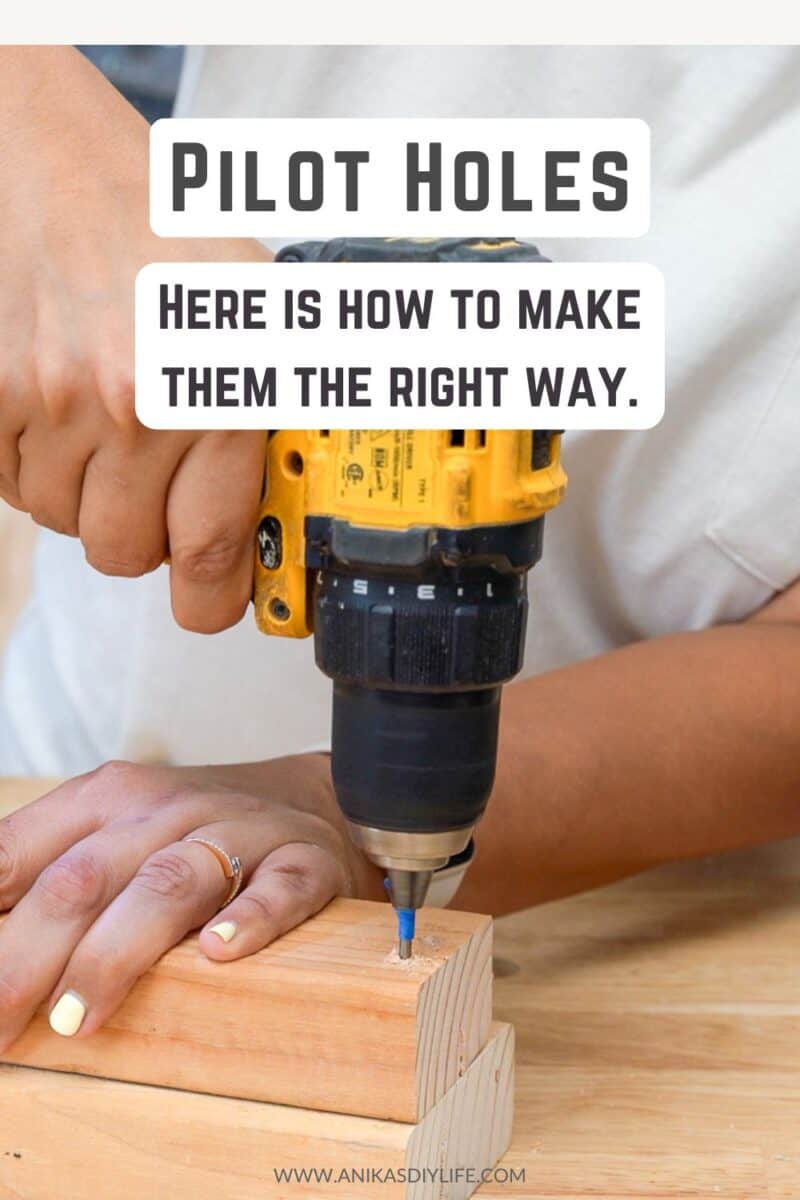
What Is a Pilot Hole?
A pilot hole is a small, pre-drilled hole that helps guide a screw into wood. This step minimizes the risk of splitting and helps with alignment.
Pilot holes are often confused and used interchangeably with predrilled holes, but there’s a subtle difference:
- A pilot hole typically goes partway into the wood and is sized smaller than the screw’s outer threads. It’s great for alignment and helping the screw start in the right spot.
- A predrilled hole usually goes the full length of the screw and matches the core diameter of the fastener. This is often necessary in structural or dense wood applications.
Why Pilot Holes Matter for Wood Screws
It is very tempting to skip pilot holes because who needs a whole other extra step. Why not just try and see if it works without a pilot hole? I have definitely fallen in that trap as well. But predrilling or pilot holes has a few very important benefits:
- Prevent splitting: Especially important near edges or with hardwoods
- Easier screw driving: Less force required, and less stress on your drill
- More accurate placement: Helps avoid wandering, especially on slick surfaces like melamine
- Cleaner results: Screws drive straighter and leave a more professional finish
- Reduced risk of screw damage: Avoids stripping or snapping screws
- Stronger joints: Because the screw threads engage more consistently without cracking the material
Even in structural projects with longer fasteners or dense woods, predrilling can improve accuracy and reduce the torque needed for installation.
Why Wood Splits Without a Pilot Hole
When you add a screw into wood, it moves the wood fibers in its path. If these wood fibers don’t have anywhere to go, it causes stresses inside the wood grain. The stress is relieved through cracks.
Especially on the edge of the board, it is particularly easy for the stress relief to result in splitting of wood.
Do You Need to Drill Pilot Holes for Screws Every Time?
Do you need to drill pilot holes for wood screws? It depends. Here are some general rules of thumb:
You SHOULD drill pilot holes when:
- Working with hardwoods like oak, maple, or walnut
- Driving screws close to the edge of the wood
- Using long screws or thick screws
- Fastening into brittle or thin boards
You MIGHT skip pilot holes when:
- Using self-tapping screws designed to create their own pilot holes
- Driving short screws into thicker material away from the edge
When in doubt, drill the pilot hole. It’s a small step that saves time and materials in the long run.
How to Drill Pilot Holes (Step-By-Step)
Here’s how to drill pilot holes like a pro:
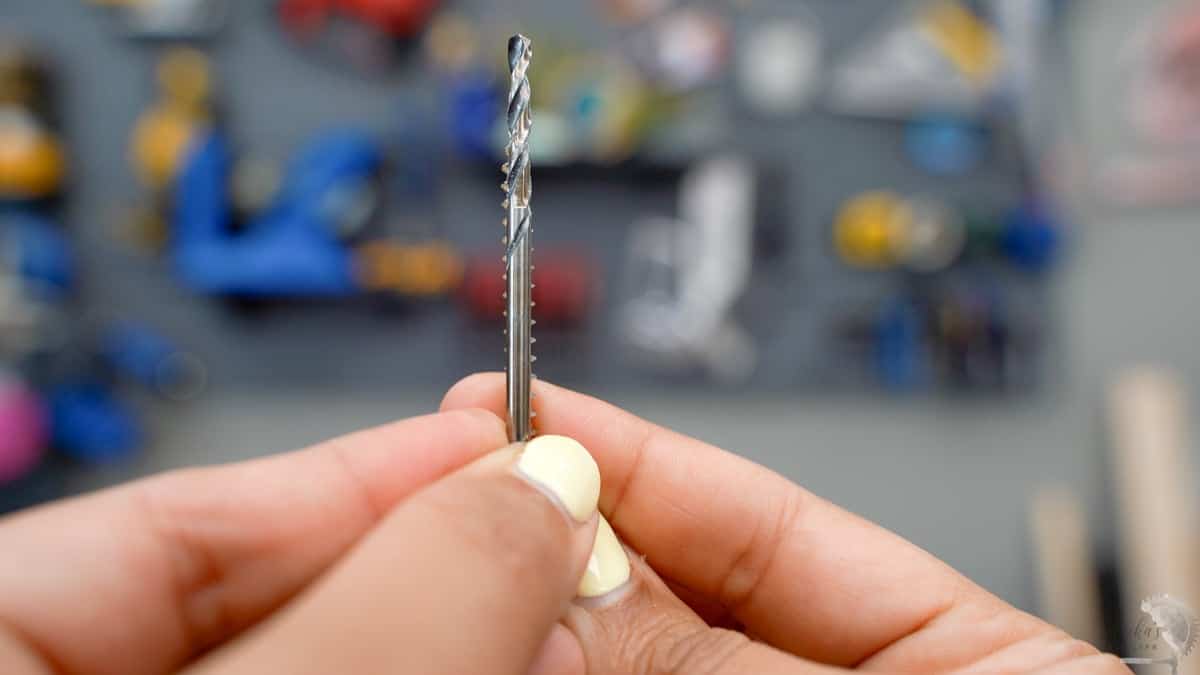
Step 1: Choose the Right Drill Bit
- Match the bit size to the inner core (not the threads) of the screw.
The best way to do this is to hold the bit in front of the screw and look at them in line of your vision. If you can see the threads on the side, that is the right size of drill bit.
If the drill bit covers the threads, it is too big.
- Example sizes for softwood:
- #6 screw: 3/32″ drill bit
- #8 screw: 7/64″
- #10 screw: 1/8″
- #12 screw: 9/64″
- #14 (or 1/4″): 5/32″
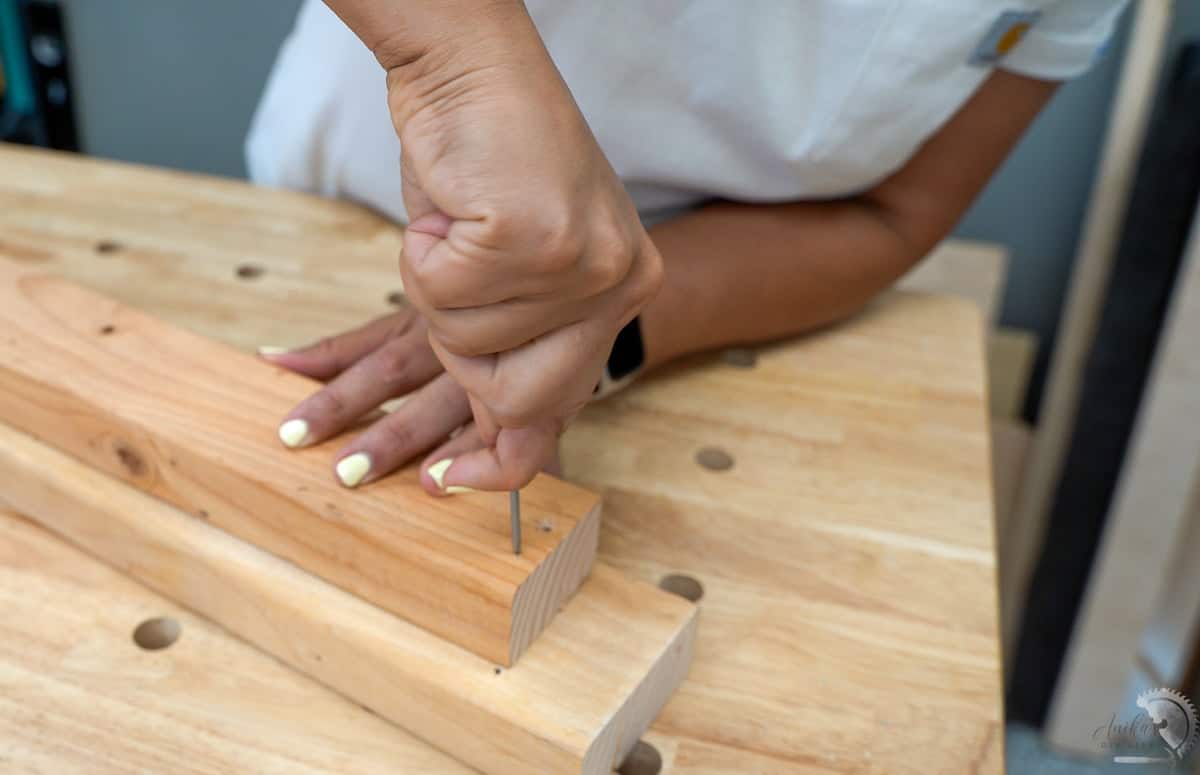
Step 2: Mark Your hole location
- Use a pencil or awl to make an indentation where the screw will go. This helps keep the drill bit from walking when you start to make the hole.
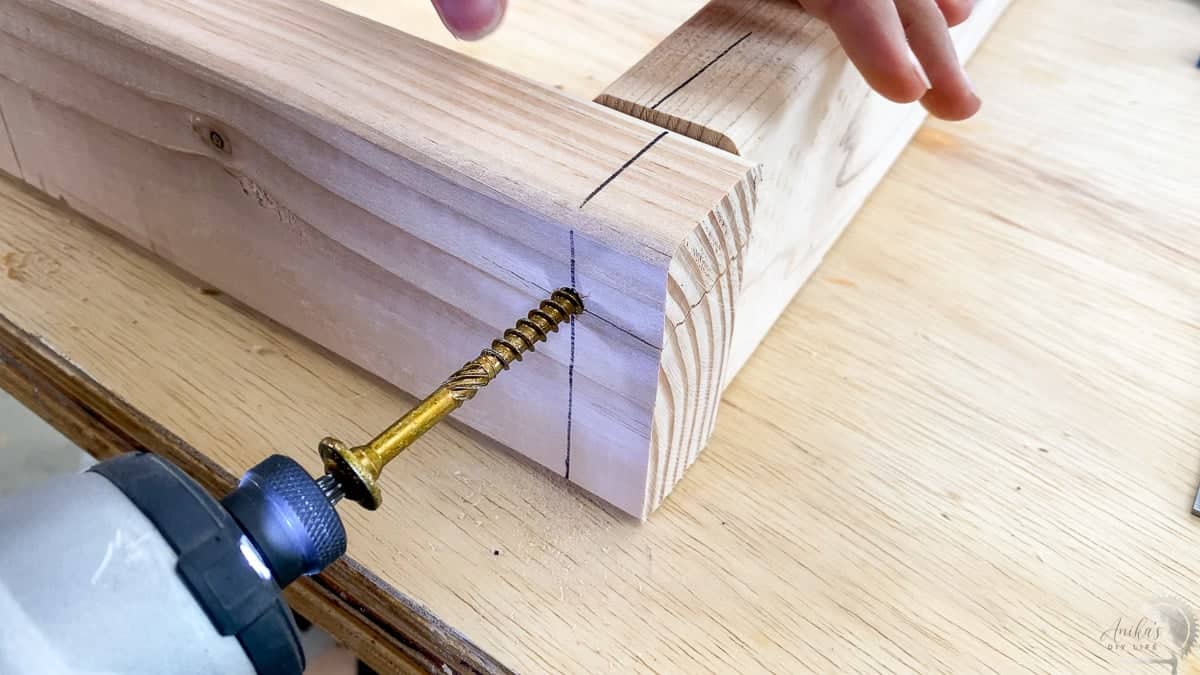
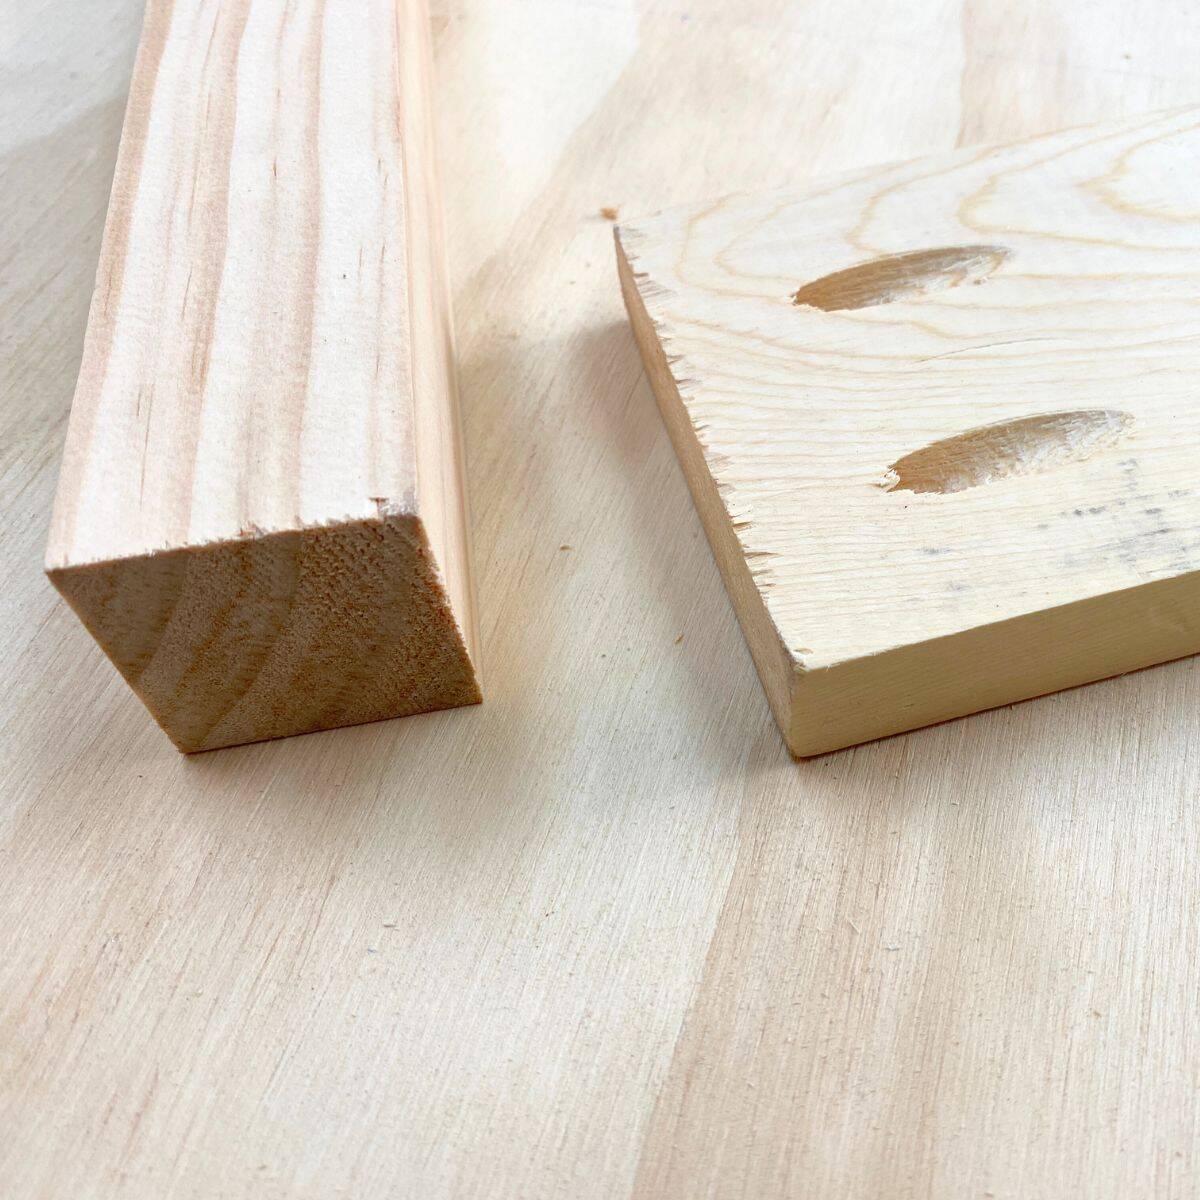
Step 3: Mark the depth of the hole
- Decide how deep you want to drill the hole and use painter’s tape to mark the drill bit.
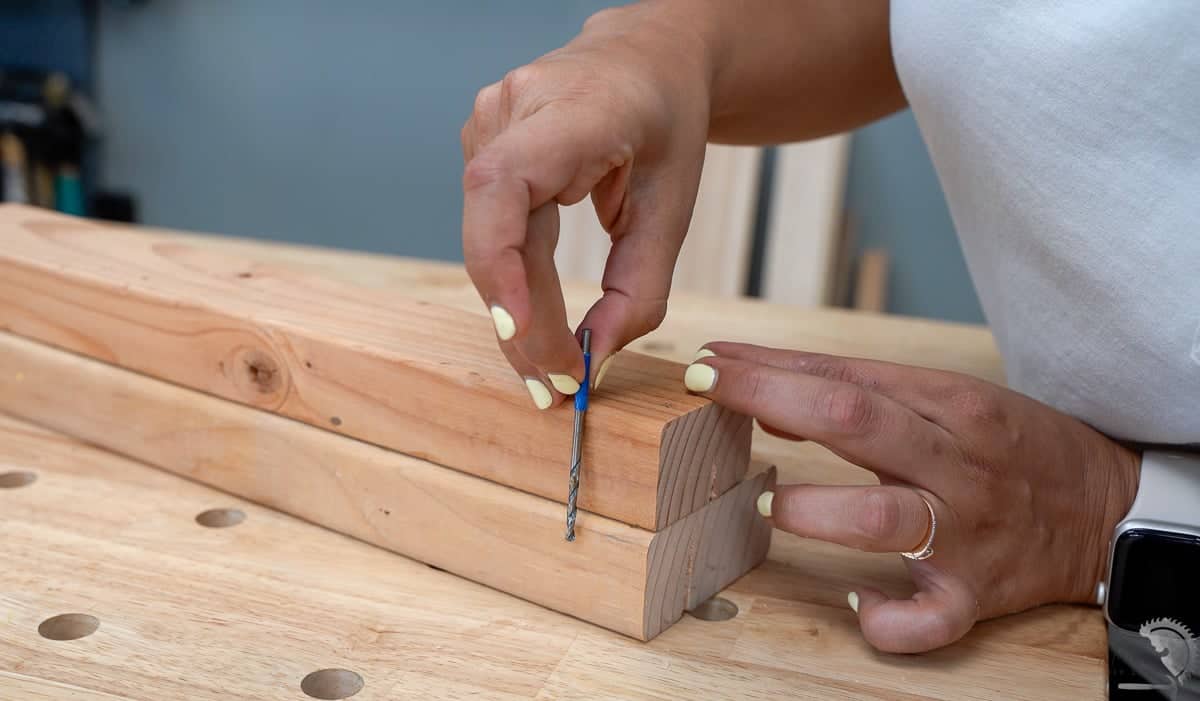
If you are drilling into a single board, you want to drill the depth of the screw.
If you are joining two boards, you want to go through the first board and just about start the hole in the second board (like shown in the image above).
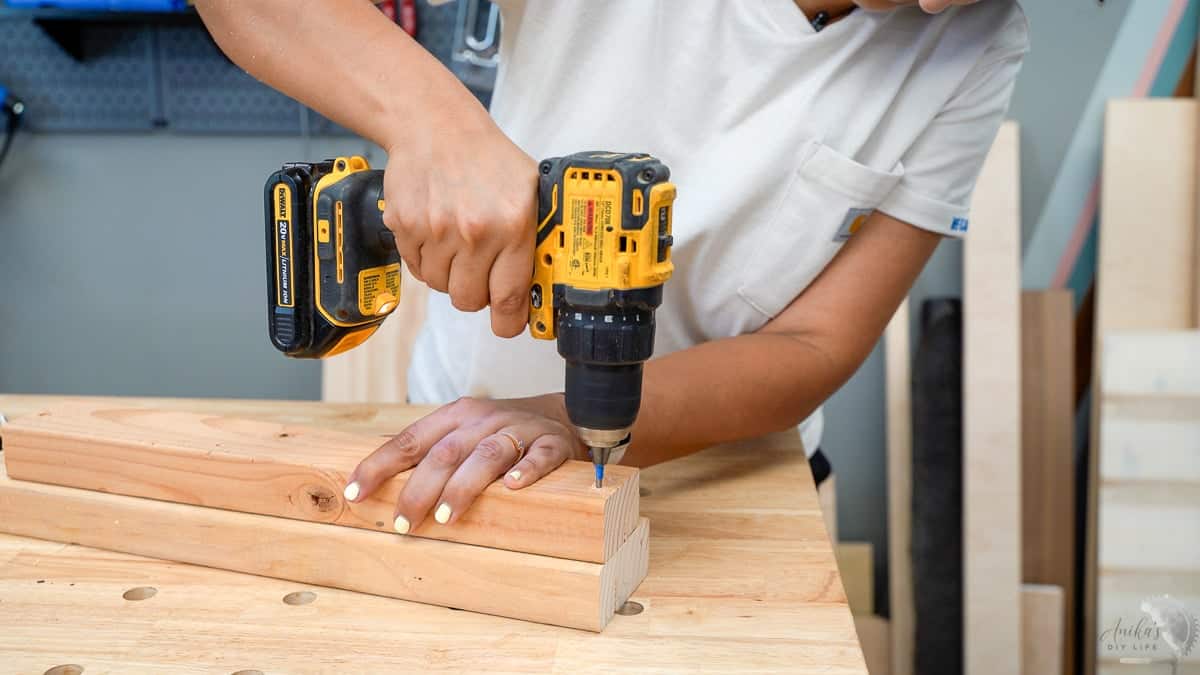
Step 4: Drill the Hole
- Hold the drill perpendicular to the wood. This is very important to get a straight hole.
- Start slow to keep control. See how to use a drill here.
- Drill as deep as the mark on the bit.
Step 5: Add a countersink (optional)
- Use a countersink bit if you want the screw head to sit flush with or below the surface.
See how to countersink screws.
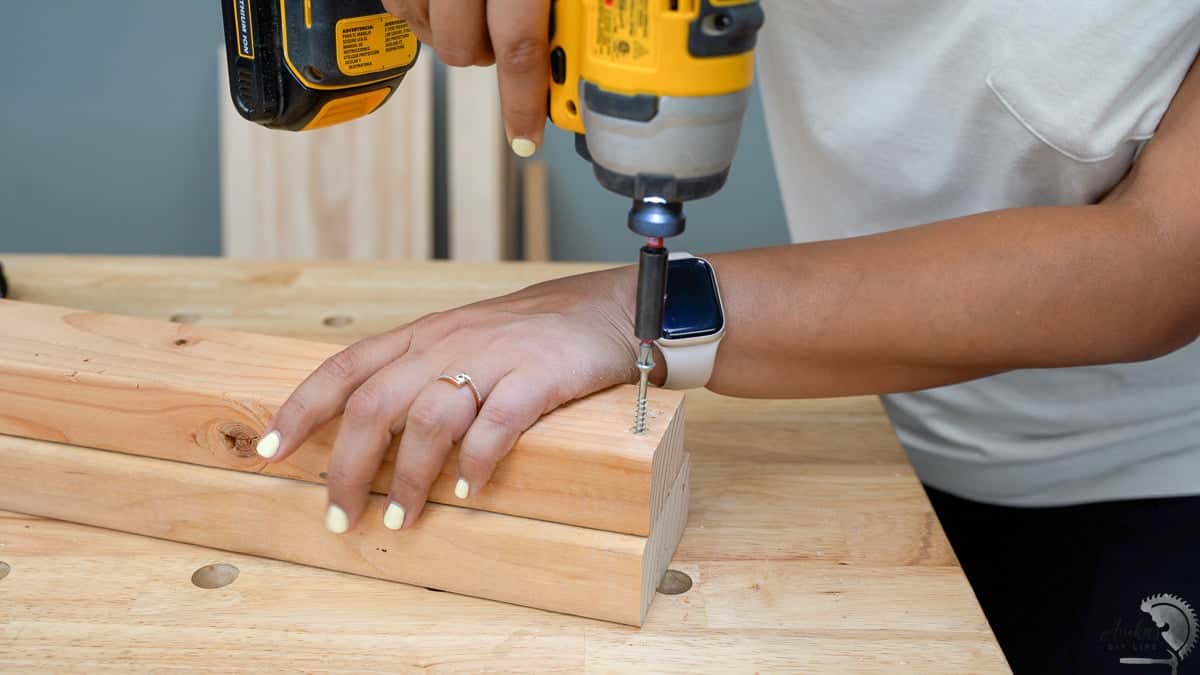
Step 6: Drive the Screw
- Insert the screw carefully and go slowly to avoid stripping
Common Mistakes to Avoid
- Using the wrong bit size: Too large and the screw won’t grip; too small and you might still split the wood
- Drilling at an angle: Can cause crooked screws and weak joints.
- Skipping the countersink (if the finish matters)
- Not clamping boards: Can lead to shifting and misaligned holes
- Drilling too deep or too shallow: Can weaken the joint or leave the screw proud.
So, do you need to drill pilot holes for wood screws? Most of the time, yes. Especially if you want strong, clean, and crack-free results, don’t skip the pilot hole.
Pilot holes may feel like an extra step, but they’re one of the simplest ways to make your projects look better and last longer.
Want more beginner-friendly woodworking tips? Grab my free Power Tools Simplified Guide and start building with confidence!
Further Reading:


Anika's goal is to inspire and empower beginners with woodworking, DIY, home improvement, and home decor ideas.
She wants everyone to unlock their creative potential and experience the feeling that comes with making something. Nothing feels better better than seeing something and saying "I can make that!"