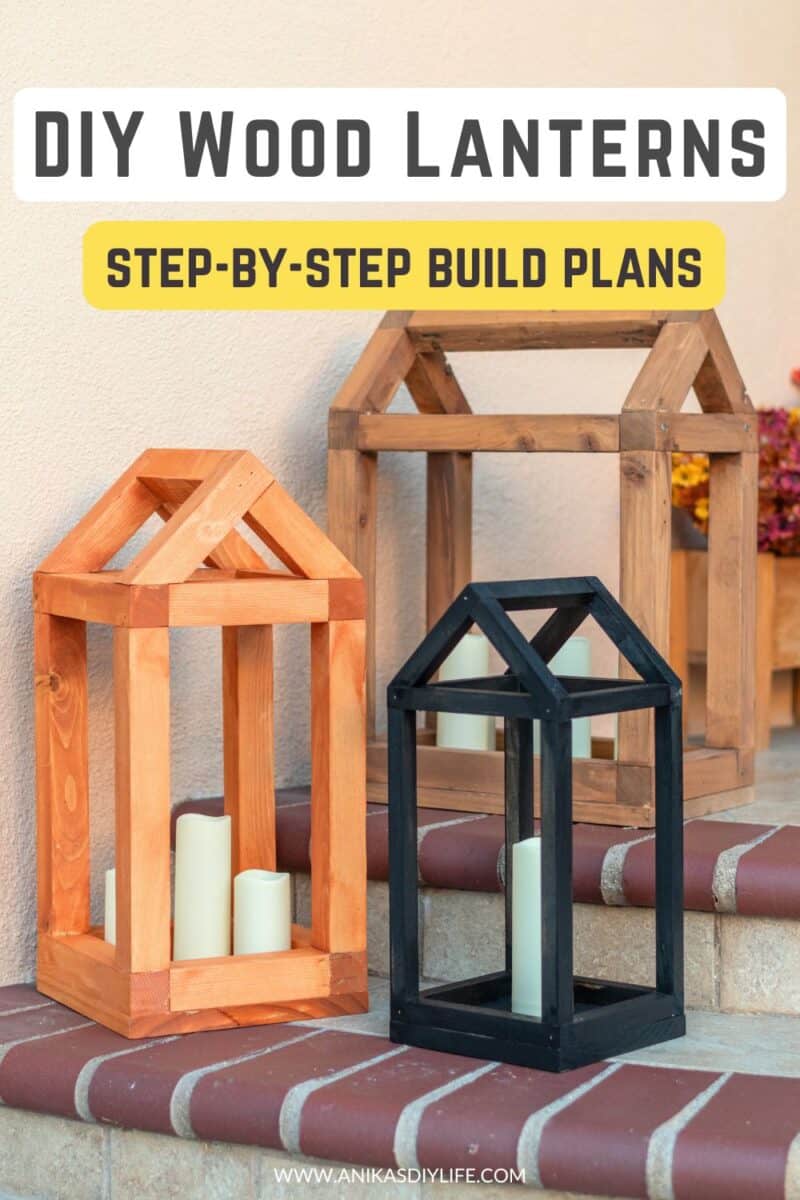
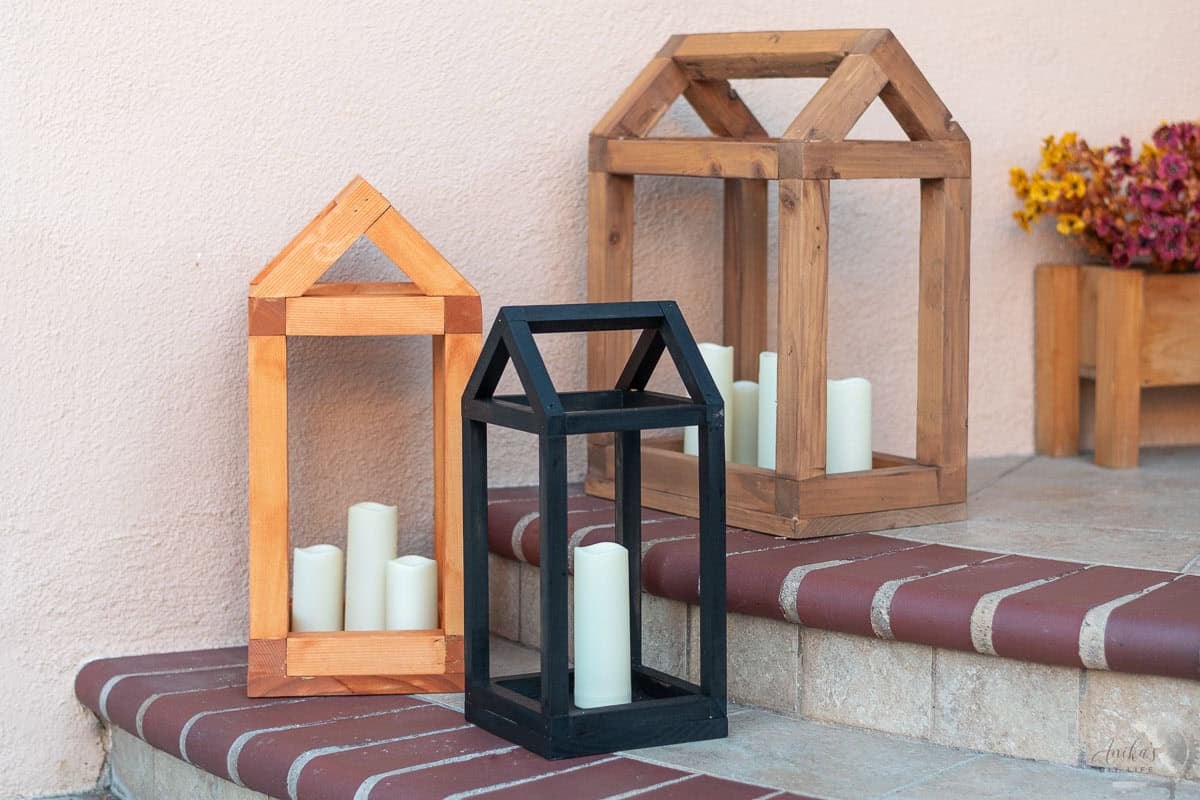
How to Build a House-Shaped DIY Wooden Lantern (3 Styles!)
Learn how to make a DIY wooden lantern with this step-by-step tutorial. Build 3 simple house-shaped lanterns using simple tools – perfect for home decor or wedding centerpieces.
Back in 2020, I built a little house-shaped lantern as part of a collaboration, but I never got around to sharing it here because I wanted to share other variations as well.
Finally, I went back to the drawing board and designed two more variations. Now, instead of just one, you get three different styles of house lanterns to try!
These lanterns are perfect for so many occasions. You can style them for the seasons, set them on a mantel or entryway table, on the porch, or even use them as unique wedding centerpieces.
No matter which size or style you go for, these lanterns bring a fun handmade touch to any space. Let me walk you through how to build your own!
***This post contains referral or affiliate links. It is a way for this site to earn advertising fees by advertising or linking to certain products and/or services. Please read my full disclosure here ***
Materials Needed:
- Lumber per the plans
- Wood glue. Use this one if you are planning to use the lantern outdoors.
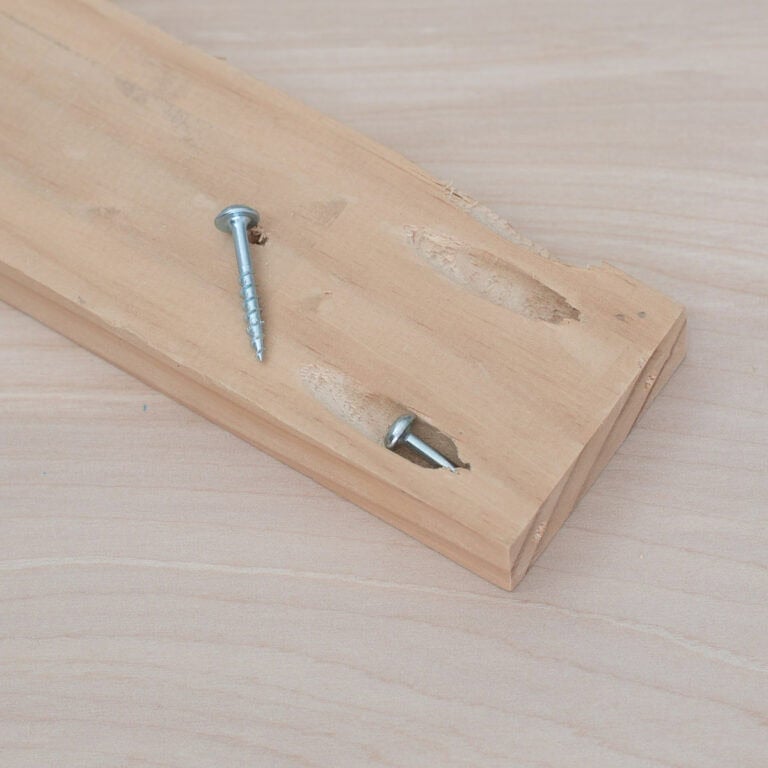
- 2” finish nails (or 2″ trim-head screws)
- 1¼” trim head screws or finish nails.
- Finish of your choice.
- Top coat. This is my favorite top coat. See more about picking the right top coat.
Tools Needed:
- Miter saw (or miter box).
- Nail gun
- Power Drill
- Sander or sanding block
I show you how to build using a nail gun, but the same can be done with just a power drill using trim-head screws. Trim-head screws have small heads that are just slightly larger than nail heads. They look better than using regular wood screws.
Grab the Plans
Want to build your own version? I’ve created detailed step-by-step plans and a complete supply list to help you make this project. Click on the button below to get the plans.
Video Tutorial
Below is the video of how I built the lanterns with lots of tips included. The full written tutorial follows below.
How to Build
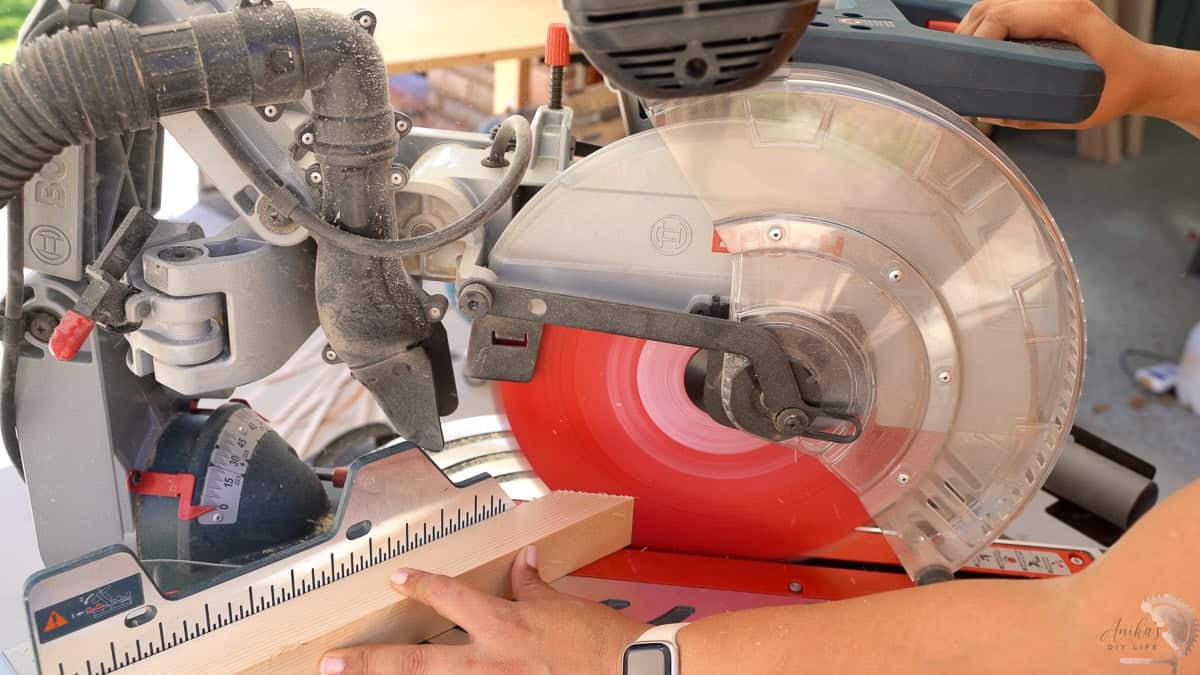
Step 1: Make the Cuts and Prepare the Lumber
- Make the cuts per the cut list in the plans.
Note: There are a lot of repeated cuts at the same size. plus there are a lot of smal pieces as well. Set up a stop block to help make these cuts safely and quickly.
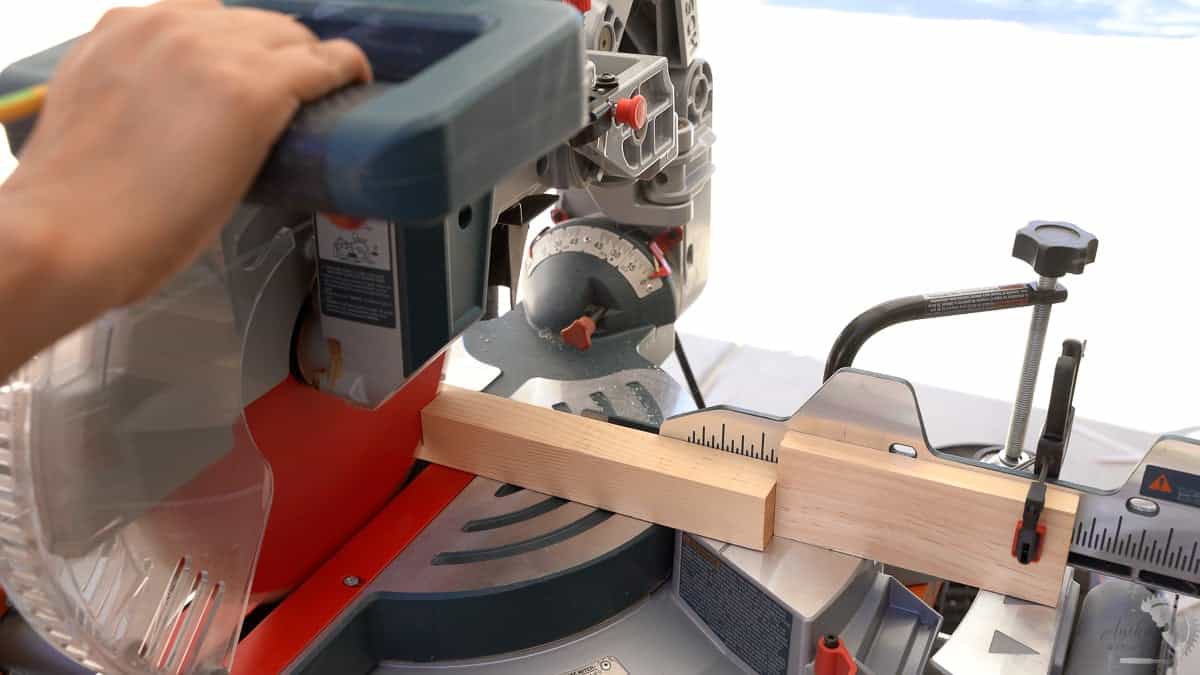
Accuracy here will make the rest of your build go much smoother, so be sure to align your saw before cutting. See how to align a miter saw.
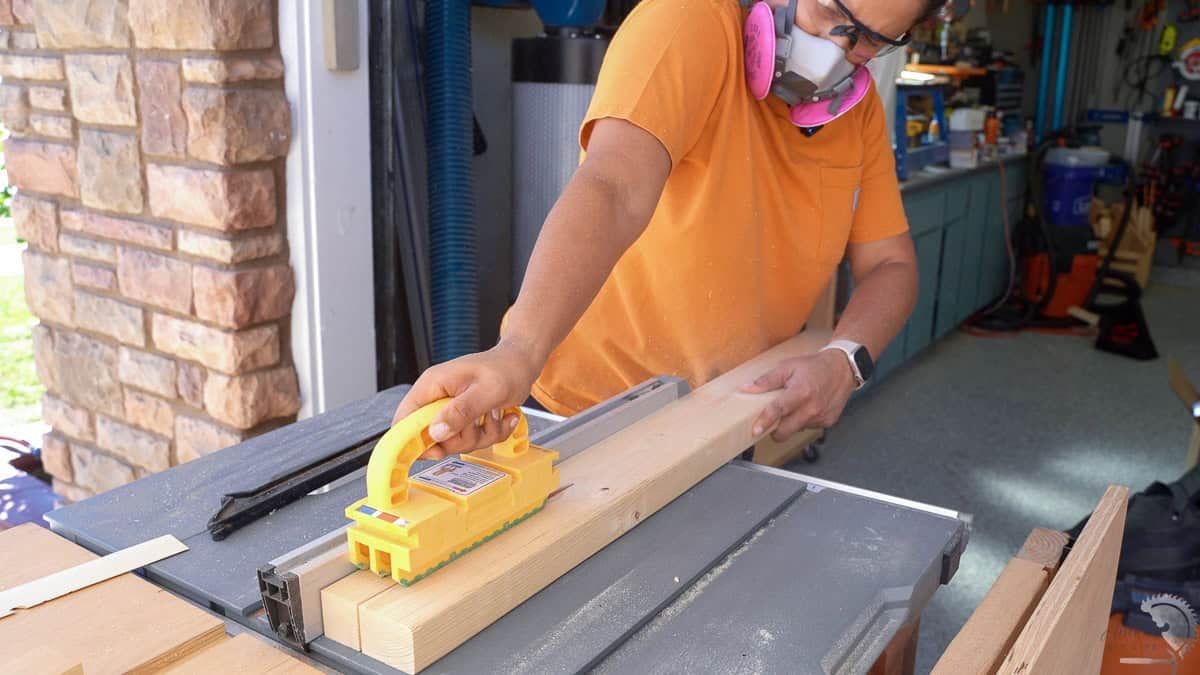
- Sand the boards smooth, starting with 80-grit to 220-grit sandpaper. This will not only make your lantern look more polished but also help the finish go on evenly. See my detailed tips on how to sand wood the right way here.
💡Budget Tip: For the lanterns using 2×2 boards, I actually made my own 2x2s from 2×6 boards I already had. Buying select pine 2x2s can get pricey, so ripping them down yourself is a cost-effective option. See my step-by-step on how to make your own 2×2 boards here.
Step 2. Assemble the Top and Bottom
- Start by forming a simple rectangle with the boards. Apply wood glue to the joints, then secure them with 2” finish nails. You can also use trim head screws instead of the finish nails.
Learn how to use a nail gun here
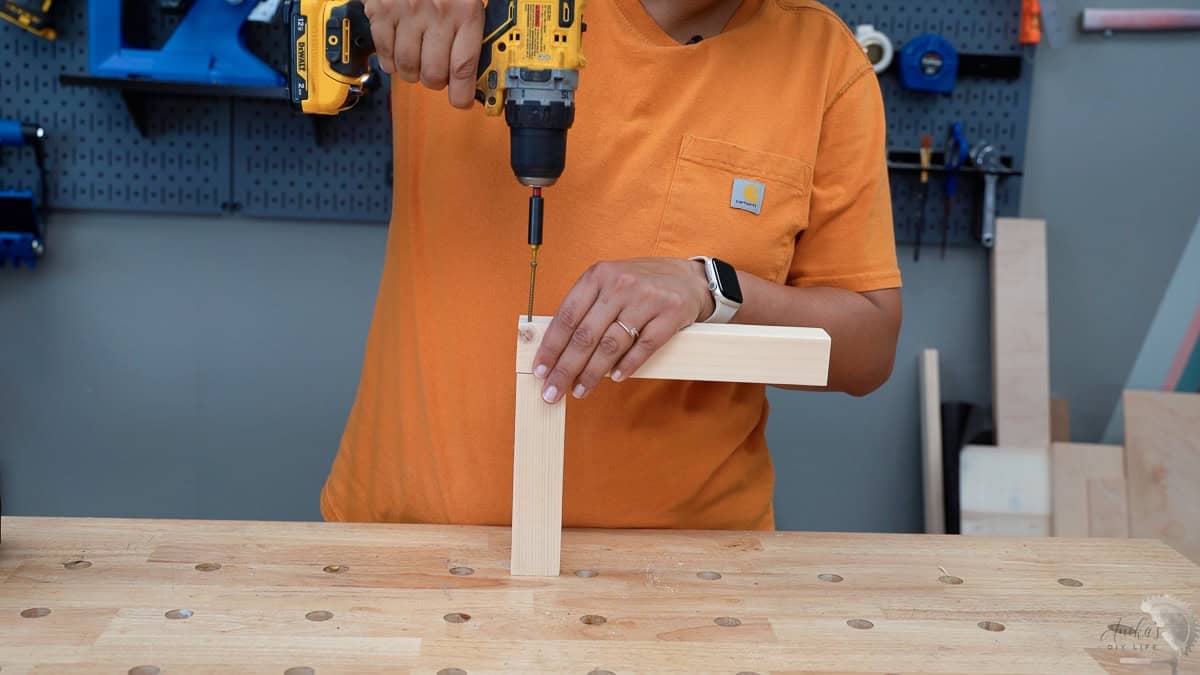
Tip: Standing up the pieces as seen the picture above makes it easier and a lot more stable to add in the screws or nails.
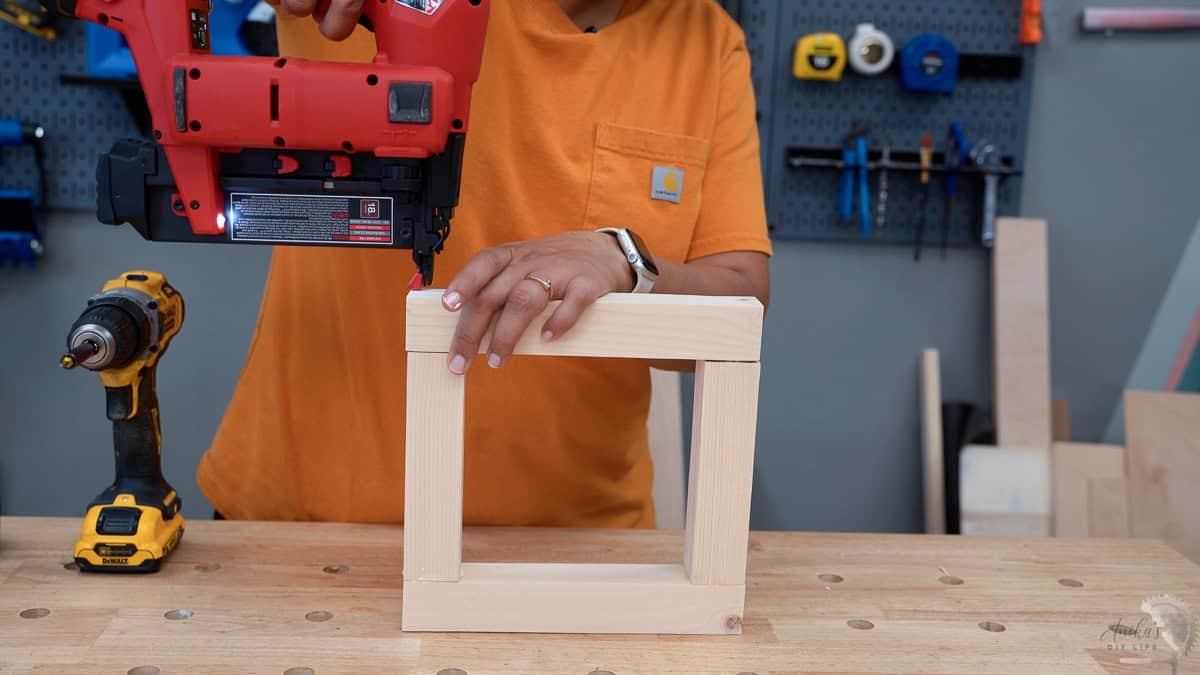
Important: Add the nails on one side of the joint. This will make sure that they do not interfere with the nails that will be added in the next step.
- Repeat the same process to create a second identical frame. One will become the base and the other the top of the lantern.
Step 3. Attach Sides
- Attach the long vertical sides to the frame using wood glue and finish nails.
Tip: It is easier to attach two diagonally opposite boards and then stand the entire structure up to attach the remaining boards.
- Attach the remaining top frame to the top using wood glue and finish nails.

At this stage, you should have a simple rectangular lantern frame.
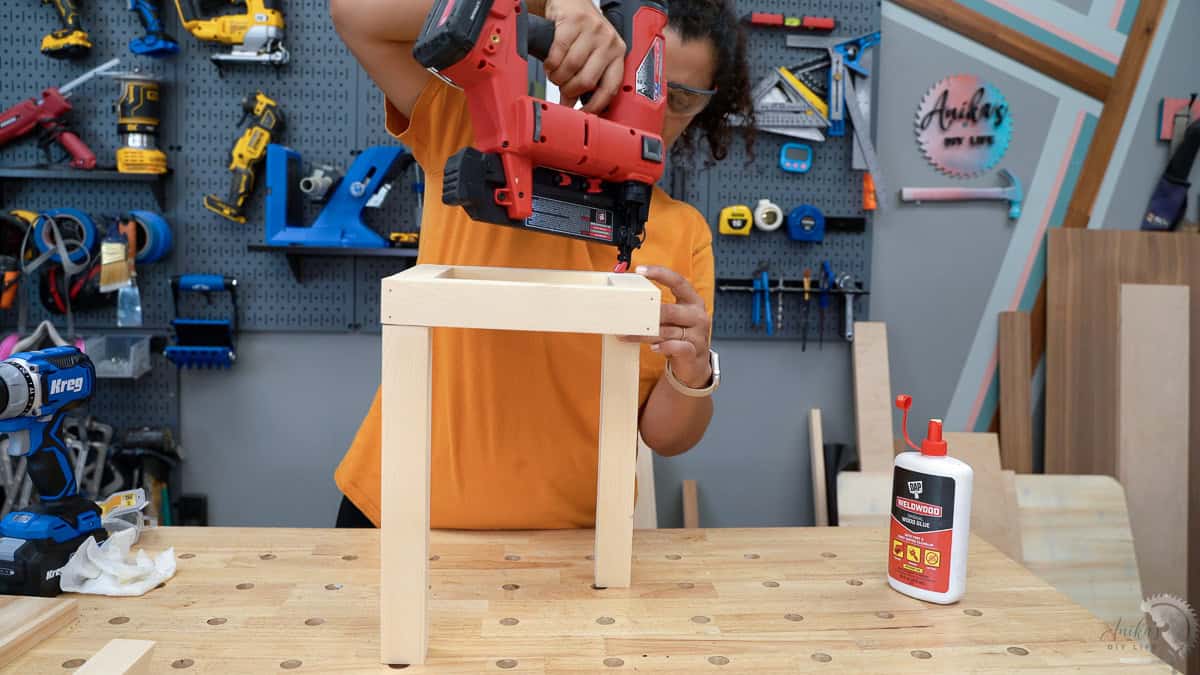
Step 4. Attach the Base
Attach the bottom board to the frame using wood glue and 1 1/4″ wood screws or finish nails to make the base for the house lantern.

📌 Tip: If using wood screws, pre-drill pilot holes before driving screws to avoid splitting the wood. See how to predrill here.
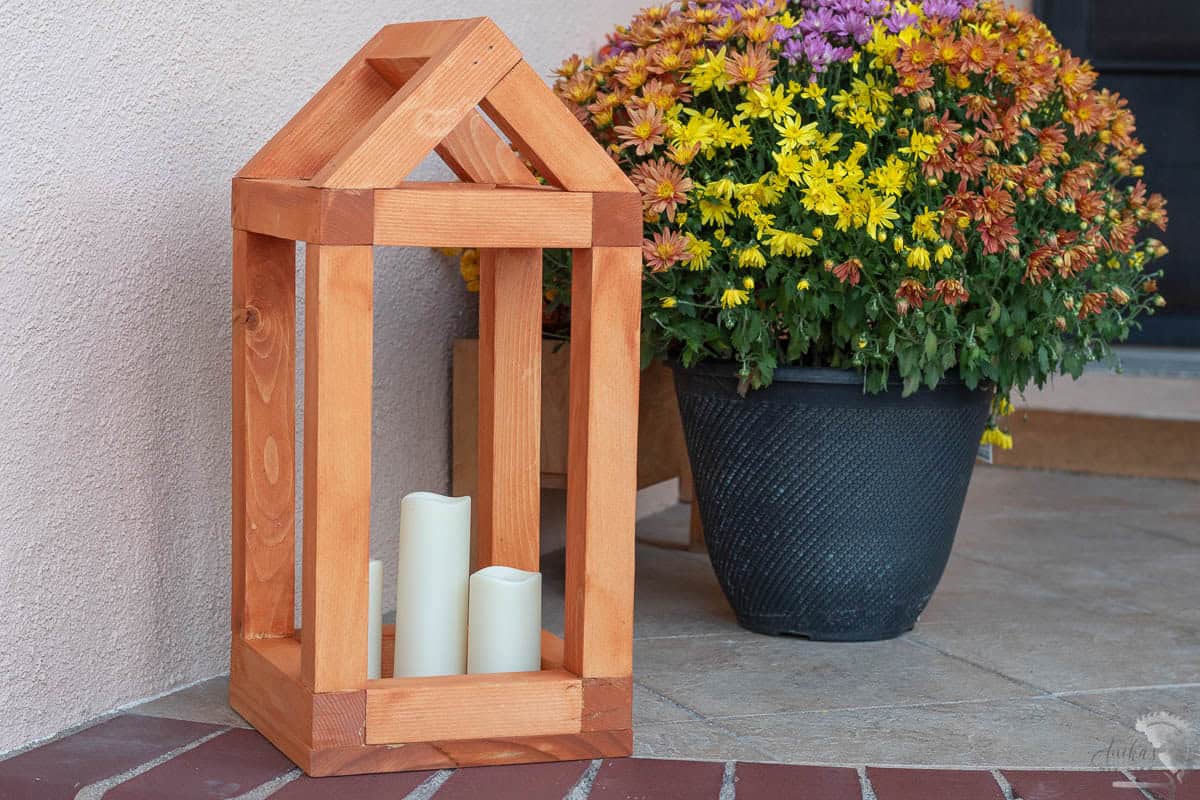
This gives the lantern a solid base and allows it to hold candles, LED lights, or even seasonal accents.
At this point you already have a “lantern” and you can use it as is. But we want to add a little more charm to it by making it house-shaped.
Step 5. Build the Roof
This is where the house shape really comes together!
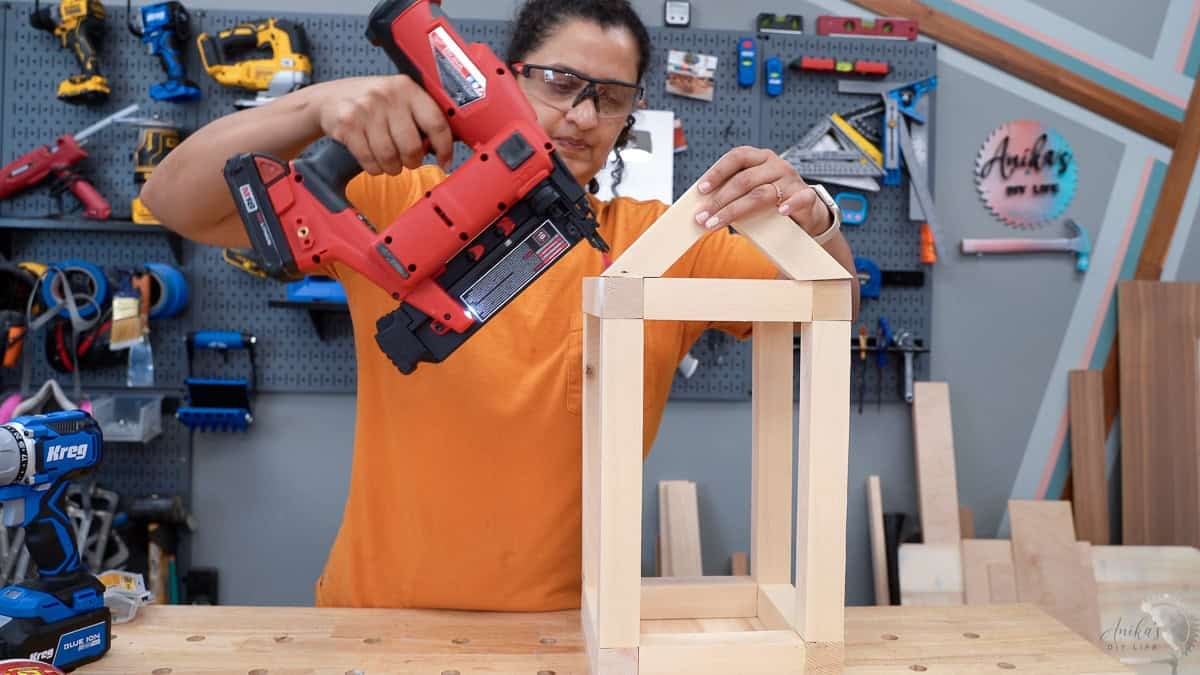
- Build roof structure by attaching the angled boards using wood glue and finish nails. Repeat for the the other side.

- Attach the center beam aligned to the top of the triangles using wood glue and finish nails.
That is it! That is the house-shaped lantern.
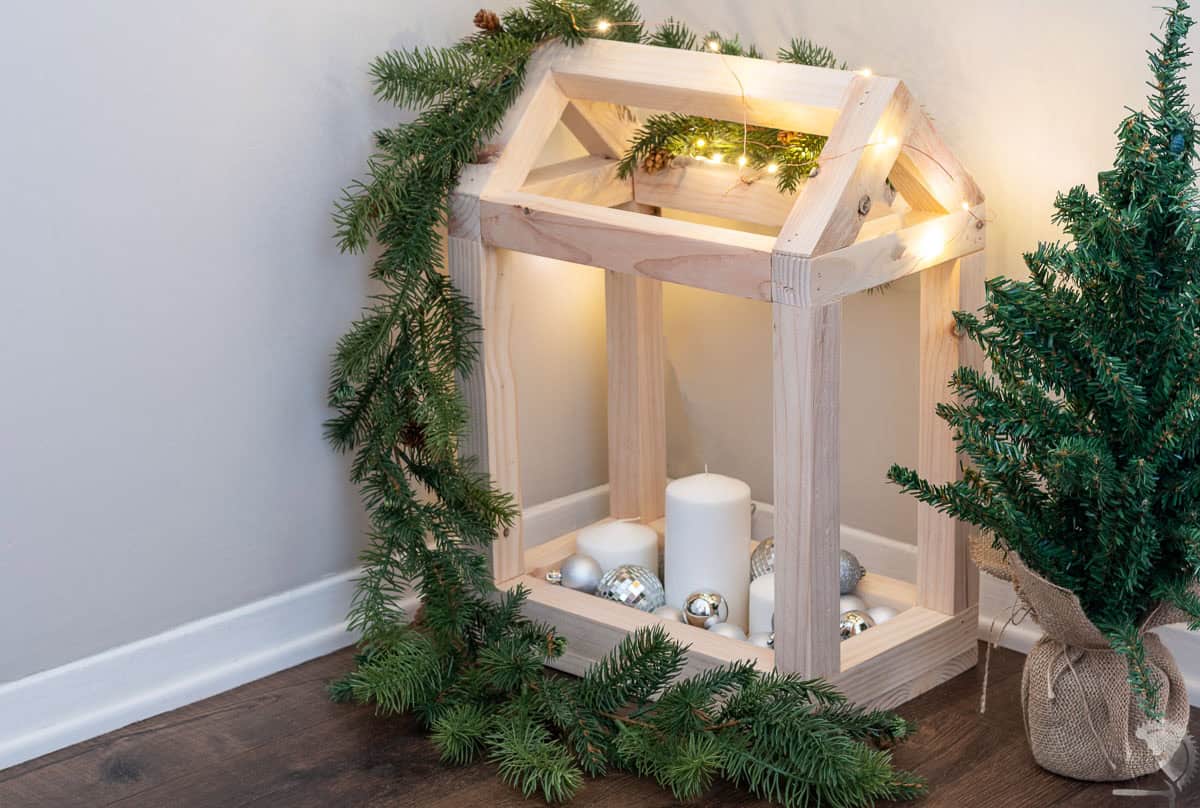
Of course, I wanted to give you more options and sizes, so I built one with a rectangular base (pssstt: this is the one I had built back in 2020).
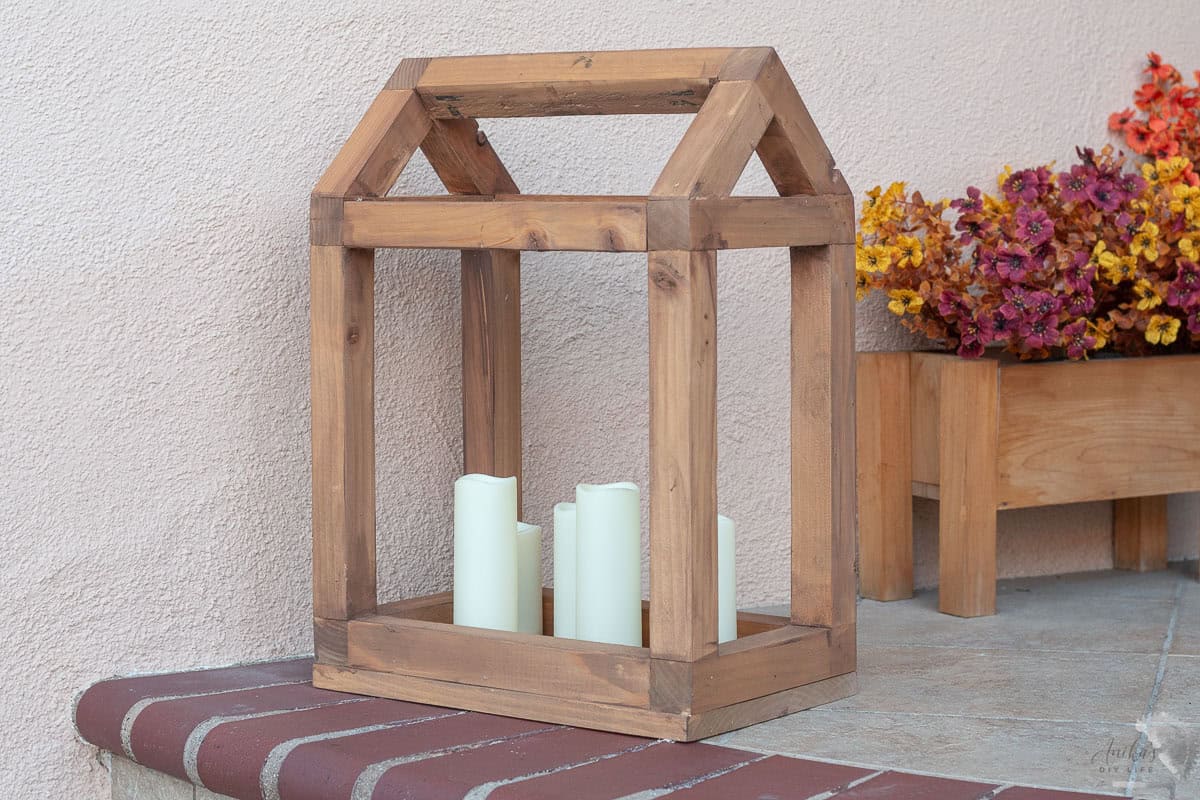
Here it is styled for fall.

And here it is styled for Christmas.
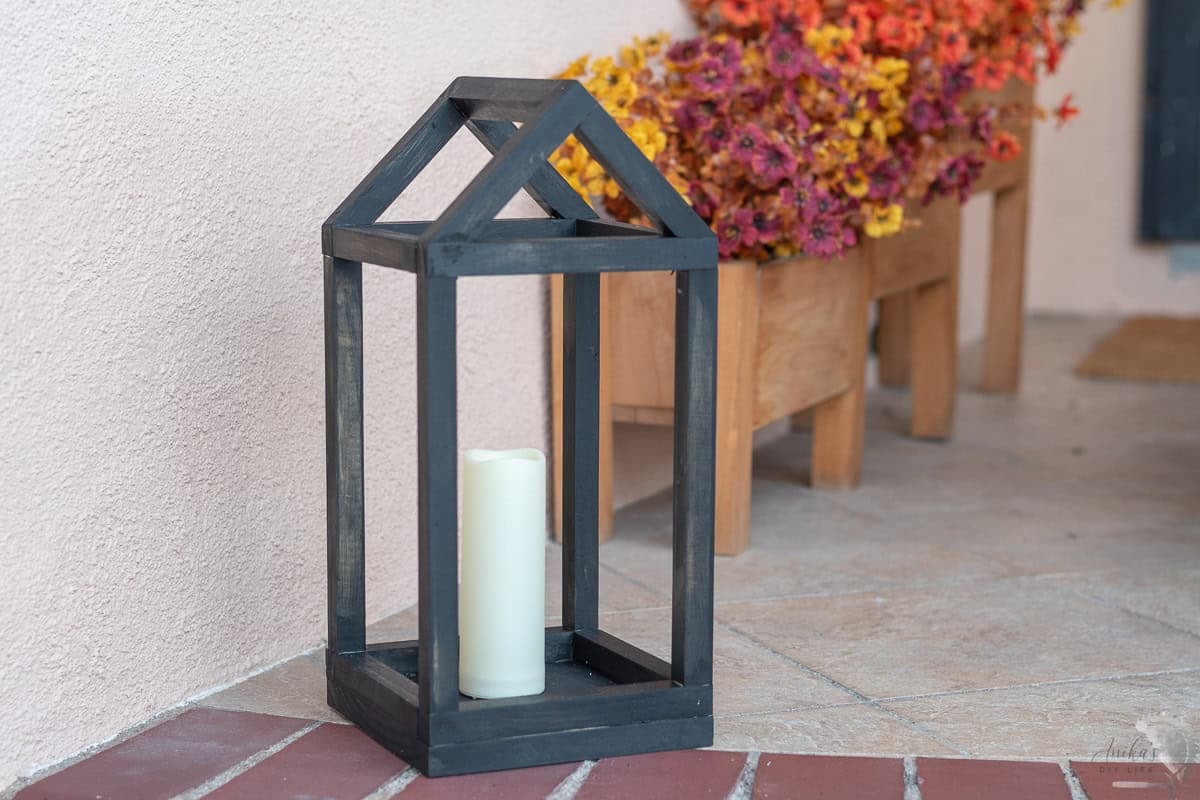
But, because I know you would ask and I am sure you would probably also want a “daintier” version, I built a version with 3/4″ square dowels as well. This one is particularly great for centerpieces.
Step 6: Finish the Lantern
The fun part is finishing! You can paint or stain it to suit your style. Don’t forget to apply the top coat to protect it from the elements, make it easy to clean, and last a long time.
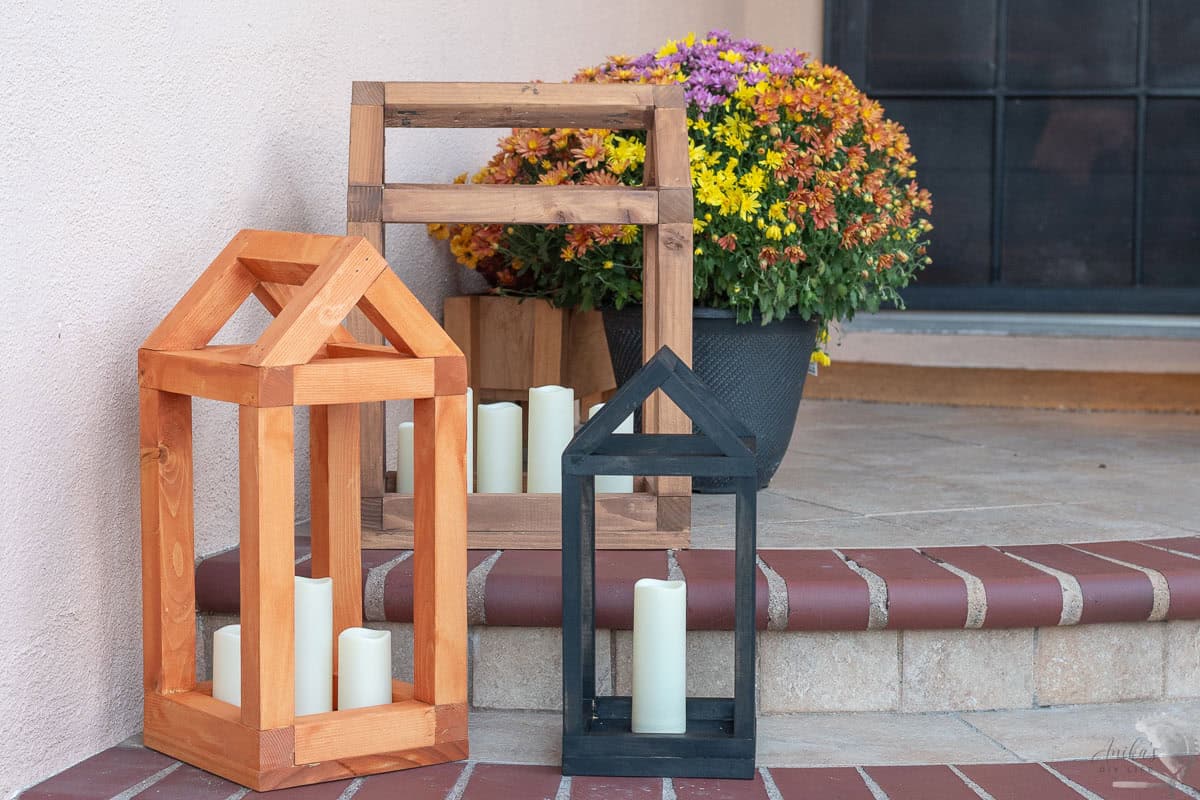
And of course, I have the plans for all three styles of lanterns.
Which one will you build?
Plans for the wooden lantern
Get the plans for the DIY wood lanterns by clicking the button below.
You might also like:


Anika's goal is to inspire and empower beginners with woodworking, DIY, home improvement, and home decor ideas.
She wants everyone to unlock their creative potential and experience the feeling that comes with making something. Nothing feels better better than seeing something and saying "I can make that!"