Textured Fabric Paneled Dresser – IKEA Tarva Makeover
Share this post:
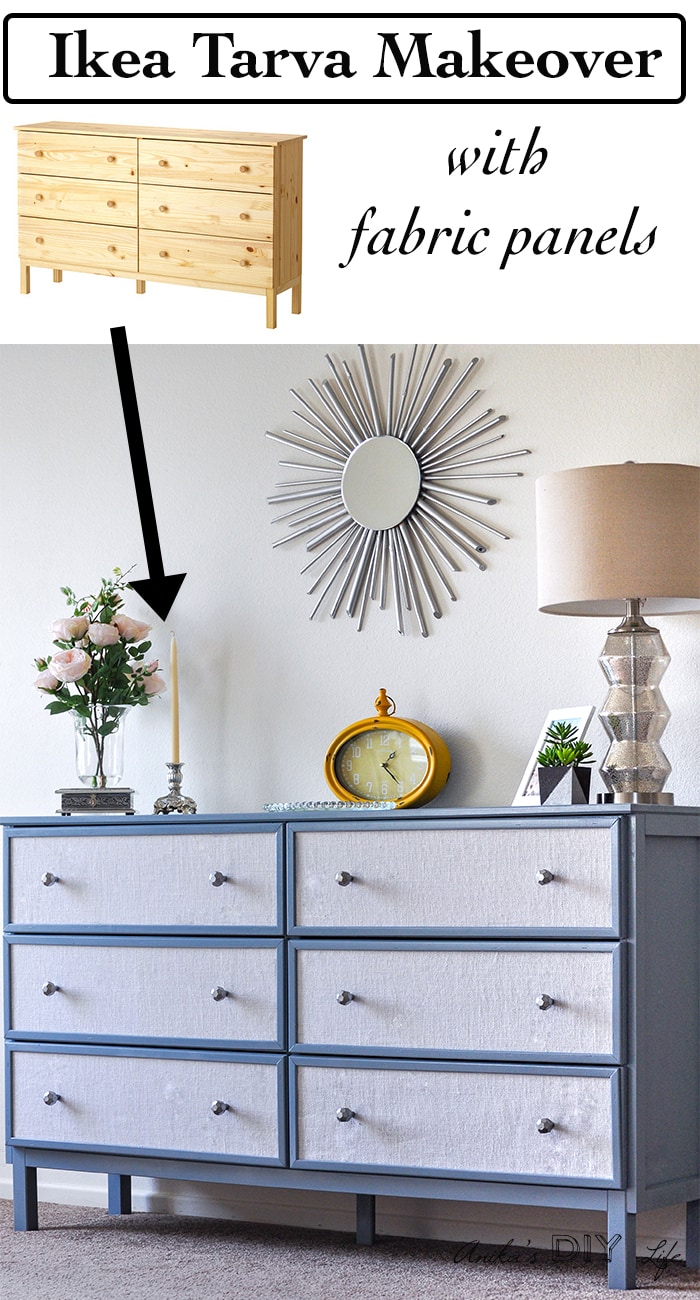
Add amazing fabric textured panels to an Ikea Tarva dresser! This unique and easy Ikea Tarva makeover will leave you swooning! 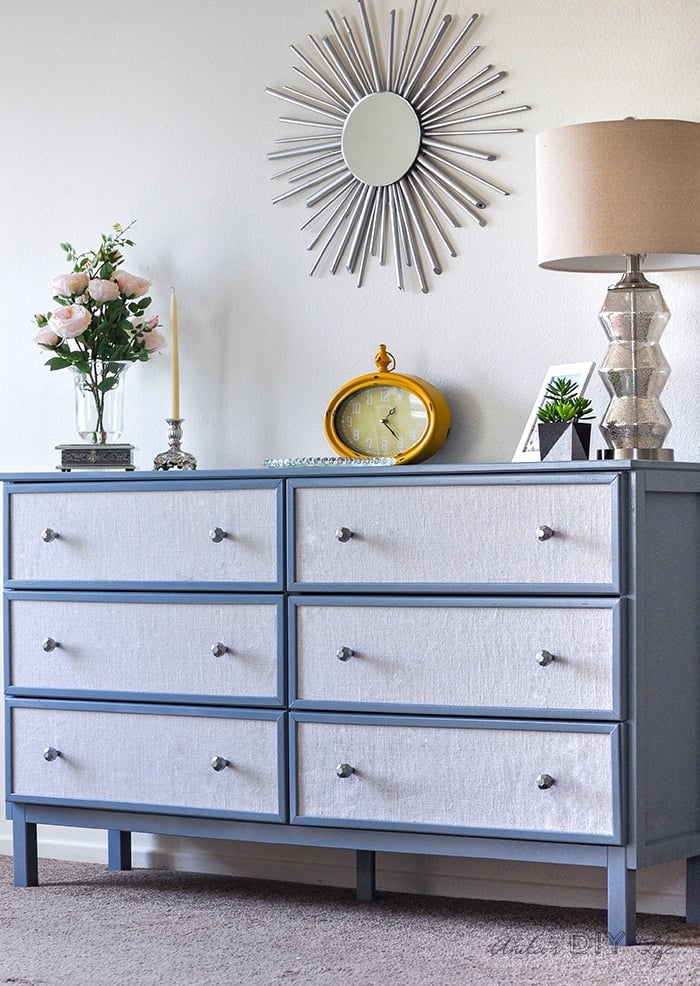
We needed a dresser for the master bedroom. I love the unfinished Ikea Tarva dresser that can be customized so I don’t have to build the whole dresser from scratch but can still get the customized look.
A couple of years ago, I had seen Centsational Girl’s textured panel dresser I have been wanting to do something similar ever since. Finally, I got around to doing my very own fabric paneled Ikea Tarva hack! 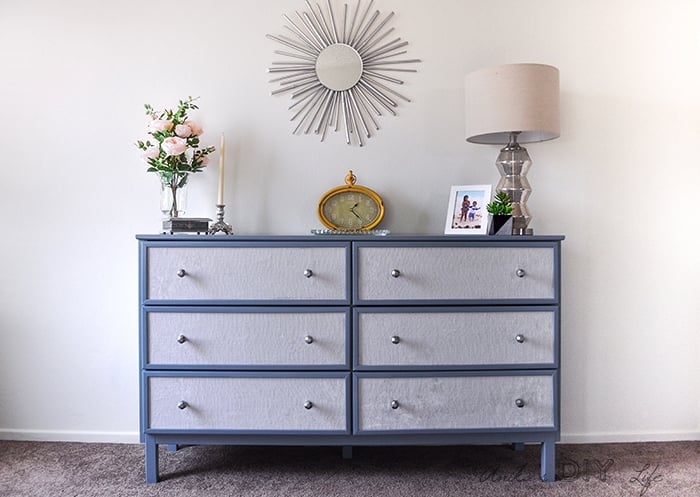
***This post contains affiliate or referral links. It is a way for this site to earn advertising fees by advertising or linking to certain products and/or services. Please read my full disclosure here ***
Materials Needed for IKEA Tarva Hack-
- 1″x 2″x 8′- quantity 3. I used furring strips. About $2.50 total.
- 1/4″ x 3/4″ screen moulding – need around 40′ – about $18.
- Burlap – 2 yards – about $5 (with coupon)
- Knobs – Hobby Lobby ($30 total with coupon/sale)
- Spray adhesive
- Shellac based Primer
- Paint of choice
- Water based Polyurethane
- Staple Gun
- Brad nailer
- Caulking and caulk gun
- wood glue
- Paint sprayer (my favorite thing!) or paint brushes and rollers.
- Orbital sander and 220 grit sand paper
- Miter saw or miter box
How to Make a Fabric Paneled IKEA Tarva Dresser –
Step 1 – Start by assembling the 6-drawer Ikea Tarva dresser. I can’t tel you how long it will take, it was a “fun” 2 hour job for us.
Step 2 – Add more definition to the sides so the drawers were better framed out using 1 x 2’s nailed to both the sides. 
Step 3 – Use caulk to fill in all the gaps and to make sure that everything looked “one piece”.
Step 4 – Give the whole dresser frame a good sanding with a 220 grit paper.Unfinished Ikea furniture is not smooth to touch and needs this for a smooth finish
Step 5 – Add a coat of Zinsser BIN primer. This is especially important to seal in all the knots in the unfinished wood. If you don’t use this, the knots bleed out over time and show up as brown stains in the paint. ,
Step 6 – Give it 2 coats of Zinsser 1-2-3 primer and then 3 coats of paint or choice, sanding lightly and wiping away the dust between each coat. I could absolutely never tell you what the paint color is – it is an oops paint I picked up for $2 – it was a dark blueish gray. I added a little white paint to get it to the color I wanted.
Step 7 – Give it two coats of poly – sanding in between each coat with a 400 grit paper. It was a lot of painting, but with my Homeright paint sprayer, it took only like 10 minutes per coat! I love that thing!
Step 8 – Now for the drawers – while the frame is drying between coats, give all the drawers a coat of spray primer, followed by silver spray paint. Find your favorite silver spray paint with my best silver spray paint comparison.
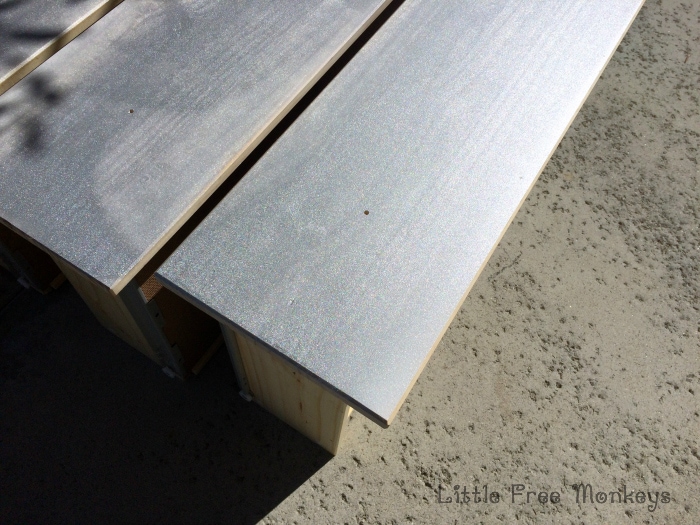
Step 9 – Cut burlap to drawer size. Using spray adhesive, glue the burlap to the drawer. Make sure to smooth out any wrinkles. I love how the silver shines through the gaps in the burlap.
Step 10 – Cut the screen molding cut to the appropriate lengths with end mitered to 45 degrees. Paint the molding before attaching it to the drawers. Trim out the drawer with the screen molding using a brad nailer with 5/8″ brads or finish nails.
The drawers ready to go! I wish I could capture the silver shine through the burlap but it just wasn’t coming through in the pictures – at least not with my current level of photography skills…

For the knobs – I spent almost a month trying to decide on the right style. Finally, I got these from Hobby Lobby. They were originally dark in color and weren’t working with the dresser. That is when I discovered Silver rub n buff. I just love the effect it had on the knobs and how they work with the dresser now.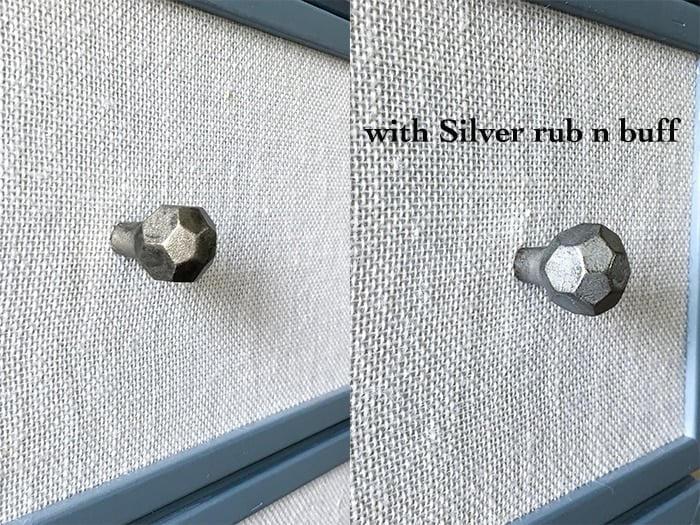
I love how the dresser came together!
Want More Inspiration for IKEA Tarva Hacks?
You will love these 15 Genius Ikea Tarva hacks –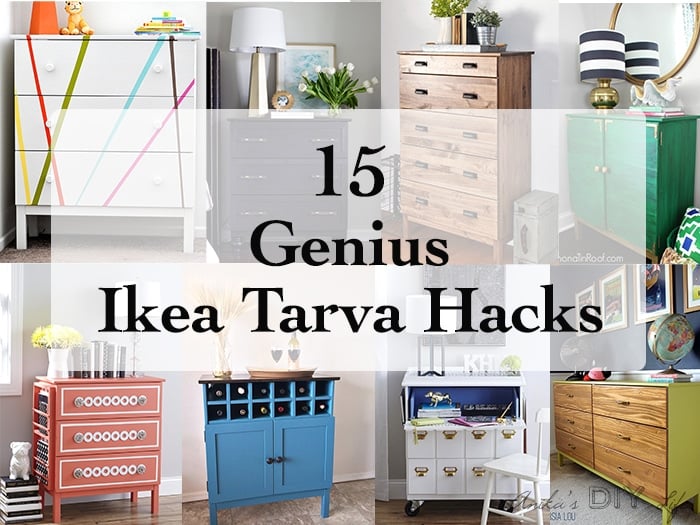
If you love Ikea hacks, take a look at this Ikea Ivar makeover! 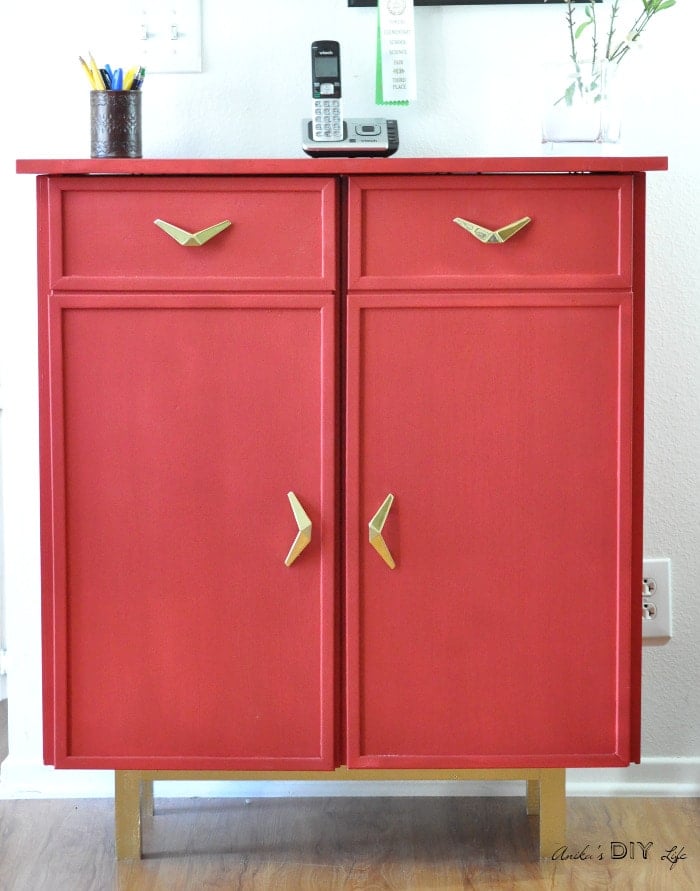
Anika's goal is to inspire and empower beginners with woodworking, DIY, home improvement, and home decor ideas.
She wants everyone to unlock their creative potential and experience the feeling that comes with making something. Nothing feels better better than seeing something and saying "I can make that!"
- Anika Gandhi
- Anika Gandhi
- Anika Gandhi
- Anika Gandhi
- Anika Gandhi
- Anika Gandhi
- Anika Gandhi
- Anika Gandhi
- Anika Gandhi
- Anika Gandhi
- Anika Gandhi
- Anika Gandhi
- Anika Gandhi
- Anika Gandhi
- Anika Gandhi
- Anika Gandhi
- Anika Gandhi
- Anika Gandhi
- Anika Gandhi
- Anika Gandhi
- Anika Gandhi
- Anika Gandhi
- Anika Gandhi
- Anika Gandhi
- Anika Gandhi
- Anika Gandhi
- Anika Gandhi
- Anika Gandhi
- Anika Gandhi
- Anika Gandhi
- Anika Gandhi
- Anika Gandhi
- Anika Gandhi
- Anika Gandhi
- Anika Gandhi
- Anika Gandhi
- Anika Gandhi
- Anika Gandhi
- Anika Gandhi
- Anika Gandhi
- Anika Gandhi
- Anika Gandhi
- Anika Gandhi
- Anika Gandhi
- Anika Gandhi
- Anika Gandhi
- Anika Gandhi
- Anika Gandhi
- Anika Gandhi
- Anika Gandhi
- Anika Gandhi
- Anika Gandhi
- Anika Gandhi
- Anika Gandhi
- Anika Gandhi
- Anika Gandhi
- Anika Gandhi
- Anika Gandhi
- Anika Gandhi
- Anika Gandhi
- Anika Gandhi
- Anika Gandhi
- Anika Gandhi
- Anika Gandhi
- Anika Gandhi
- Anika Gandhi
- Anika Gandhi
- Anika Gandhi
- Anika Gandhi
- Anika Gandhi
- Anika Gandhi
- Anika Gandhi
- Anika Gandhi
- Anika Gandhi
- Anika Gandhi
- Anika Gandhi
- Anika Gandhi
- Anika Gandhi
- Anika Gandhi
- Anika Gandhi
- Anika Gandhi
- Anika Gandhi
- Anika Gandhi
- Anika Gandhi
- Anika Gandhi
- Anika Gandhi
- Anika Gandhi
- Anika Gandhi
- Anika Gandhi
- Anika Gandhi
- Anika Gandhi
- Anika Gandhi
- Anika Gandhi
- Anika Gandhi
- Anika Gandhi
- Anika Gandhi
- Anika Gandhi
- Anika Gandhi
- Anika Gandhi
- Anika Gandhi
- Anika Gandhi
- Anika Gandhi
- Anika Gandhi
- Anika Gandhi
- Anika Gandhi
- Anika Gandhi
- Anika Gandhi
- Anika Gandhi
- Anika Gandhi
- Anika Gandhi
- Anika Gandhi
- Anika Gandhi
- Anika Gandhi
- Anika Gandhi
- Anika Gandhi
- Anika Gandhi
- Anika Gandhi
- Anika Gandhi
- Anika Gandhi
- Anika Gandhi
- Anika Gandhi
- Anika Gandhi
- Anika Gandhi
- Anika Gandhi
- Anika Gandhi
- Anika Gandhi
- Anika Gandhi
- Anika Gandhi
- Anika Gandhi
- Anika Gandhi
- Anika Gandhi
- Anika Gandhi
- Anika Gandhi
- Anika Gandhi
- Anika Gandhi
- Anika Gandhi
- Anika Gandhi
- Anika Gandhi
- Anika Gandhi
- Anika Gandhi
- Anika Gandhi
- Anika Gandhi
- Anika Gandhi
- Anika Gandhi
- Anika Gandhi
- Anika Gandhi
- Anika Gandhi
- Anika Gandhi
- Anika Gandhi
- Anika Gandhi
- Anika Gandhi
- Anika Gandhi
- Anika Gandhi
- Anika Gandhi
- Anika Gandhi
- Anika Gandhi
- Anika Gandhi
- Anika Gandhi
- Anika Gandhi
- Anika Gandhi
- Anika Gandhi
- Anika Gandhi
- Anika Gandhi
- Anika Gandhi
- Anika Gandhi
- Anika Gandhi
- Anika Gandhi
- Anika Gandhi
- Anika Gandhi
- Anika Gandhi
- Anika Gandhi
- Anika Gandhi
- Anika Gandhi
- Anika Gandhi
- Anika Gandhi
- Anika Gandhi
- Anika Gandhi
- Anika Gandhi
- Anika Gandhi
- Anika Gandhi
- Anika Gandhi
- Anika Gandhi
- Anika Gandhi
- Anika Gandhi
- Anika Gandhi
- Anika Gandhi
- Anika Gandhi
- Anika Gandhi
- Anika Gandhi
- Anika Gandhi
- Anika Gandhi
- Anika Gandhi
- Anika Gandhi
- Anika Gandhi
- Anika Gandhi
- Anika Gandhi
- Anika Gandhi
- Anika Gandhi
- Anika Gandhi
- Anika Gandhi
- Anika Gandhi
- Anika Gandhi
- Anika Gandhi
- Anika Gandhi
- Anika Gandhi
- Anika Gandhi
- Anika Gandhi
- Anika Gandhi
- Anika Gandhi
- Anika Gandhi
- Anika Gandhi
- Anika Gandhi
- Anika Gandhi
- Anika Gandhi
- Anika Gandhi
- Anika Gandhi
- Anika Gandhi
- Anika Gandhi
- Anika Gandhi
- Anika Gandhi
- Anika Gandhi
- Anika Gandhi
- Anika Gandhi
- Anika Gandhi
- Anika Gandhi
- Anika Gandhi
- Anika Gandhi
- Anika Gandhi
- Anika Gandhi
- Anika Gandhi
- Anika Gandhi
- Anika Gandhi
- Anika Gandhi
- Anika Gandhi
- Anika Gandhi
- Anika Gandhi
- Anika Gandhi
- Anika Gandhi
- Anika Gandhi
- Anika Gandhi
- Anika Gandhi
- Anika Gandhi
- Anika Gandhi
- Anika Gandhi
- Anika Gandhi
- Anika Gandhi
- Anika Gandhi
- Anika Gandhi
- Anika Gandhi
- Anika Gandhi
- Anika Gandhi
- Anika Gandhi
- Anika Gandhi
- Anika Gandhi
- Anika Gandhi
- Anika Gandhi
- Anika Gandhi
- Anika Gandhi
- Anika Gandhi
- Anika Gandhi
- Anika Gandhi
- Anika Gandhi
- Anika Gandhi
- Anika Gandhi
- Anika Gandhi
- Anika Gandhi
- Anika Gandhi
- Anika Gandhi
- Anika Gandhi
- Anika Gandhi
- Anika Gandhi
- Anika Gandhi
- Anika Gandhi
- Anika Gandhi
- Anika Gandhi
- Anika Gandhi
- Anika Gandhi
- Anika Gandhi
- Anika Gandhi
- Anika Gandhi
- Anika Gandhi
- Anika Gandhi
- Anika Gandhi
- Anika Gandhi
- Anika Gandhi
- Anika Gandhi
- Anika Gandhi
- Anika Gandhi
- Anika Gandhi
- Anika Gandhi
- Anika Gandhi
- Anika Gandhi
- Anika Gandhi
- Anika Gandhi
- Anika Gandhi
- Anika Gandhi
- Anika Gandhi
- Anika Gandhi
- Anika Gandhi
- Anika Gandhi
- Anika Gandhi
- Anika Gandhi
- Anika Gandhi
- Anika Gandhi
- Anika Gandhi
- Anika Gandhi
- Anika Gandhi
- Anika Gandhi
- Anika Gandhi
- Anika Gandhi
- Anika Gandhi
- Anika Gandhi
- Anika Gandhi
- Anika Gandhi
- Anika Gandhi
- Anika Gandhi
- Anika Gandhi
- Anika Gandhi
- Anika Gandhi
- Anika Gandhi
- Anika Gandhi
- Anika Gandhi
- Anika Gandhi
- Anika Gandhi
- Anika Gandhi
- Anika Gandhi
- Anika Gandhi
- Anika Gandhi
- Anika Gandhi
- Anika Gandhi
- Anika Gandhi
- Anika Gandhi
- Anika Gandhi
- Anika Gandhi
- Anika Gandhi
- Anika Gandhi
- Anika Gandhi
- Anika Gandhi
- Anika Gandhi
- Anika Gandhi
- Anika Gandhi
- Anika Gandhi
- Anika Gandhi
- Anika Gandhi
- Anika Gandhi
- Anika Gandhi
- Anika Gandhi
- Anika Gandhi
- Anika Gandhi
- Anika Gandhi


You know I still love this piece. It’s one great IKEA hack. Seriously. Great. Thanks for linking up to Friday’s furniture Fix. We love your work!! Susie from The Chelsea Project
I LOVE this makeover! You are so creative. I never ever would have thought of using metallic paint under the burlap – what an amazing idea!
Thank you Julie!!!