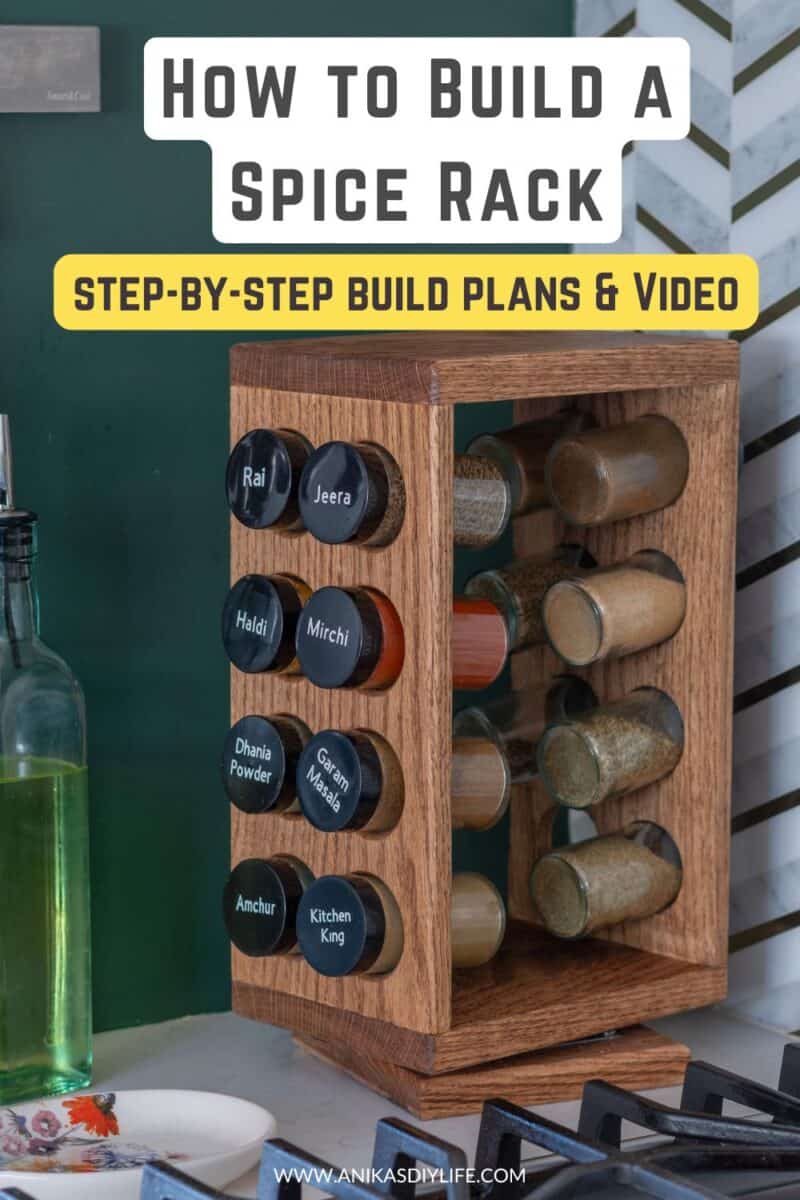
How to Build a DIY Rotating Spice Rack
Build your own DIY rotating spice rack! This lazy susan wooden spice rack is an easy, one-day project perfect for kitchen organization and makes a great gift.
This is one of those projects that I can’t stop looking at and thinking… I can’t believe I made that!
When I started to try to figure out how to build this in my head, I couldn’t believe it was going to be so easy…
In fact, I had the idea for it a few months ago and then just procrastinated on it because I was SO sure I was missing something and that there was no way it was going to be so easy.
But DIY gift week felt like the perfect excuse to finally tackle it… and I’m so glad I did. Yes, it really was easier than I imagined!
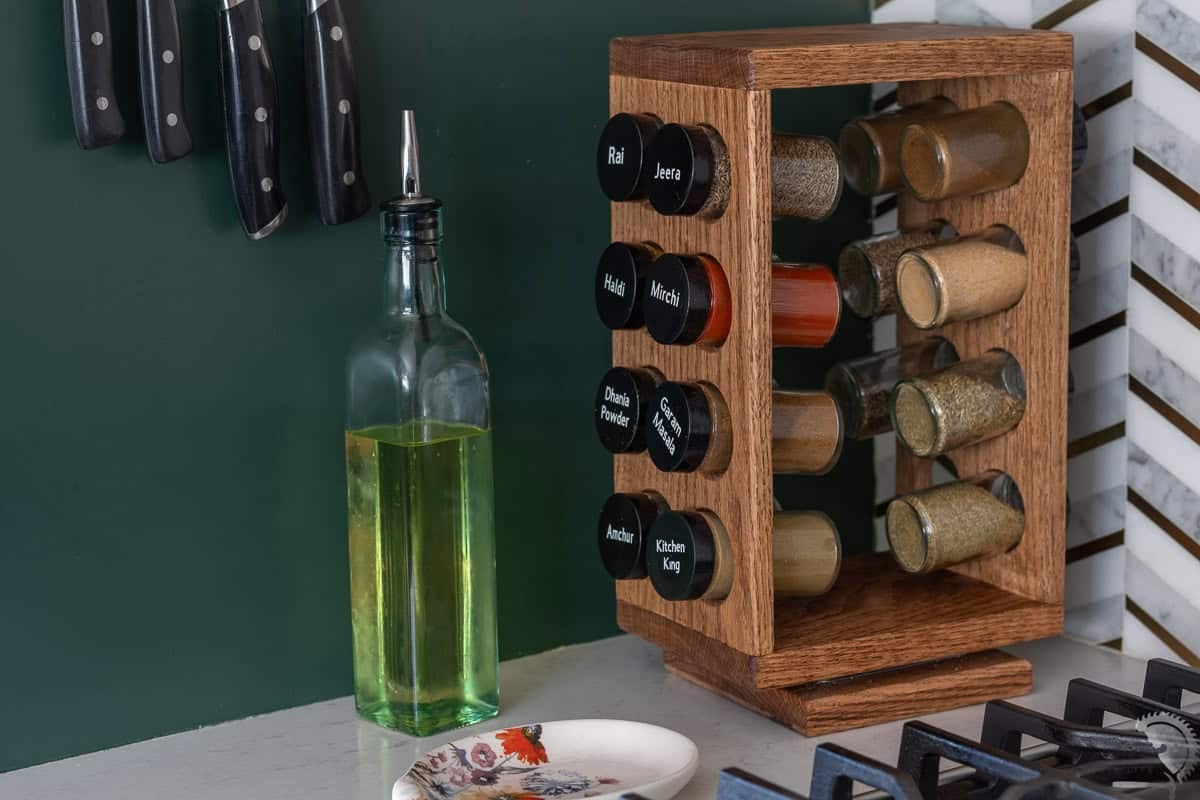
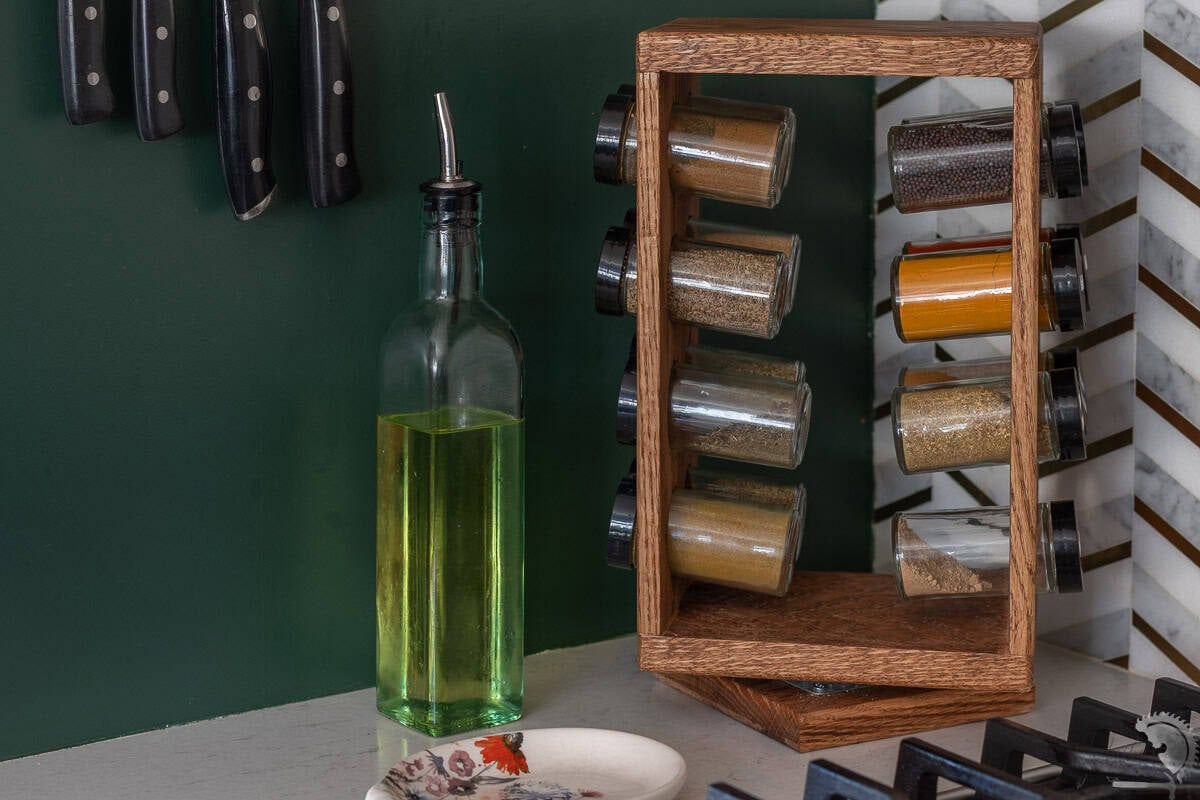
It holds 16 spices and took me only a day to make!
Rotating spice racks are pretty common in most kitchens. I’ve had one for as long as I’ve had my own kitchen. They’re not only easy to grab and use, but honestly, they look good too. Spices make the best kitchen decor!
I decided to use oak for this project, and although I am still not quite sure about my decision to stain it this color, I think I still really like it in my kitchen.
***This post contains referral or affiliate links. It is a way for this site to earn advertising fees by advertising or linking to certain products and/or services. Please read my full disclosure here ***
Materials Needed
- Lumber per the plans
- 1 3/4″ Forstner bit (this will depend on the size of the bottles you have. Be sure to measure carefully.
- 3/4″ Forstener bit or regular bit
- 1¼” finish nails
- 1/4″ round over router bit (optional)
- Clamps. I like these.
- Wood Glue
- Lazy Susan Hardware
- Paint/stain of your choice
- Clear Coat. I used this one.
Tools Needed
I have slowly upgraded my tools over the years, and below I have added both the tools I use in my shop and beginner-friendly options so you can pick what fits your budget.
- Miter Saw – What I use | Beginner Option
- Sander – What I use – I have had this since 2015 and still going strong!
- Brad nailer – What I use | Beginner Option
- Drill Press with Drill Press Table. You can also use a Drill with a drill guide or just be really careful about drilling the holes straight manually.
- Router
How to Build the Spice Rack
Step 1: Prep the boards
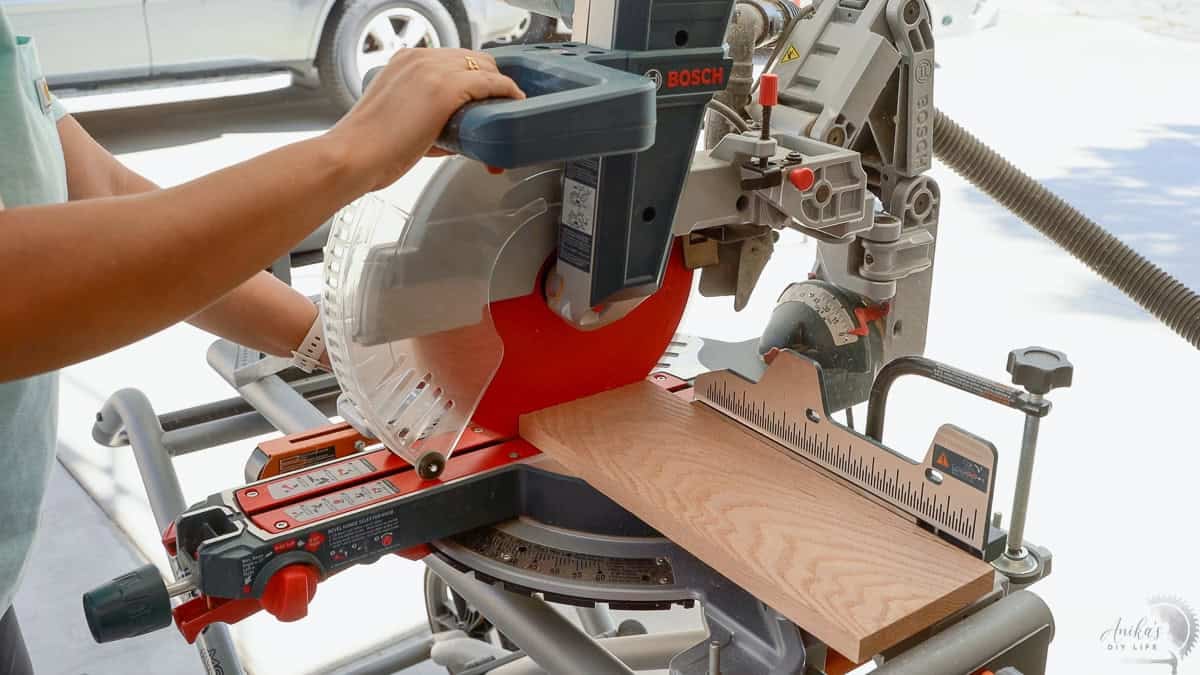
- Make the cuts per the cut list. I used a miter saw for the cuts.
Step 2: Make the holes for bottles
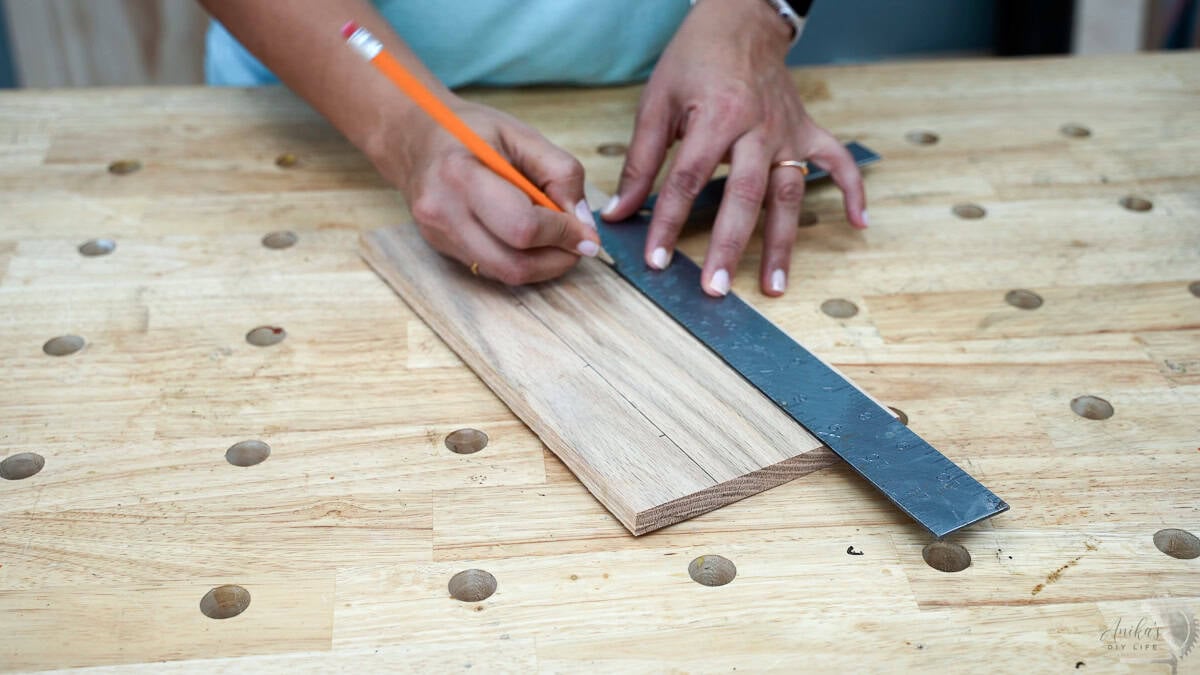
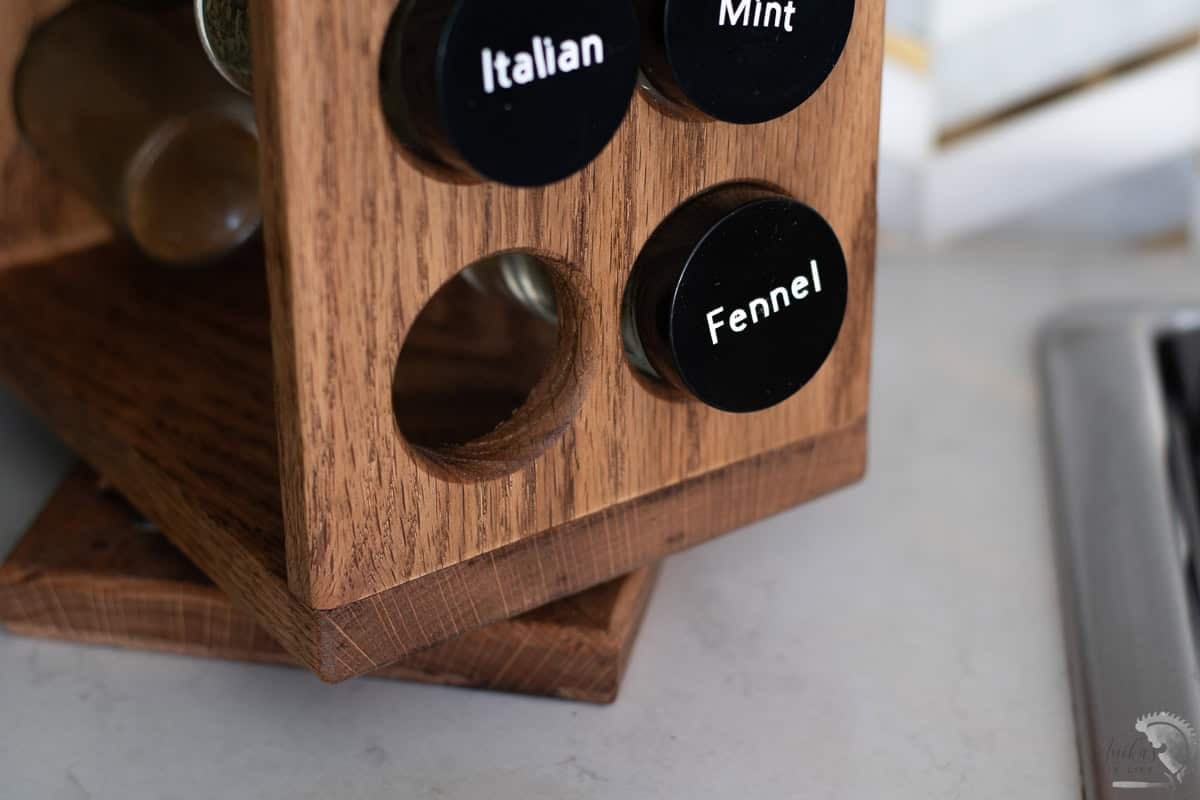
- Measure and mark the locations for the holes on the side panels. The plans show you the calculations for the 1 3/4″ diameter spice bottles I have.
- Make the holes using the Forstener bit.
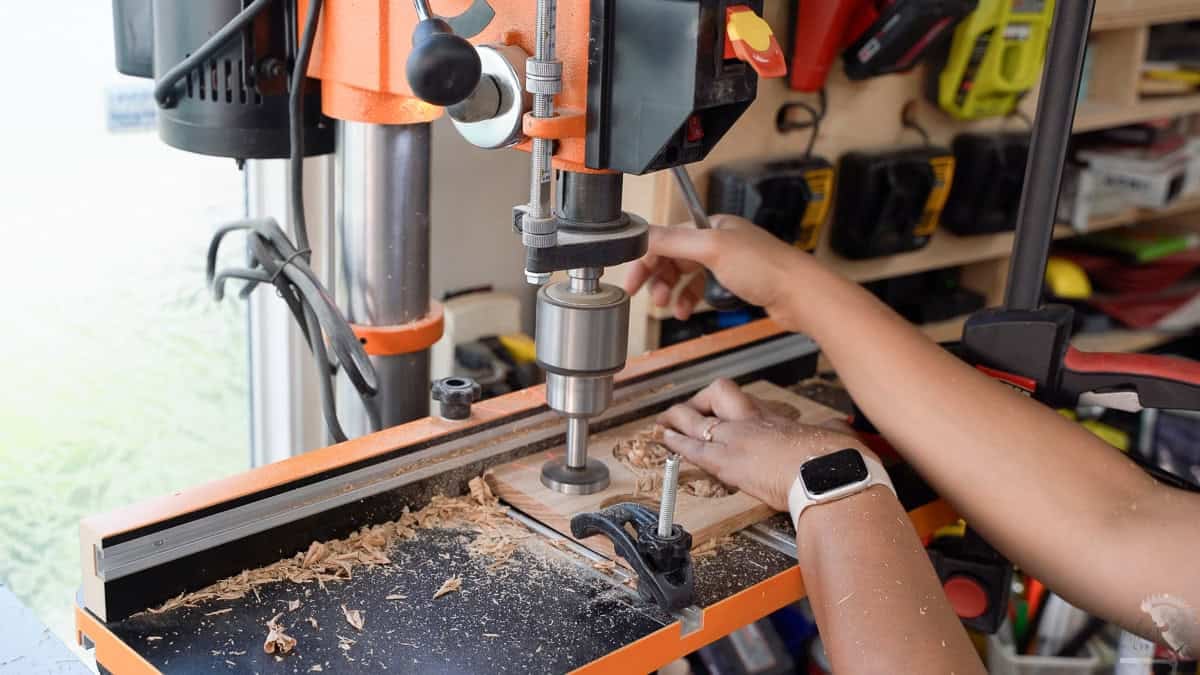
I used my drill press for this, and having a drill press table makes it so easy to make the holes quickly.
You can use just a drill or with a drill guide. The key is to make the holes straight down.
- (optional) Using a roundover bit, make a slight round over on the holes on one side (this will be the front). This is completely optional, but I think it gives it a slightly elevated look.
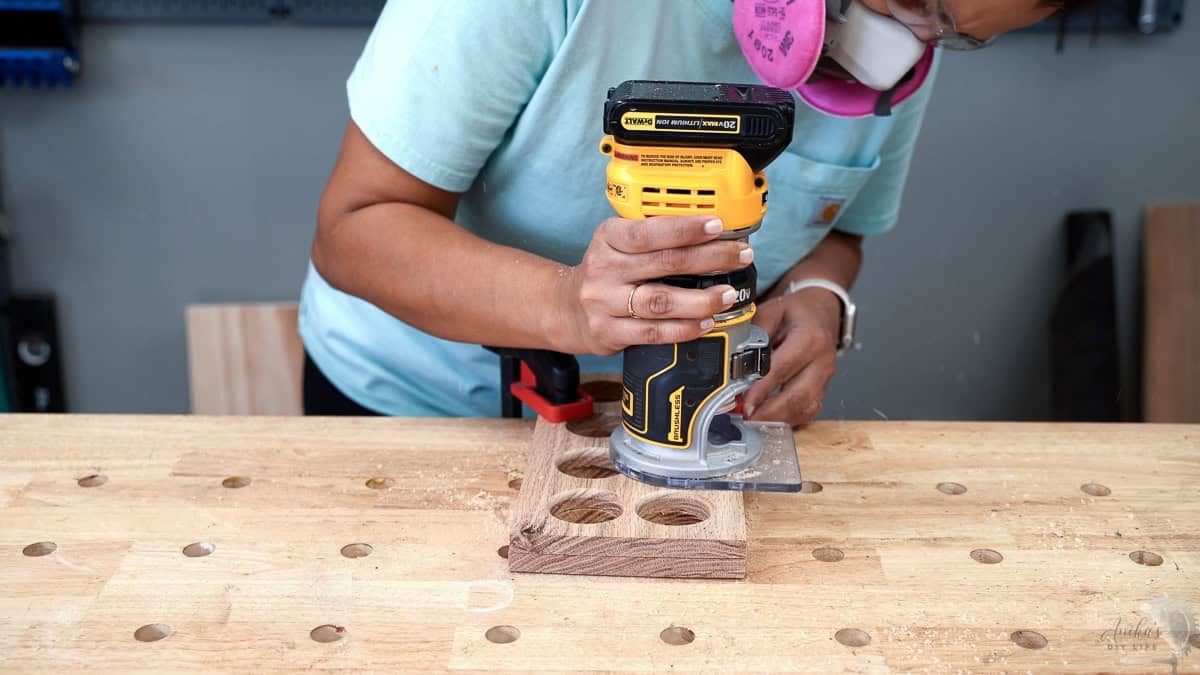
Tip: If you’re using a handheld router on 1/2″ boards, clamp the two boards together to give the router enough surface area to ride on.
Step 3: Build the rack
- Attach the two sides to the top and bottom using wood glue and finish nails.
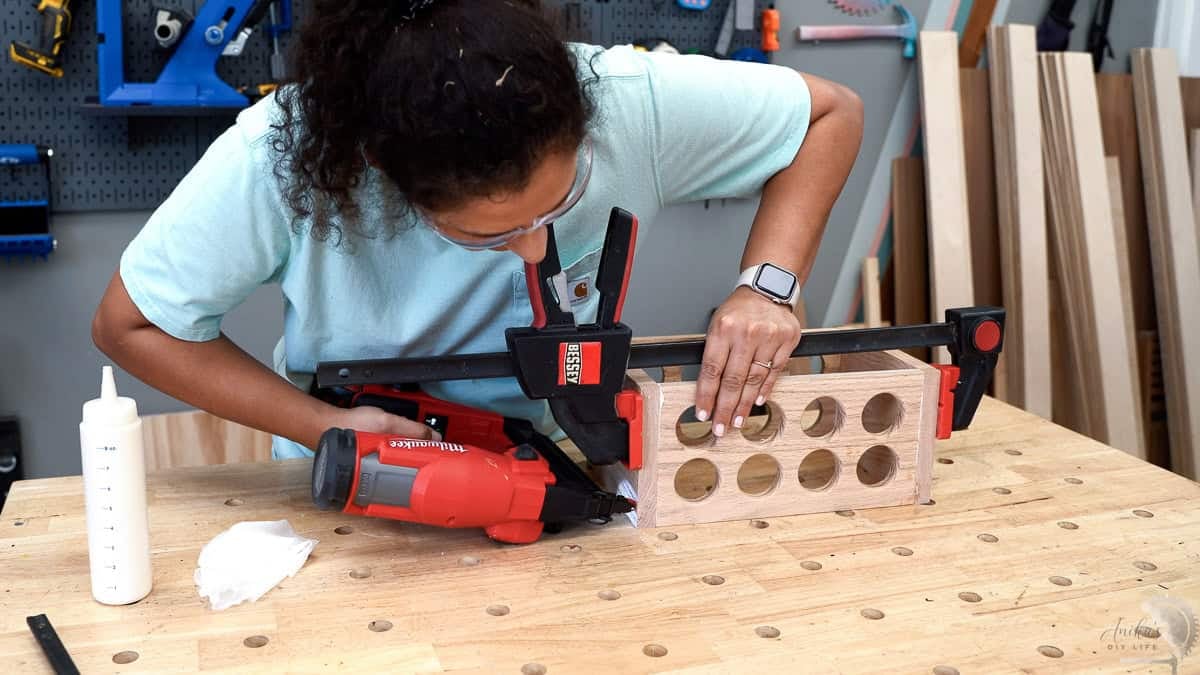
You can skip finish nails and just use glue and clamp it, and let it dry overnight. I was in a hurry to finish this project, so I used the finish nails. They are barely visible in the final product.
Step 4: Final finish
- (optional) I decided to run the roundover bit across all edges of the rack to soften them. Of course, this is optional.
- Sand off any roughness and also remove any glue residue.
- This is also a good time to stain and apply top coat on the project if you like. Also, don’t forget to stain the separate lazy susan base.
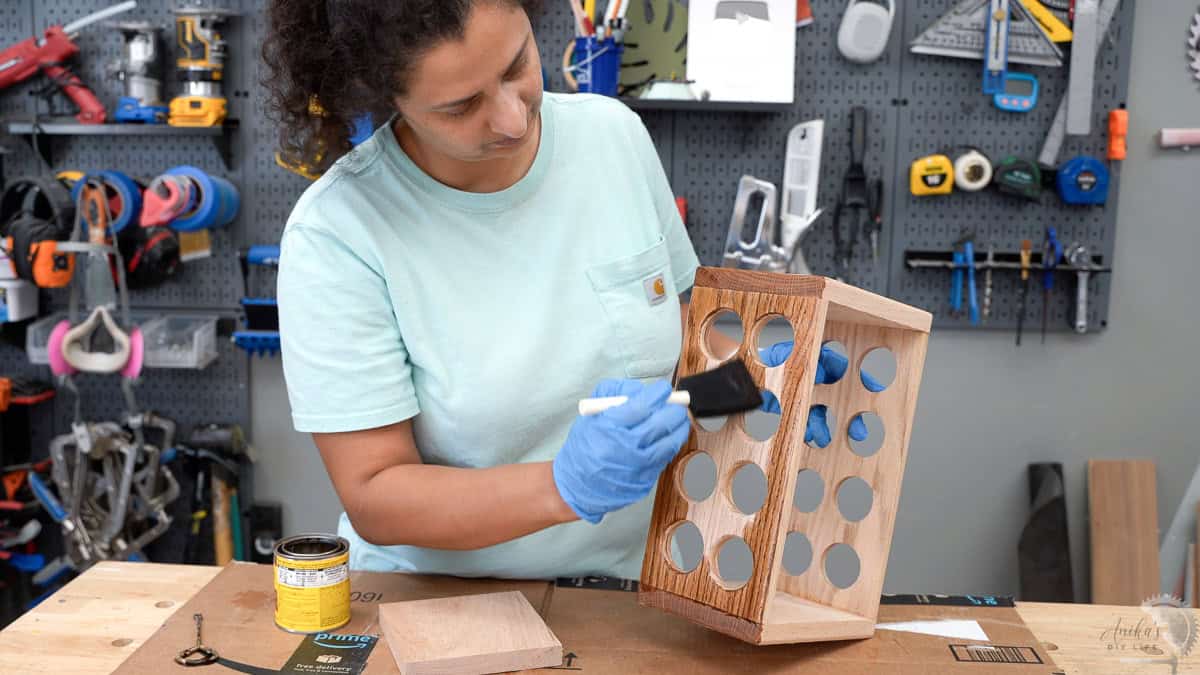
Like I mentioned earlier, I was originally planning to leave the oak natural and just apply a top coat. But I thought it needed some warmth… I used a light walnut stain, and I am still not sure if I like it. Maybe I should have gone with a different wood species… anyway, it’s not too bad and looks pretty decent in the kitchen. Maybe someday I will build out of another species.
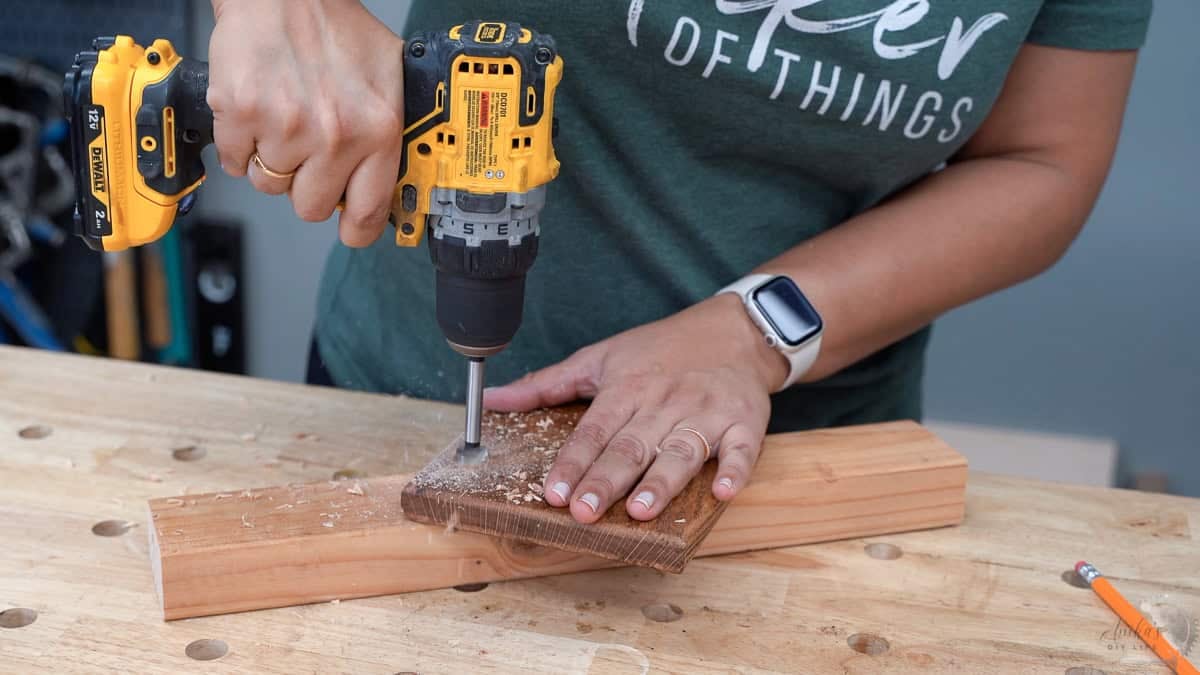
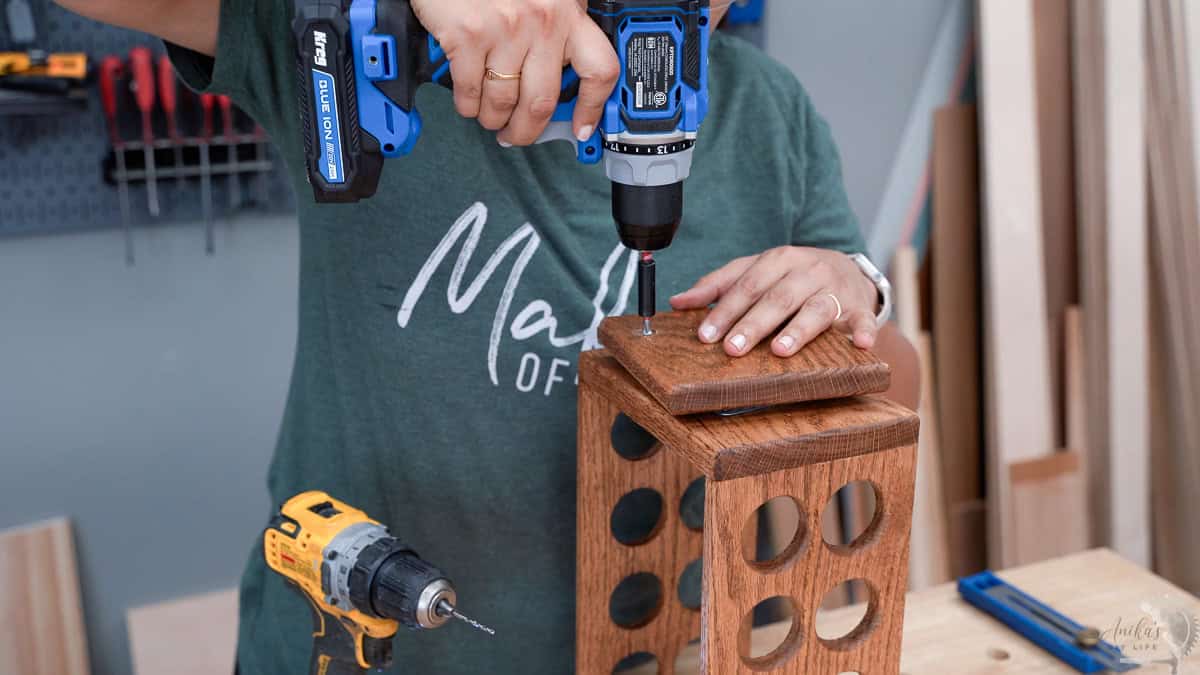
Step 5: Attach the Lazy Susan Hardware
- Start by aligning and marking the location for the screws on the base.
- Make a separate hole next to one of the locations. This becomes the “window” to attach the hardware to the rack.
- Attach the hardware to the base
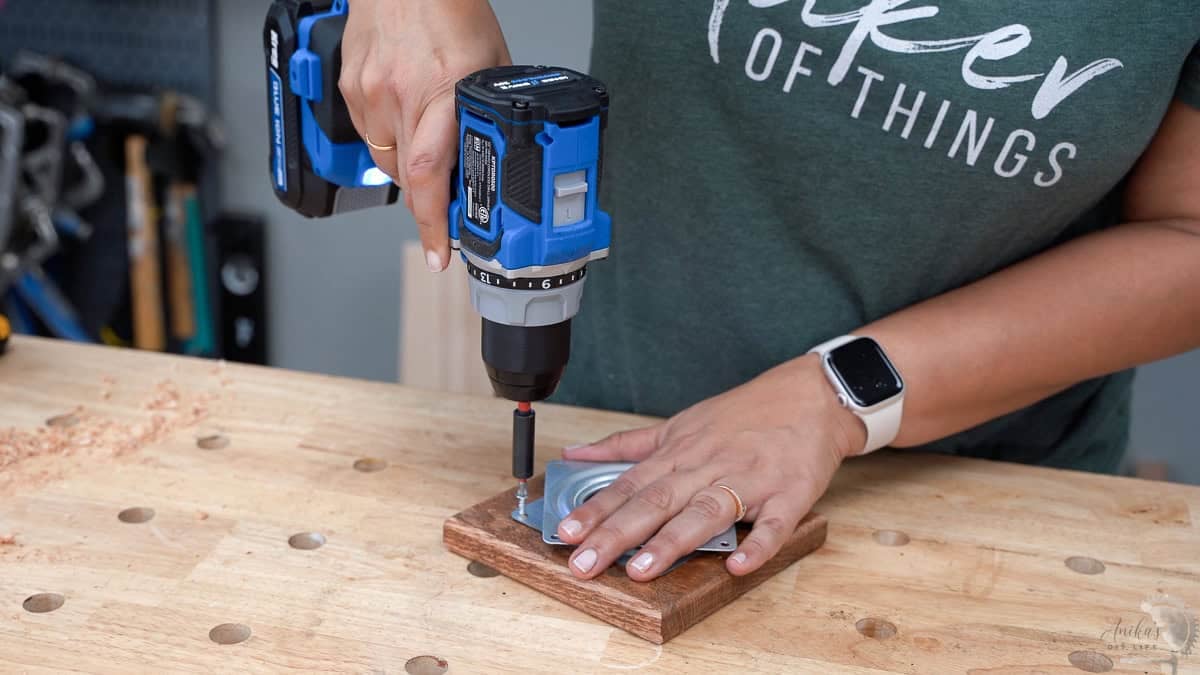
- Attach the hardware to the rack.
And done!
I loaded it up with all the spices and still can’t believe this was so easy to make!
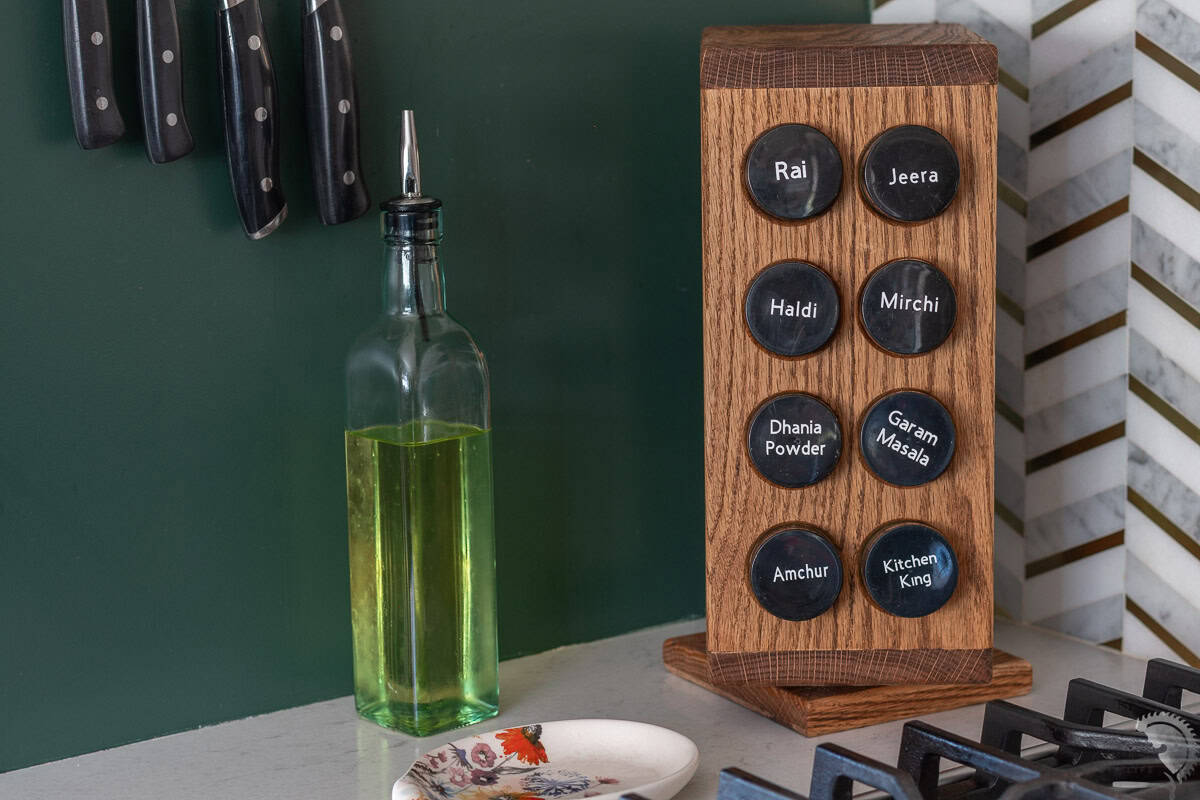
This rotating spice rack can hold 16 spices – enough space to keep all my often-used spices handy. Of course, as any indian, I have a whole pull-out spice cabinet as well with lots more spices.
This rotating spice rack is such a fun project and makes an amazing gift for a hostess or anyone who loves cooking or organizing their kitchen.
Printable Plans for the DIY Jewelry Holder
Don’t forget! You can get this entire project in a printable format in your email by clicking the button below.
More DIY Gift Ideas:
This is Day 4 of the DIY Gifts Week! All this week, I teamed up with my friends Shara from Woodshop Diaries and Kati from Houseful of Handmade to bring you new DIY gift ideas every day.
Click on the project below to check out all the projects for today.
DIY Accordion Hat Rack by Woodshop Diaries
DIY wooden spoon rest by Houseful of Handmade
Anika's goal is to inspire and empower beginners with woodworking, DIY, home improvement, and home decor ideas.
She wants everyone to unlock their creative potential and experience the feeling that comes with making something. Nothing feels better better than seeing something and saying "I can make that!"