DIY Hanging Concrete Planter – With Ombre Spray Paint Effect
Learn how to make a DIY hanging concrete planter and give it a pretty ombre effect using Rust-Oleum spray paint. It makes the perfect hanging planter for any room.

This post is sponsored by The Home Depot
Pssst: I am partnering with The Home Depot to give away two $50 gift cards. See more at the bottom of the post!
It has been a while since I worked with concrete.
And the best way to get back into working with concrete is to make a planter…
I decided to add a quick twist on the simple concrete planter by turning into a hanging concrete planter using chain.
To add character, I spray painted it for a gorgeous ombre effect with some of Rust-Oleum’s rich colors.
Materials for a Hanging Concrete Planter
- Fast setting concrete
- Plastic bowls of various size. (Hit up your local dollar shop or thrift store)
- Cooking oil spray
- S-hooks
- Decorator Chain
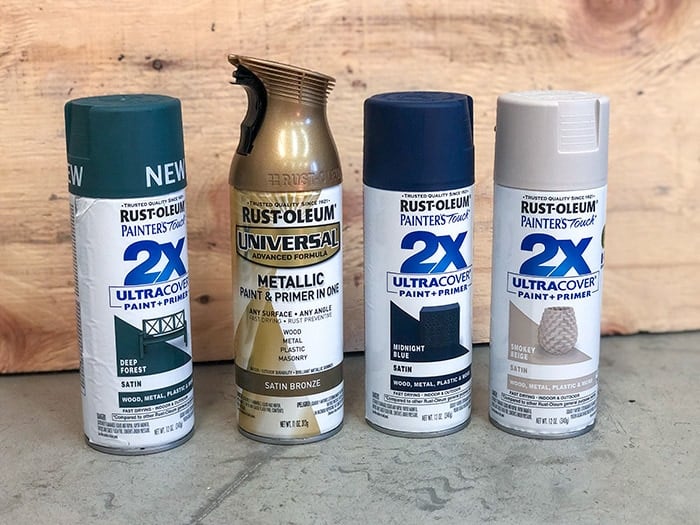
- Spray Paint. I used –
- Rust-Oleum Comfort Grip
- Random Orbital sander and 220 grit sandpaper
- 3/8″ masonry bit.
Did you know you could order all your supplies online for pick up at The Home Depot? I love doing that. It saves so much time!
DIY Hanging Concrete Planter
Below is the video of how to make the hanging concrete planter. Step by step instructions follow below.
Click here to subscribe to my YouTube Channel for more great videos!
How to Make a Hanging DIY Concrete Planter
I got all my supplies including concrete, hardware and spray paint at The Home Depot.
Below are the colors I used. Aren’t they gorgeous?
Let’s build the hanging concrete planter!
Step 1: Pour the Concrete Planter
Important – Be sure to wear gloves, mask and eye protection while mixing concrete.
- Mix a batch of concrete well to pancake batter-like consistency.
- Pick a couple of plastic bowls that are close in size and grease them well with cooking oil.
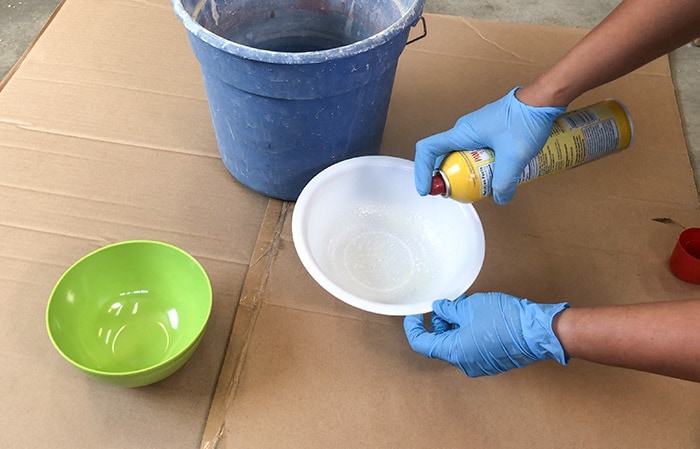
Tip – It is very important to grease the bowls well. It can be tough to get the concrete out of the molds, so take some time and grease them up well.
- Pour the concrete mix about halfway in the bigger bowl.
- Place the small bowl in the middle and weight it down. Be sure to balance it so the sides are equally thick.

- Using a sander, vibrate the bowls and get the bubbles out.
- 24 hours later (if you used the quick setting concrete), remove the plastic bowls and sand any rough edges with a sanding block.
Step 2: Spray Paint the Planter
- Place the planter upside down on a lazy susan.
- Spray the base color. I used Rust-Oleum Smokey Beige. Let dry for an hour.

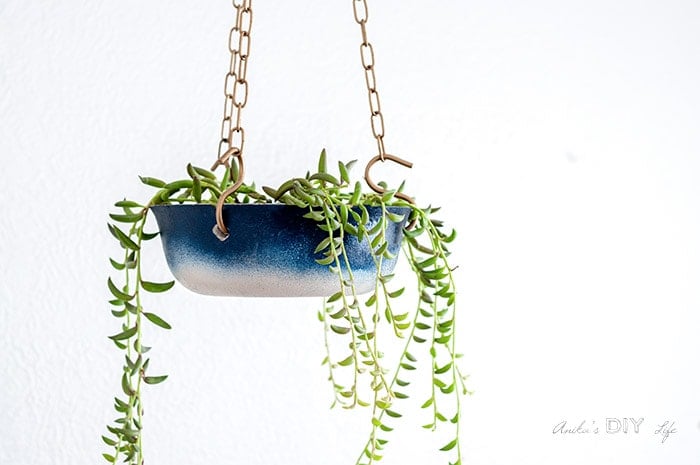
- For the ombre effect, spray short bursts of Rust-Oleum Midnight Blue with the nozzle level with the edge of the planter. Rotate the lazy susan while spraying to get an even ombre coat all around the planter.

Step 3: Spray Paint the Hardware
- Spray paint the S-hooks and chain. I used Rust-Oleum Univeral Satin Bronze. It is a very pretty metallic!

Spray painting hack – To spray paint the chain, I added a few eye hooks to scrap 4×4 posts and used them to hang the chains as I spray painted them. After I sprayed from both sides, and the paint was dry to touch, I just turned them over to spray any spots I had missed.
Step 4: Hang up the Planter
- Mark half an inch down from the lip and drill a hole using a 3/8″ masonry bit.
- Insert S-hooks and attach the chain to it. I added an S-hook to the top too.
- Add your favorite plant and hang it up.

The planter has no holes for drainage, so I added a few rocks and added string of bananas.
I love the combination of the Smokey Beige and Midnight Blue along with the Satin Bronze.
DIY Concrete Bowl
I couldn’t help myself, so I made another concrete bowl. This time using one of the patterned bowls as the inside mold.
This gave me a gorgeous striped interior.
I spray painted this with Rust-Oleum Deep Forest Green and added an ombre lip with the Satin Bronze.

I can’t stop staring at this gorgeous combination.
Isn’t it amazing how you can completely transform a simple object with just a few coats of spray paint?!
Take a look at Rust-Oleum’s 2019 color watch palette – bright deep hues to simple neutrals. Which one is your favorite?
RELATED: See all my tips for using spray paint
If you make this, I would love to see! Feel free to email photos to me at [email protected] or tag me on Instagram @anikasdiylife for a chance to be featured on social media! I can’t wait to see what you build!
And NOW! The giveaway I promised.
I am partnering with The Home Depot to giveaway two $50 Home Depot gift cards so you can get on that fun project you have been wanting to spray paint!
What are you going to spray paint and transform?
Enter below!
a Rafflecopter giveawayMore DIY Concrete Project Ideas
Anika's goal is to inspire and empower beginners with woodworking, DIY, home improvement, and home decor ideas.
She wants everyone to unlock their creative potential and experience the feeling that comes with making something. Nothing feels better better than seeing something and saying "I can make that!"


I just remodeled my laundry room and put a shelf over my washer and dryer. On one of my trips to Home Depot I found the cutest succulent and this planter is going to be perfect for it! I’m obsessed with that forest green color you used!
Ofh my gosh I love this so much! And you know I love the color 😍
I love this! I’ve had an empty macrame hanging plant holder and I’ve been looking for the perfect planter for it and have not found one yet. It’d be great to make my own and spray paint it whatever colors I want. Thanks for the ideas! 🙂
Great project!! Please sign me up for the Home Depot gift card give a way. Our boy scouts are working on some bird house for local Audubon project. They could use the extra $$ to purchase wood for the project. These same boy made the cool bench a couple of years ago. They all loved how their benches turned out.
Thanks,
Donna
Wow! Great job… it almost looks like clay pottery that has been fired in the kiln…and I love the paint colors… I use the midnight blue often in my projects and you just opened my eyes to the “Deep Forest” new color addition from rustoleum. That color would be fab with my next project of revamping an old piece of wall art (metal) that has been bothering me. One question: referring to your alternative draining technique (no holes on bottom) you mentioned rocks and “string of bananas”… curious about the banana part, would you elaborate? Thanks for posting this and all of your cool projects and tips.
Best,
Amy
Hi Amy, I am so happy you liked the project! The Deep Forest is a really gorgeous color! The “string of bananas” is the name of the plant that I planted. 🙂