Dremel Wood Carving – DIY Mandala Wall Art
Dremel wood carving is a great way to make engraved wood art. Make a gorgeous DIY mandala wall art using the Dremel tool with this step by step tutorial.
We think you will also like this DIY Wire and wood art, and this Custom Industrial sign, 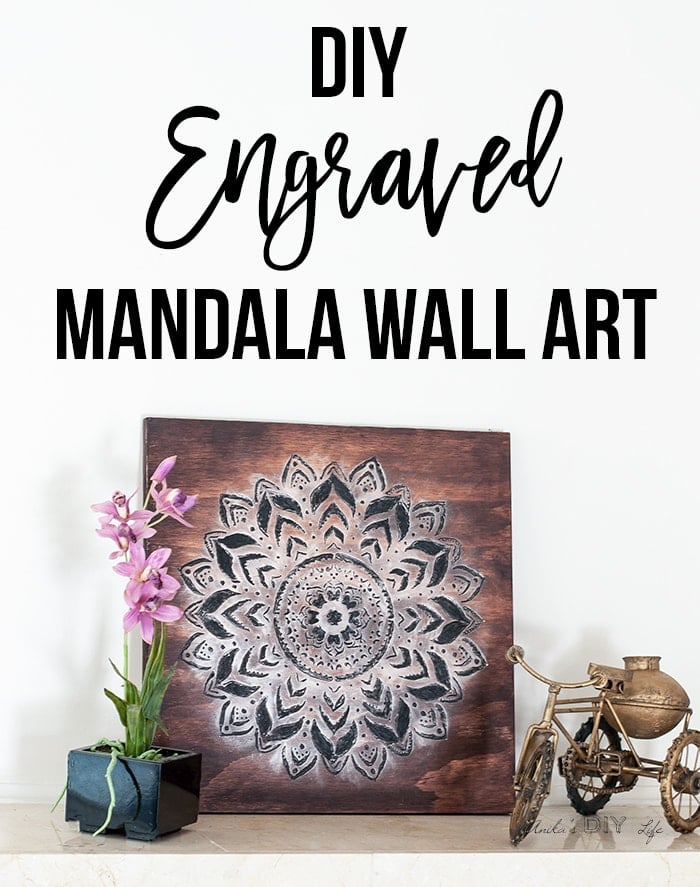
The fun part of the DIY “bug” is that everything you see – you try to figure out how to make one yourself!
So when I saw a gorgeous carved mandala in a little market of handicrafts in India, my first thought – “I can make that!”
Unfortunately, I couldn’t take a picture of the original but stayed in my head and one of those “someday” projects.
That “someday” is here! Presenting my Dremel wood carving! 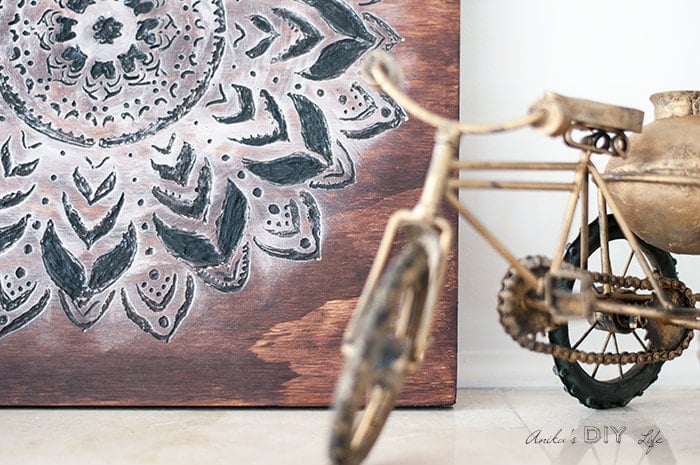
I am so excited because it is pretty close to the one we saw down to the metallic shine!

RELATED: How to make a custom Industrial Sign
Of course, the carving could be (a lot) more uniform… and the details on the original were a lot more intricate, but, it is close enough and I am very much in love with it!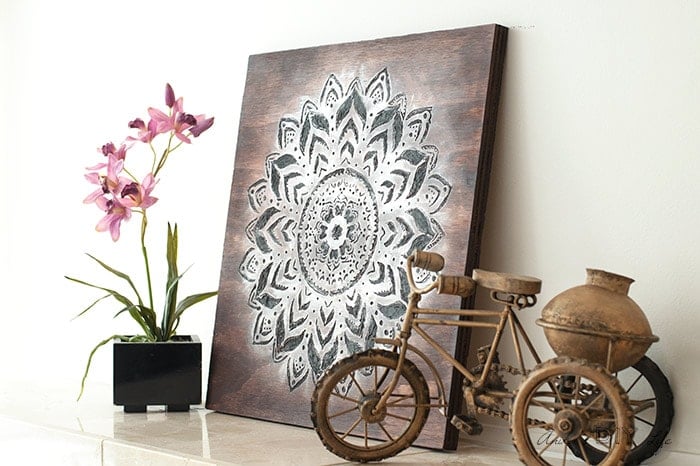
And guess what! You are in a for a treat because I have teamed up with 27 other AMAZING DIY bloggers who are bringing you gorgeous square wall art ideas! Look for it at the end of this post.
***This post contains affiliate or referral links. It is a way for this site to earn advertising fees by advertising or linking to certain products and/or services. Please read my full disclosure here ***
Materials needed for Dremel Wood Engraving –
- Plywood in the size of your choice. (Mine is 16″x16″)
- Dremel rotary tool ( I have this version. But a basic version will do too)
- Mandala stencil or any design of your choice (like this one)
- Black acrylic paint
- Foam Pouncer
- Random orbital sander
- Tack cloth
- Stain in the color of your choice. (I used Carrington)
- Metallic wax ( I used Metallic Lustre in Rose Gold)
Before we get started, make sure to follow me on Instagram, Facebook, YouTube, and Pinterest to keep up with all my latest builds and projects!
How to Use a Dremel to Carve Wood –
Here is a video of exactly how I made it. Step by Step written instructions and other details follow.
How to Engrave Wood
Step 1 – Transfer the mandala design onto the plywood using black acrylic paint.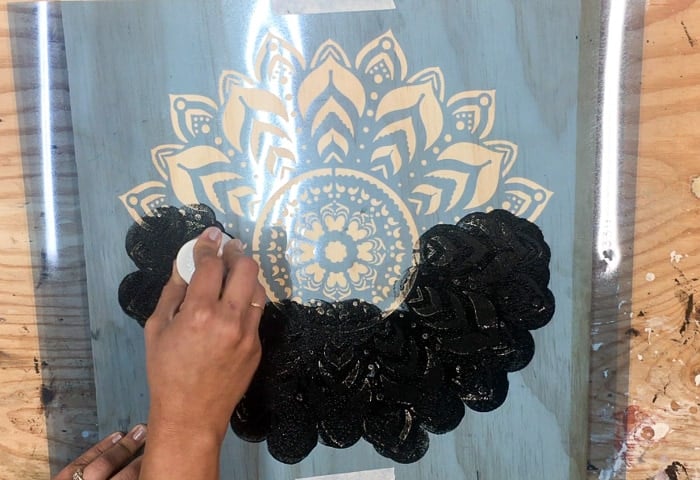
Step 2 – Use the Dremel rotary tool with a wood carving tip to carve out all the black paint from the plywood.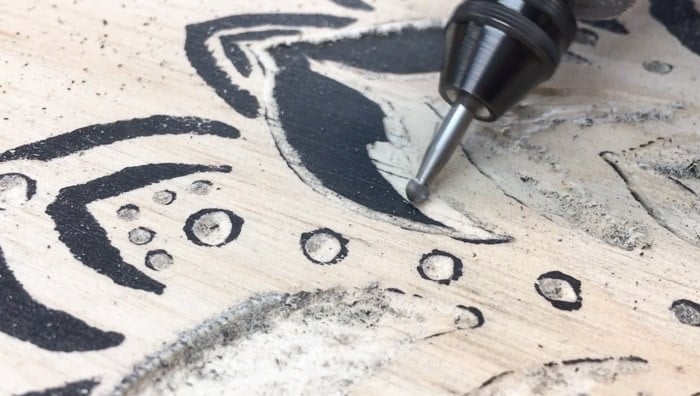
This can look and sound intimidating but it didn’t take me as long as I had expected. In fact, it was kind of calming – like adult coloring. Also, my other project at that time involved staining a patio so this was a nice change of pace.
It took me a just over an hour total across 3 sessions. You have to take a break because holding that tool for a long time isn’t fun for your fingers.
Step 3 – Once everything was carved, remove all the dust and fill in the carved area with black acrylic paint (again). You don’t have to worry about staying within the lines too much.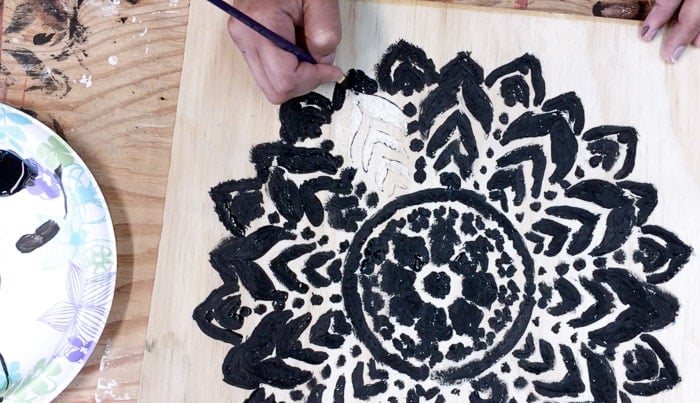
Step 4 – Using the sander and 220 grit sheet, remove a thin layer of the plywood to reveal a clean engraved design.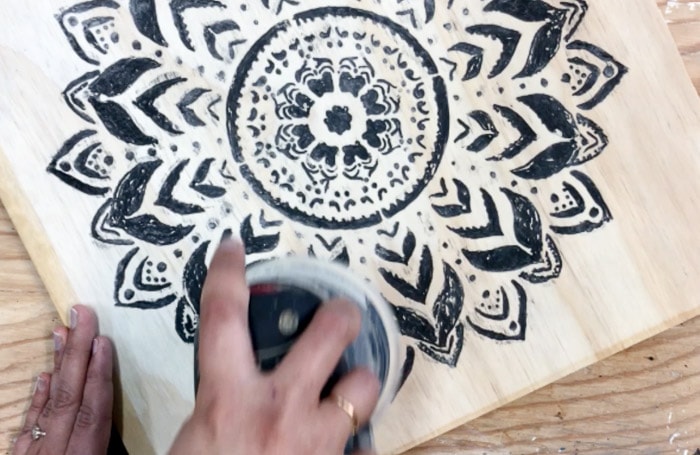
Step 5 – Stain the entire plywood in the color of your choice.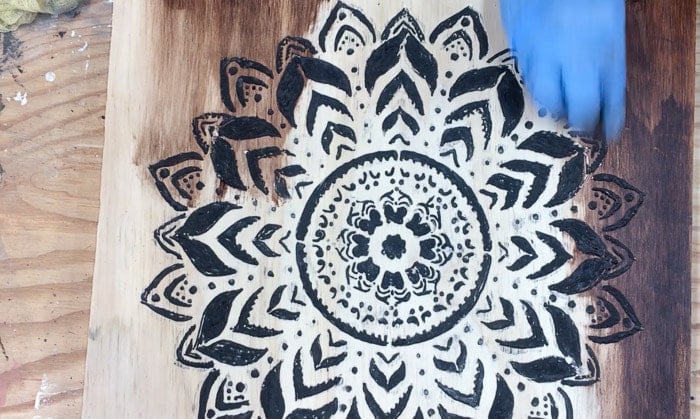
Step 6 – Use the metallic wax to add a glow to the mandala. Start in the center and use a circular motion. When I was happy with the coverage of the “glow”, I buffed it with a clean soft cloth till it was shiny.
That’s it! It was really as easy as it sounds! And SO much fun to make…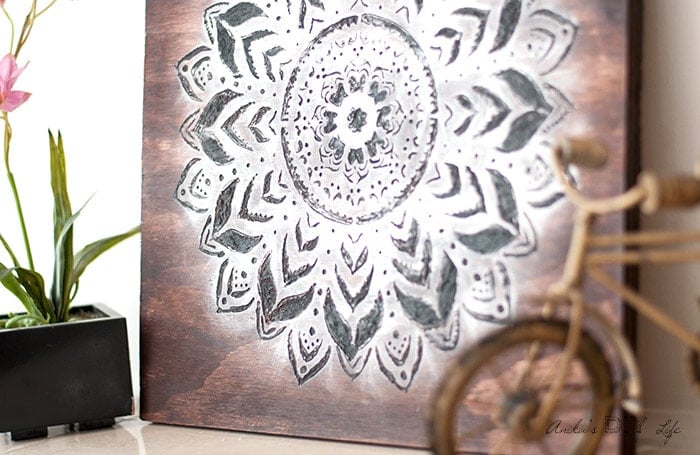
I have a few more I want to make and create a collage of sorts… maybe in multiple colors… that would be fun!
Shop Madala Wall Art –

But for now, here is the treat I promised you all! The gorgeous wall art ideas from 27 other DIY bloggers. Go check them all out!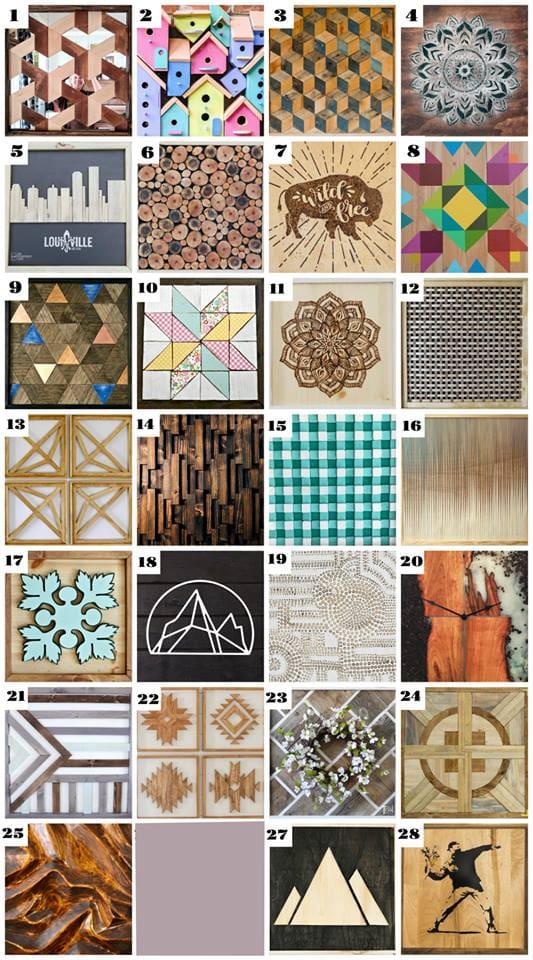
1) Reality Daydream / 2) 100 Things 2 Do / 3) House Becoming Home / 4) Anika’s DIY Life / 5) My Repurposed Life / 6) 3×3 Custom / 7) One Project Closer / 8) Merrypad / 9) Chatfield Court / 10) Create & Babble / 11) Hazel & Gold / 12) Jen Woodhouse / 13) Sawdust 2 Stitches / 14) Wood Work Life / 15) Remodelaholic / 16) Evan & Katelyn / 17) Jaime Costigio / 18) Pneumatic Addict / 19) Bower Power / 20) Lazy Guy DIY / 21) My Love 2 Create / 22) Addicted 2 DIY / 23) Her ToolBelt / 24) Shades of Blue / 25) Ugly Duckling House / 27) DIY Huntress / 28) Mr Fix It DIY
Didn’t I say you were in for treat?!
I am off to browse through all of these because I can’t stop staring all the pretty ideas!
Anika's goal is to inspire and empower beginners with woodworking, DIY, home improvement, and home decor ideas.
She wants everyone to unlock their creative potential and experience the feeling that comes with making something. Nothing feels better better than seeing something and saying "I can make that!"


What you can do to speed process, is to make a sanding sealer of 1/2 minerals spirits to 1/2 poly or spar. Apply liberal and dry. After dry, stencil Mandalay. Carve out area then use spray paint to color in as you did. Sand.it will cut time in half on painting by brush. Nice job.
That is beautiful. I am not a Carpenter or anything and watching you I thought I could do that too… Thanks for sharing. I’m pinning and putting the link in my evernote program on my phone so I remember.
I found you on one of the linkies…
I must have missed something?? How does it show so much white paint?
It is Great!!! Thanks for sharing. I will surely try it out!!
Hi Paulee, Are you referring to the “glow” it is a metallic wax I rubbed on at the very end.
OK!!! Great!! Thanks for getting back to me!!!
Qué maravilla!!!
Un trabajo excelente.
Muy elegante, y único.
Felicidades por ello, y gracias por el paso a paso.
Besos y feliz fin de semana
Simply gorgeous xx