How to Build a DIY Tapered Planter Box for Beginners
Learn how to build a high-end DIY Tapered Planter from cedar for under $30 with basic power tools and one afternoon.
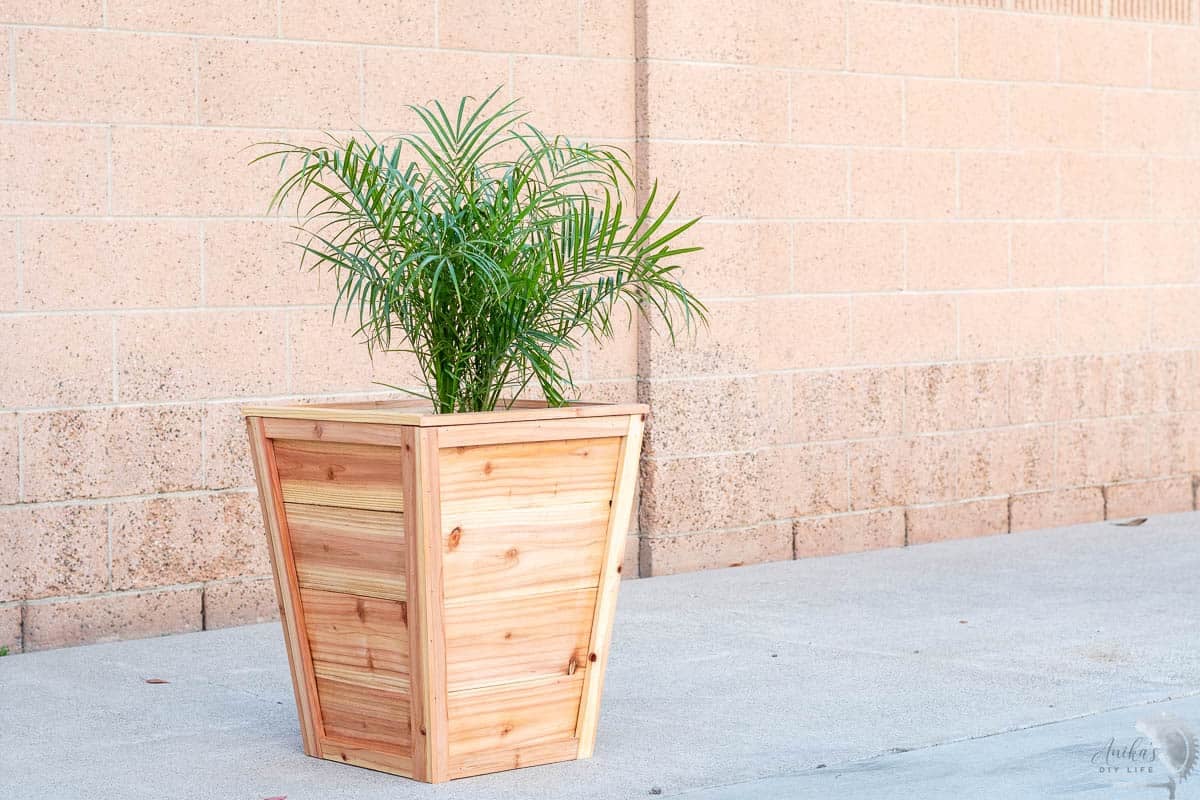
If you’ve been eyeing those tall tapered planters at the garden center — the ones with the clean architectural lines that cost $150 to $300 each — I have good news.
I’ve been teaching woodworking for 13 years, and this is one of my favorite beginner projects. Not because it’s simple (it does involve angled cuts), but because of a clever design trick that makes it look far more complicated than it actually is.
Instead of cutting traditional compound miters, this DIY tapered planter box uses a “stacked box” method and one single angle: 7 degrees. You set it once. You never move it. And the result looks like something you’d find at a high-end nursery.
Whether you’re a seasoned pro or a confident beginner, this project is the perfect Saturday build to transform your entryway.
***This post contains referral or affiliate links. It is a way for this site to earn advertising fees by advertising or linking to certain products and/or services. Please read my full disclosure here ***
Depending on your local lumber prices, you can expect to spend $40–$60 for a single planter using cedar fence pickets, or $80–$120 with select cedar boards. Either way, you’re saving at least $100 compared to buying one.
Material Needed
- Cedar Boards per the plans (I used 1×6 cedar fence pickets for a budget-friendly option, but select cedar boards work too!)
- Square Plastic Planter (to use as a liner)
- Outdoor wood glue
- 1″ Brad nails (or trim head screws )
- Sandpaper (60/80, 120, 180, and optionally 220 grit)
- Spar urethane for finishing
- Tape measure
A quick note on wood: Cedar and redwood are my go-to for outdoor builds. They are naturally rot-resistant, they hold up beautifully without a lot of maintenance, and they have that gorgeous color that looks incredible on a porch. Pressure-treated lumber is cheaper, but I don’t love it for a decorative piece like this. Plus, it can have a lot of chemicals that makes it hard to handle.
Tools Needed
- Sander (I have had this sander since 2015!)
- Miter saw – What I use | Beginner option
- Table saw (for ripping boards)
- Circular saw (alternative to miter saw)
- Brad nailer – What I use | Beginner option
Don’t have all these tools yet? My free Power Tools Simplified Guide breaks down exactly what each tool does and which ones are worth buying first. Grab it here.
Download the Tapered Planter Plans
Want the exact measurements and 3D diagrams? Click below to get the printable build plans sent to your inbox.
Step-By-Step Instructions
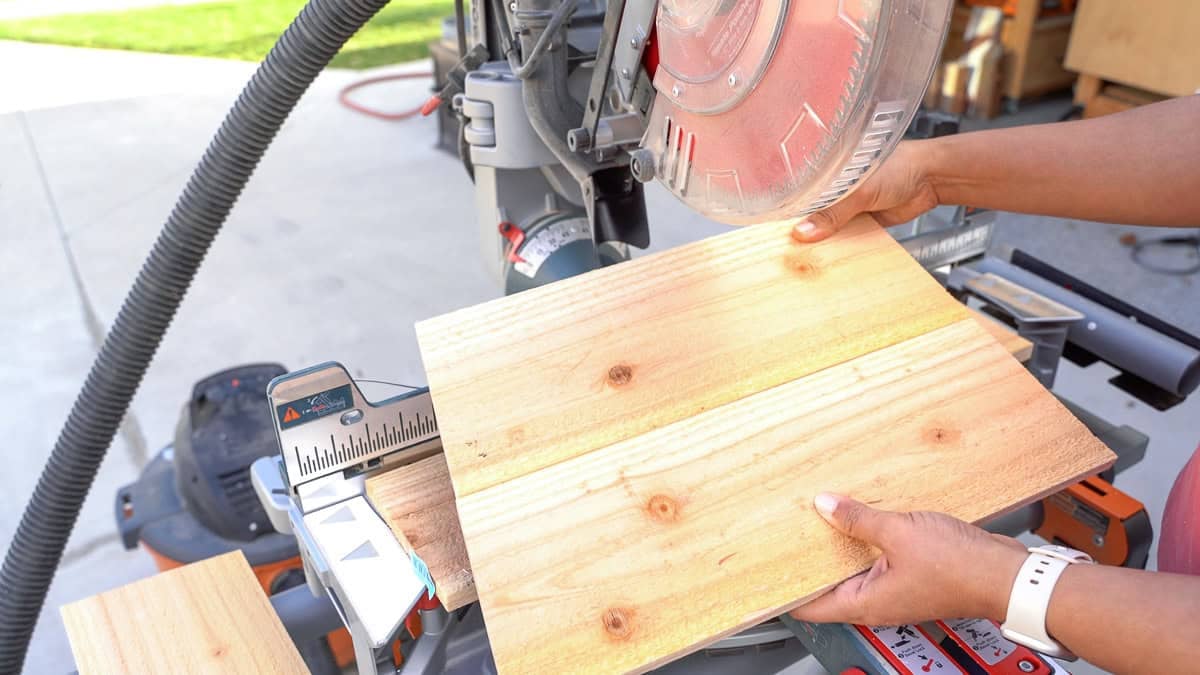
Step 1: Make the Tapered Cuts
The “magic angle” for this entire project is 7 degrees. Set your miter saw to 7 degrees, lock it in, and don’t touch it again until the project is done.
Every single angled cut in this build uses that same setting, which is exactly what makes this beginner-friendly.

To cut each board, use the “Cut, Flip, Mark” method:
- Cut one end of the board at 7 degrees
- Flip the board over
- Measure and mark the length from the long side
- Make your second cut
Start by cutting the boards for your top (largest) box first. Then use the short side of those boards as your long-side measurement for the next row down.
Be sure to watch the full video to see exactly how to do this.
Each row will have two identical boards. When you’re done, you’ll have two stacks of 8 boards each.
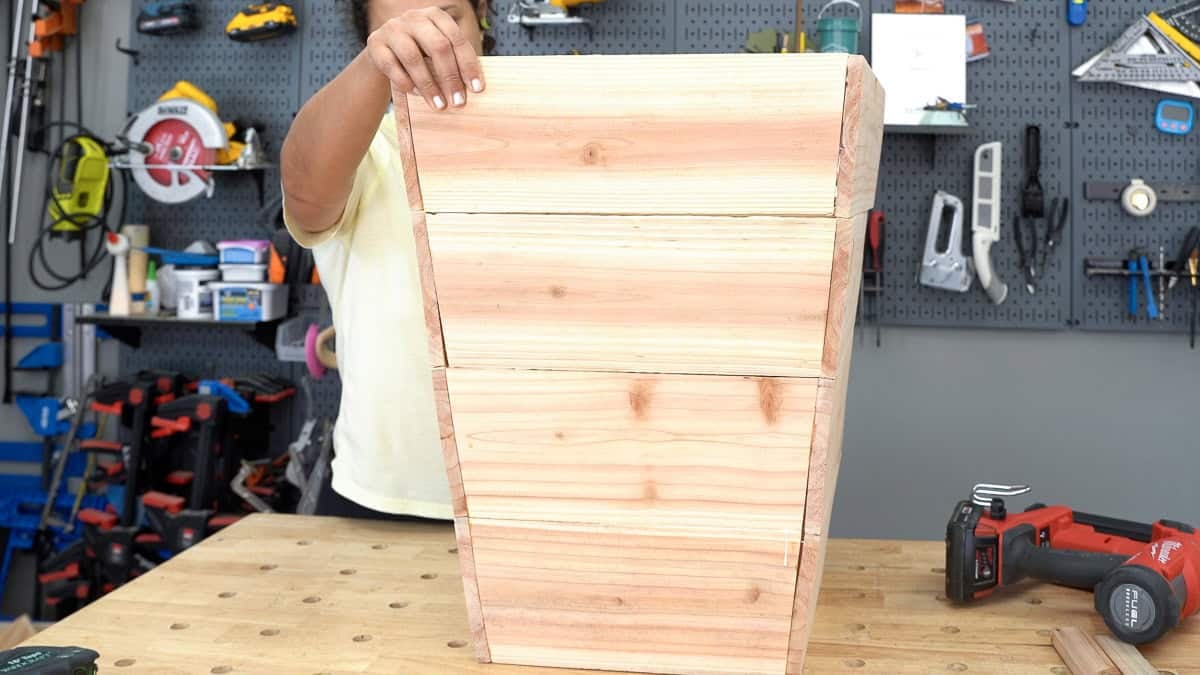
Why this works: Because each row is slightly smaller than the one above it, stacking them creates that tapered silhouette – no compound miters, no complex geometry. Just one angle, repeated.
New to saws? Check out my guides on How to Use a Miter Saw or How to Use a Circular Saw, and How to use a table saw.
Step 2: Sand the Boards
- Sand the boards down to 150 or 220 grit before assembly. See how to sand wood.
Trust me, it is so much easier to sand flat boards than to try to sand a fully assembled box later.
Here’s my shortcut: I only sanded the exterior-facing side to a smooth finish. For the interior faces, I just knocked off the roughness with 80 grit.
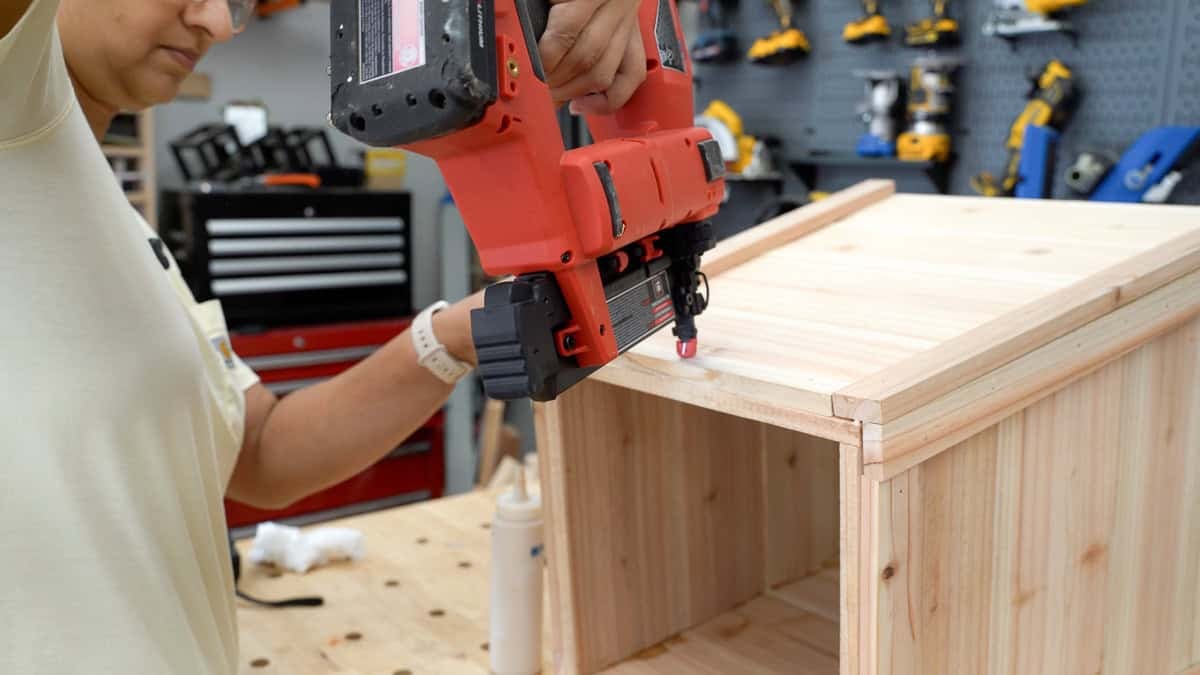
Step 3: Build the Four Tiers
We are building four separate square boxes for each tier.
- Attach the boards using exterior wood glue and brad nails. Work your way around until all four sides are connected.
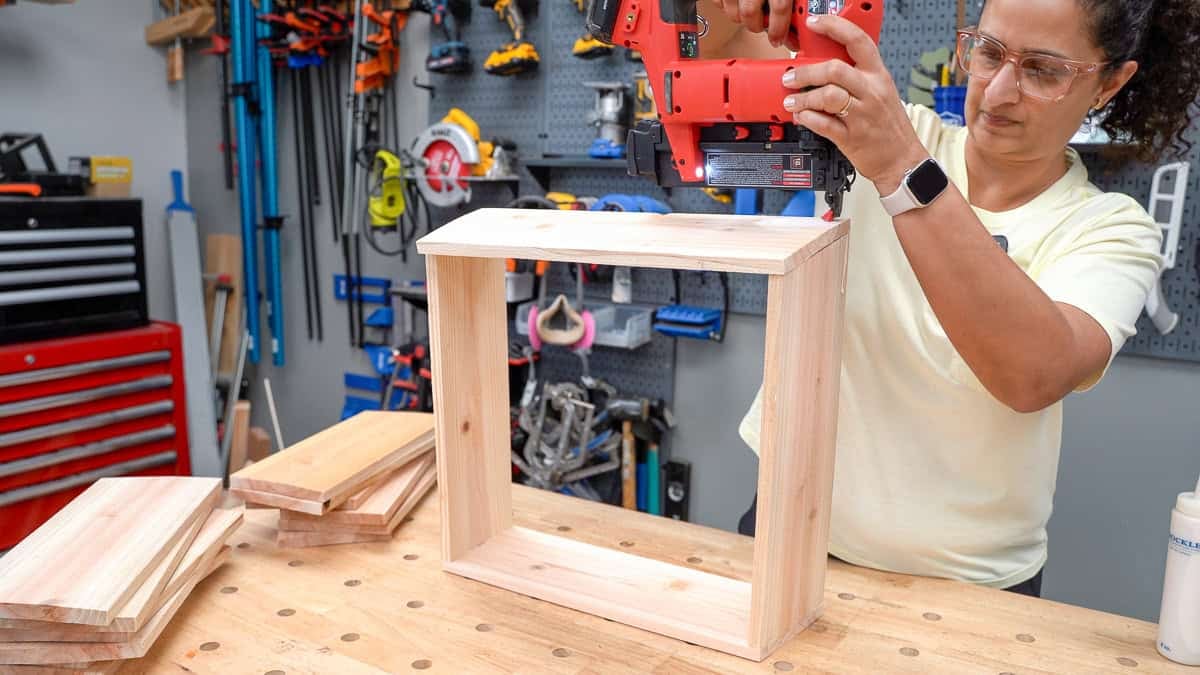
Pro Tip: Use one brad nail to “tack” the boards together first. This allows you to nudge them into alignment before committing with more nails.
🛑 Always check for square by measuring corner to corner diagonally in both directions. If both measurements match, you’re square. If they don’t, give the box a gentle nudge before the glue sets. See how to check and correct for square.
Why this matters: A box that’s even slightly out of square will cause headaches when you stack the tiers. The tapers won’t line up cleanly. Taking 30 extra seconds to check here saves you from a frustrating fix later.
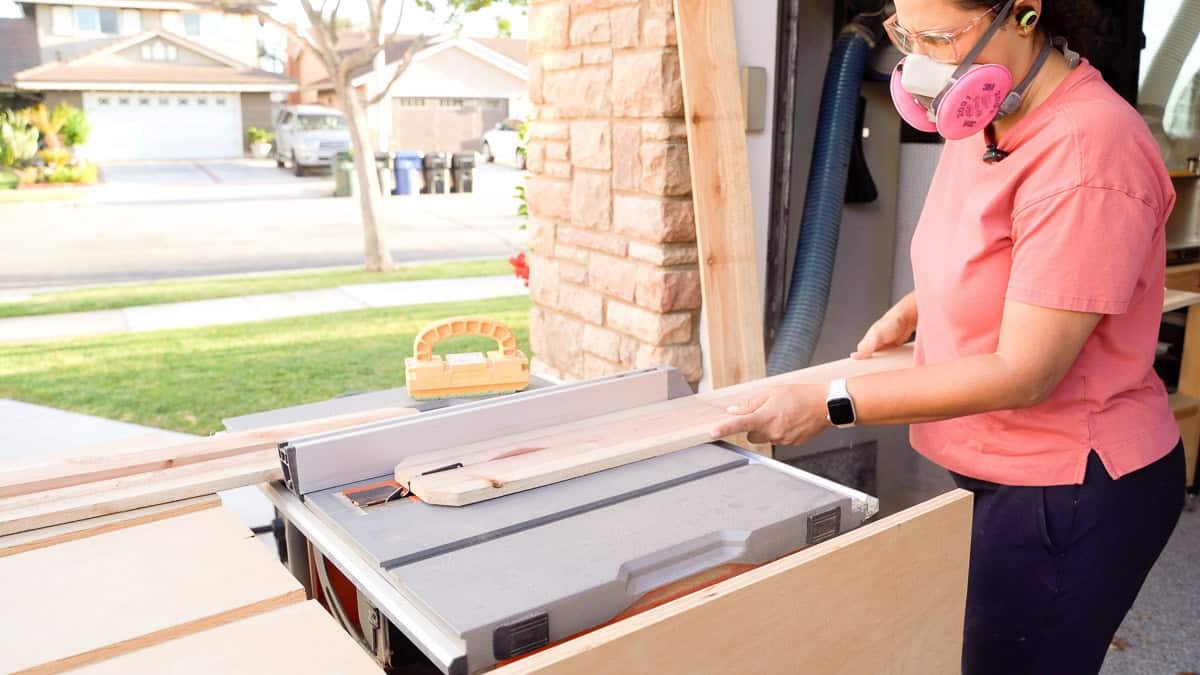
Step 4: Rip the trim pieces
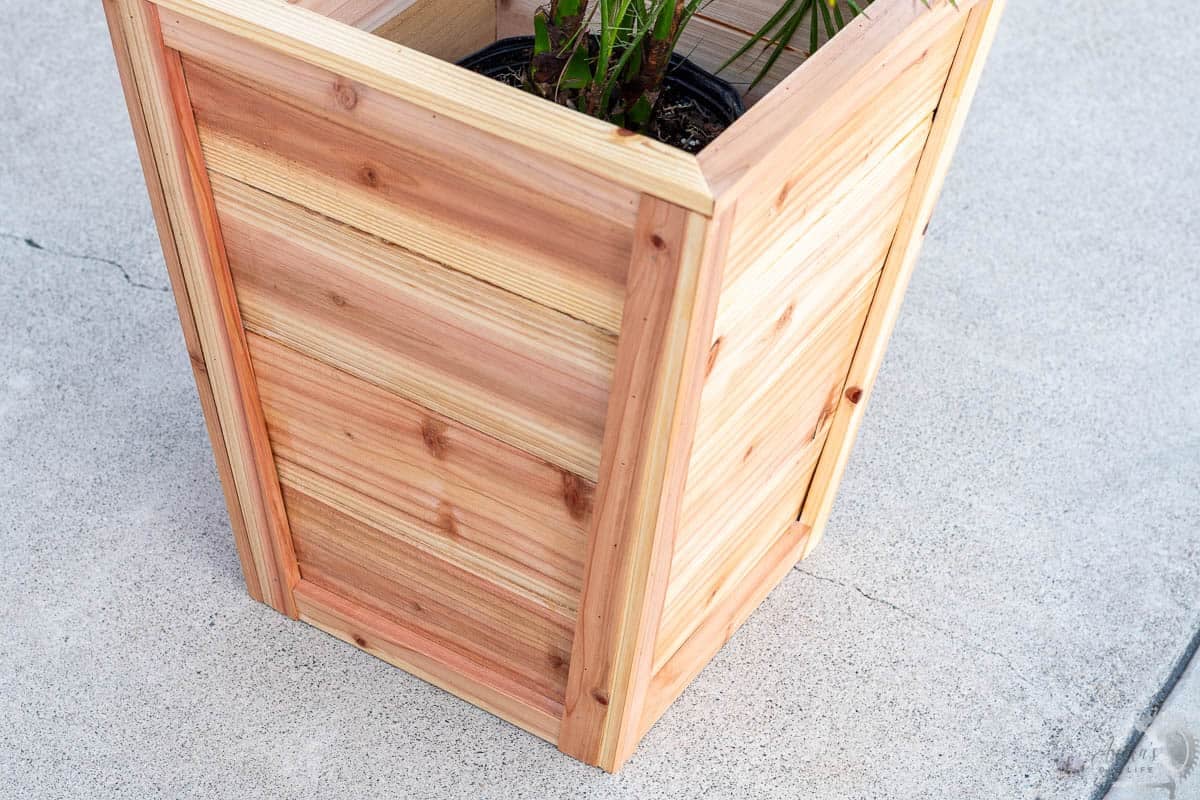
- Rip cedar boards into quarters to create thin trim pieces. These will cover the corners and the joints between the stacked boxes and the top.
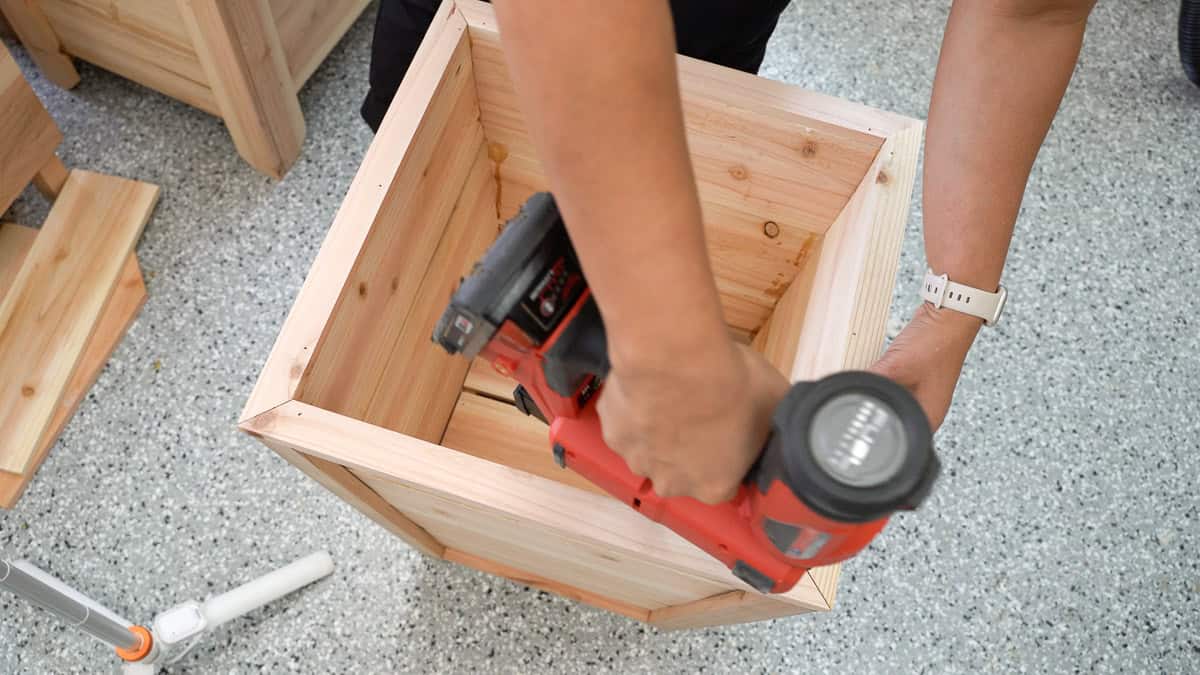
Step 5: Build the planter box
- Apply an exterior wood glue between each tier and stack them up. Make sure the tapers line up perfectly!
- Measure and cut the vertical trim pieces to size.
- Attach the vertical trim pieces to the corners using glue and brad nails. These are the boards that keep the planter together, so don’t skimp on the nails or glue.
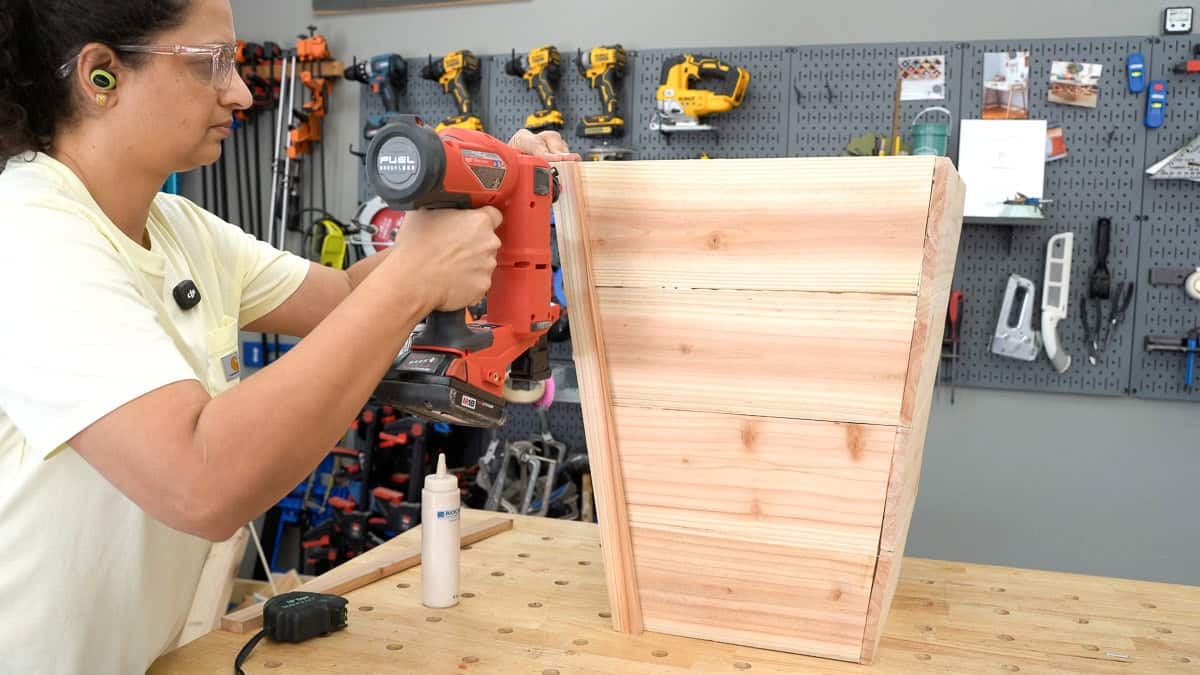
Important: Pay close attention to the alignment at the bottom. Because the angle is subtle, it’s easy to get off-track if you only look at the top.
- Measure, cut, and attach the horizontal trim pieces one at a time. Don’t pre-cut these all at once. Because each tier is slightly different, cutting as you go gives you the tightest, most professional fit.
Step 6: Add interior supports
- Attach support cleats to the inside of the planter. I used a scrap piece of the trim board.
- Attach the slats to the support cleats

Since my plastic liner is 13″ deep, I didn’t want it sitting at the very bottom of the 17″ tall planter. I also didn’t want it showing at the top. So, I measured 15″ down from the top and installed support cleats and slats.
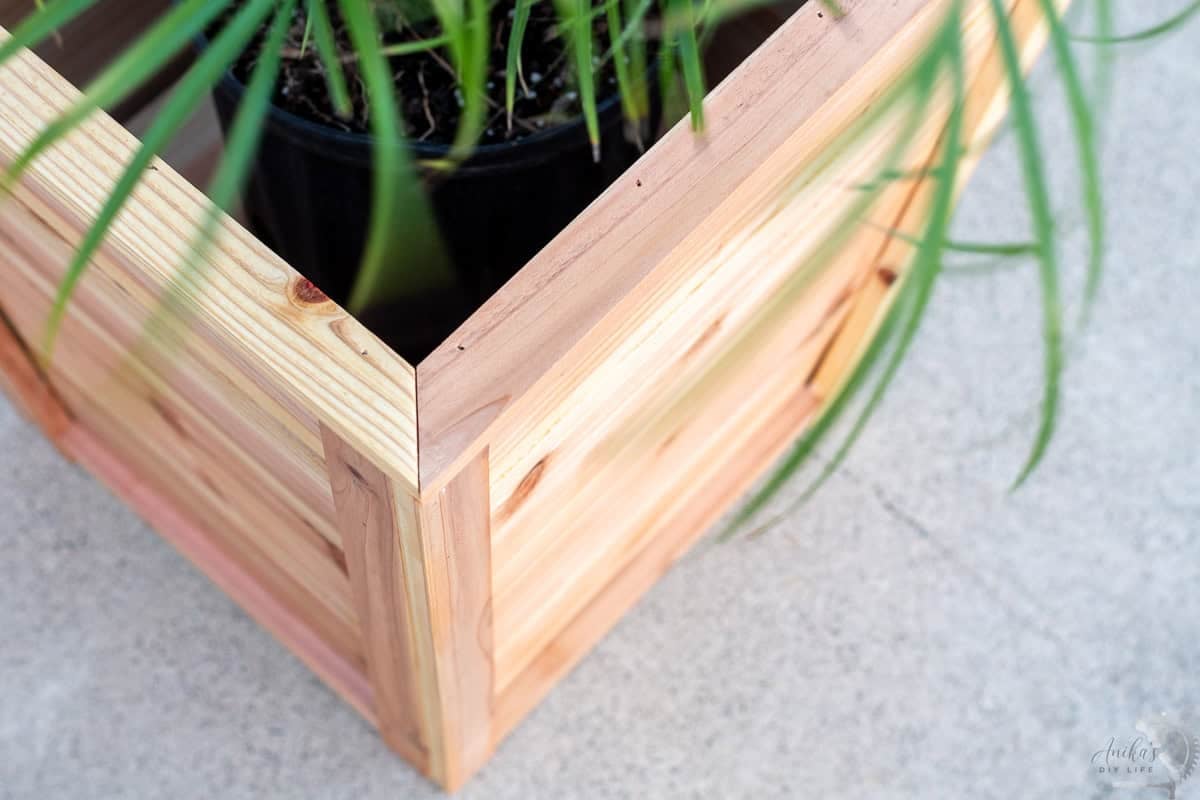
Step 7: Attach the top trim
- Measure and cut the top trim to size with 45 degree mitered ends. This is the detail that takes the planter from “homemade” to “high-end.” Attach with wood glue and finish nails.
Pro tip: Cut one piece, hold it in place, then mark and cut the next one. Mitered frames are unforgiving; small gaps at the corners are very visible. Cutting piece by piece gives you the most precise fit.
This gives it that professional, finished look.
Step 8: Protect the wood
- To keep that warm cedar color from going gray, apply 2–3 coats of Spar Urethane. It’s UV-resistant and specifically formulated for outdoor wood.
- You can also stain or paint before applying the Spar Urethane if you want a different color. Just make sure the stain is fully dry before you top-coat.
That is it!
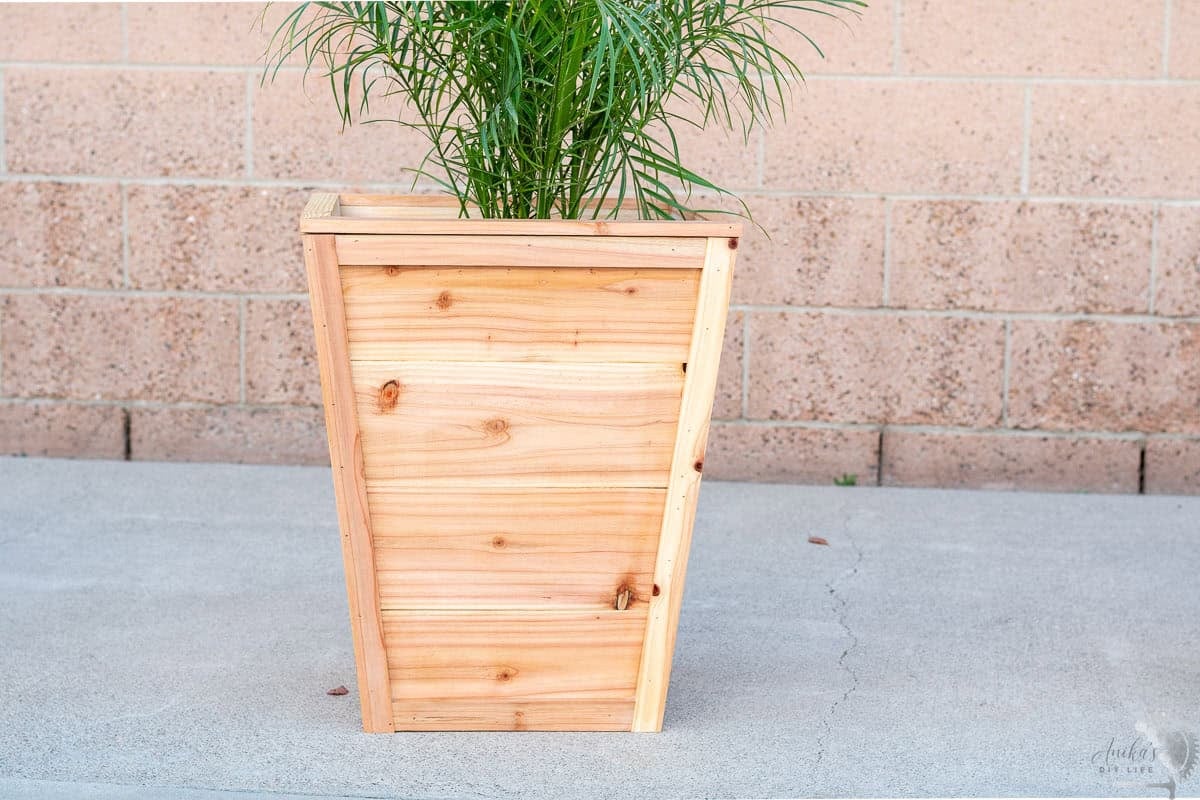
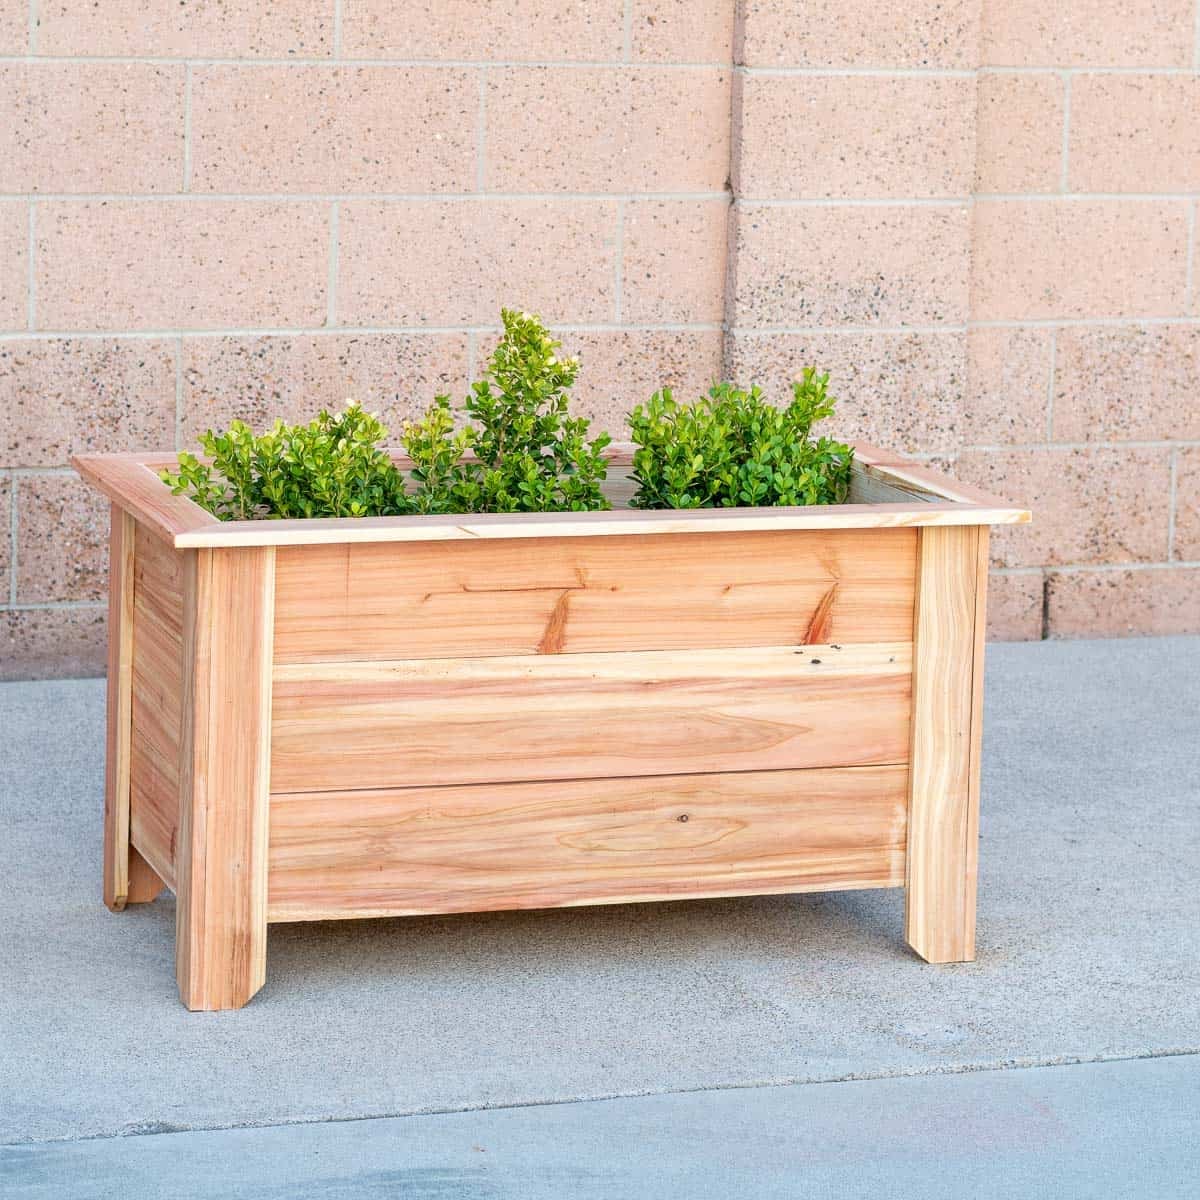
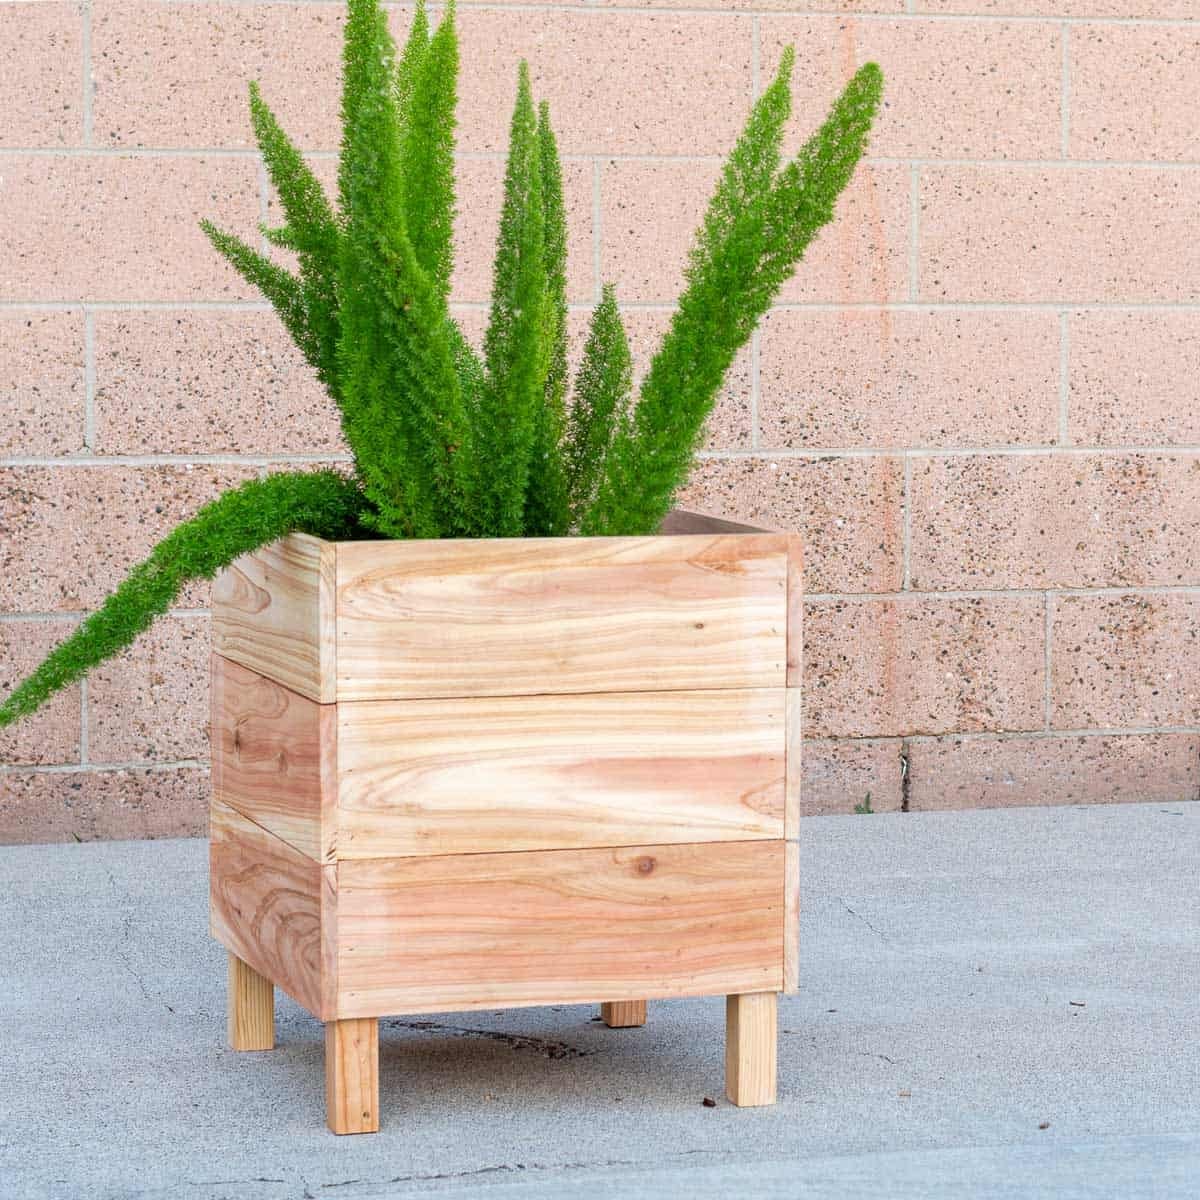
Drop in your plastic liner, add your favorite palms or flowers, and you’re done!
There is a high-end, tapered cedar planter that looks like it costs hundreds of dollars but only costs you a Saturday afternoon and a few boards.
Frequently Asked Questions
What Is the Best Wood for Outdoor Planter Boxes?
Cedar is my top recommendation for outdoor planters, and it’s what I use in this build. It’s naturally rot-resistant, which means it holds up in rain and humidity without needing a lot of maintenance. Redwood is another excellent option but harder to find and more expensive. Avoid pine for outdoor builds unless it’s pressure-treated. Untreated pine will start to deteriorate within a season or two.
How Long Will a Cedar Planter Box Last Outdoors?
A cedar planter box that’s properly finished with Spar Urethane can easily last 10–15 years outdoors. The two things that shorten its life the fastest are standing water at the base and direct soil contact. Using a plastic liner insert (like we do in this build) protects the interior wood from moisture and significantly extends the life of the planter.
Can a Beginner Build a Tapered Planter Box?
Yes, and this specific design was built with beginners in mind. The “stacked box” method means you’re only ever working with one angle (7 degrees) and simple square boxes. You don’t need advanced joinery skills or specialty jigs. If you’ve used a miter saw before, you can build this.
Do I Need a Table Saw to Build This Planter?
You’ll need a table saw for ripping the trim strips in Step 4. If you don’t own one, you can also get 1×2 boards and use them as trim.
How Much Does It Cost to Build a DIY Cedar Planter Box?
Using cedar fence pickets (the budget option), you can build this planter for roughly $30-$50 in materials. Using select cedar boards brings the cost to $80–$120. Either way, you’re spending a fraction of the $150–$300 price tag you’d see at a garden center for a similar tapered planter.
What Size Plastic Liner Should I Use?
That depends on the finished interior dimensions of your planter, which is why I always recommend shopping for the liner before building the box, rather than the other way around. For the dimensions in my plans, a square plastic planter in the 12″–14″ range fits well. Make sure it has drainage holes.
Can I Paint or Stain This Planter Instead of Using a Natural Finish?
Absolutely. Cedar takes paint and stain beautifully. Just apply your stain or paint first, let it dry completely, and then seal with Spar Urethane. Skipping the top coat is the most common mistake I see — without it, even a painted planter will start to peel and fade within one season outdoors.
Download the Tapered Planter Plans
Want the exact measurements and 3D diagrams? Click below to get the printable build plans sent to your inbox.
You might also like:


Anika's goal is to inspire and empower beginners with woodworking, DIY, home improvement, and home decor ideas.
She wants everyone to unlock their creative potential and experience the feeling that comes with making something. Nothing feels better better than seeing something and saying "I can make that!"