
How to Make a DIY Bottle Opener (Easy Wall Mounted)
Learn how to make a DIY bottle opener with this easy wall-mounted tutorial! Perfect scrap wood project for your patio or bar. Grab the step-by-step plans.
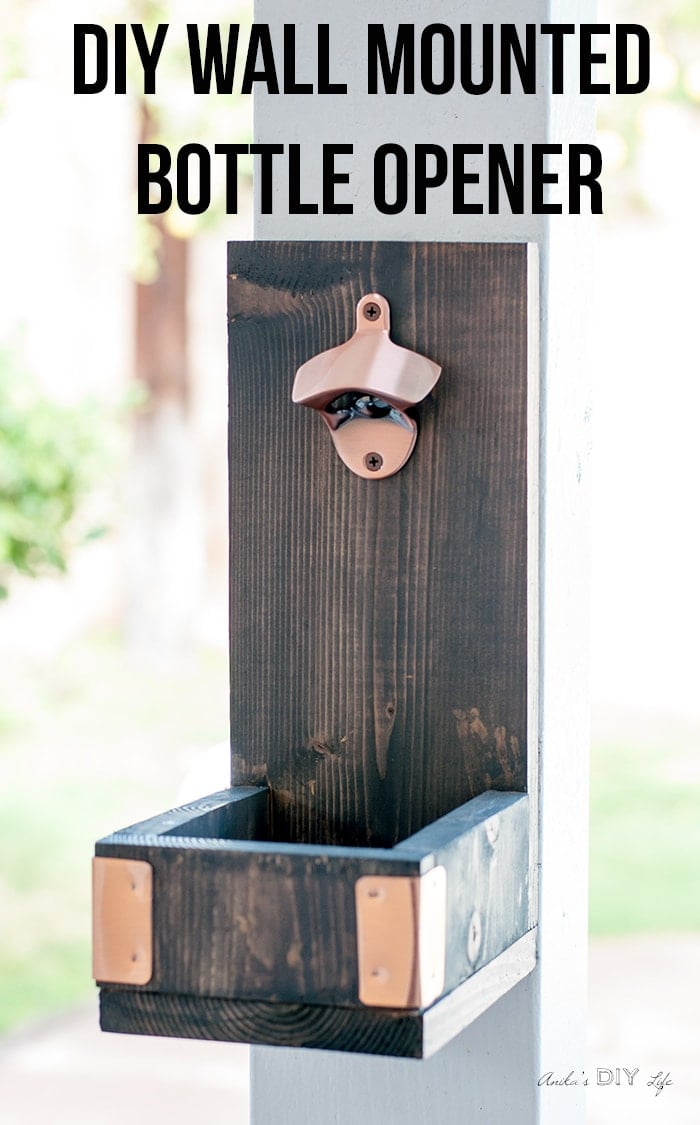
This project had been on my long “must-build” list for a while. I had a perfect spot on the patio right next to the pool begging for one. It’s the ultimate project for a day when you don’t have a massive build planned but are absolutely itching to make something with your hands.
Why This Wooden Bottle Opener is the Perfect Weekend Project
- Scrap Wood Friendly – You only need a few small cuts of a standard 1″ x 6″ board. It is an amazing way to clear out your scrap pile!
- Beginner-Approved – No complex joinery or expensive tools required. If you can make straight cuts and use a hammer or brad nailer, you can build this.
- Highly Customizable – You can easily change up the stain, paint, or hardware to match any indoor or outdoor decor.

To elevate the look of this build, I paired a rich, dark gray wood stain with warm copper sheet metal accents. The contrast of the wood and metal completely transforms a simple project into something that looks high-end!
DIY Bottle Opener Plans
I have the detailed plans with an exact cut list below. Grab your printable plans by clicking the button below.
***This post contains referral or affiliate links. It is a way for this site to earn advertising fees by advertising or linking to certain products and/or services. Please read my full disclosure here ***
Material Needed
- 1″ x 6″ boards per the plans.
- 1¼” finish nails
- Wood glue
- Wall mounted bottle opener. Similar to the one I used, which is unavailable
- Copper sheet
Tools Needed
- Miter saw
- Brad nailer or hammer
- Tin snips
- Metal corner rounder
- Drill
Related: 21 DIY wood Gifts for Him
How to Build
I have a video with a step-by-step tutorial on how to make this. The detailed written tutorial follows below.
Step 1: Prep the boards
- Make the cuts for the plans.
You basically need three sets of cuts – the back, the sides, and the bottom. You can easily use scrap wood if you have enough lying around.
I used a miter saw for this, but you can also use a jigsaw or circular saw or even a miter box!

- Sand the boards for a smooth finish using a random orbital sander or sanding block.
Pro Tip: It is always much easier to sand your individual boards before assembly so you can easily reach every corner and get a flawless final finish!
Step 2. Assemble the front pocket
- Attach the front and 2 side pieces together using wood glue and finish nails to create a U shape.
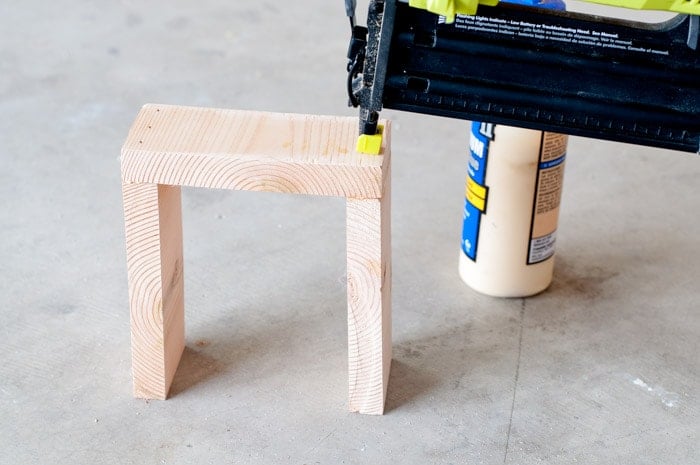
The brad nails act as clamps while the glue dries.
If you don’t have a brad nailer, you can also use a hammer and nails or you can use trim head screws and a drill/driver.
Related: Which nail gun do you need?
Step 3: Attach the back panel
- Align the back piece to the two side pieces and attach them using wood glue and brad nails.
The pieces should sit flush so that there is no overhang.

Step 4: Attach the bottom
- Attach the bottom of the bottle opener with wood glue and finish nails, as you did previously for the front, sides, and back.
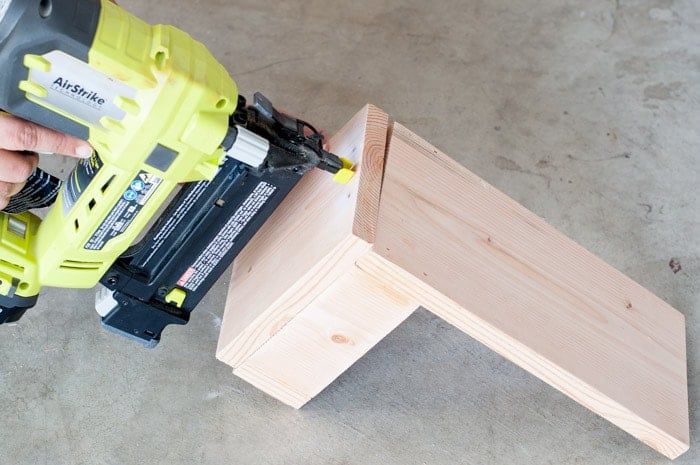
The building is done! Now for the finish.
Step 5: Apply the finish
- Wipe away any squeezed-out wood glue, and apply your favorite stain or paint.
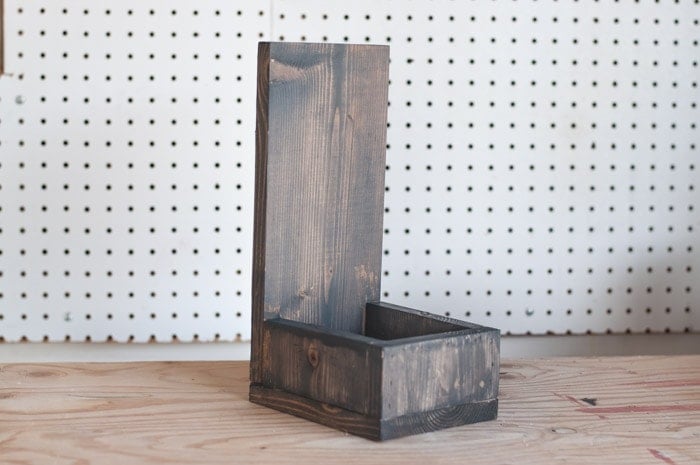
I used Varathane Carbon Grey, which gives the pine wood an incredibly beautiful, modern, and weathered rustic look. Allow the stain to dry fully per the manufacturer’s instructions.
- Apply a couple of coats of top coat. I would recommend applying spar urethane if it is going to be used outdoors.
See How to Seal Wood
Step 6 – Install the bottle opener hardware
- Mark the location of the bottle opener on the front of the back piece. I went about an inch down for the top screw and the center of the board.
- Attach using the screws included with the bottle opener hardware kit and a drill.

Step 7: Add the decorative accents (optional)
The main bottle opener is done but I wanted to add a little bit of character to it.
I used copper sheeting to make the accent trim. Lately I have been liking the look of the copper with this stain color. Here’s how I did it:
- Cut the copper sheet, using tin snips, into 2″ by 2″ square pieces.
- Round out the sharp corners using a metal corner rounder.
- Mark the location where you want to bend the strip and use the edge of the wood to bend the sheet around it.
- Attach using brad nails.

That’s it! An easy and gorgeous handmade gift for the man (or woman) in your life!

Did I tell you I am in love with the copper detail? I think it really finishes off this DIY wall-mounted bottle opener.
Need more handmade gift ideas?
- 21 DIY Wood Gifts For Him: Last-minute Ideas
- 18 Easy DIY Gifts For Her
- 31 Easy Woodworking Gift Ideas

Anika's goal is to inspire and empower beginners with woodworking, DIY, home improvement, and home decor ideas.
She wants everyone to unlock their creative potential and experience the feeling that comes with making something. Nothing feels better better than seeing something and saying "I can make that!"


Oh my gosh I love this project! It turned out great and the copper details are perfect.
Thanks Toni!! I am so happy with how the copper details turned out 🙂
If you glued n nailed the bottom how do you empty it other than pull them out by hand I’ll be putting a latch on the bottom so the tops can fall straight into the bin when it’s time to empty it, but thanks for the idea
We have made some of these too and they are so handy. Thanks for sharing.
This is so nice, Anika! Will it fit any size bottle? The copper accents are lovely! Would love to have you link-up at Homestyle Gathering!