How to Build a DIY Mail Organizer (No Power Tools Required!)
Learn how to build this easy wall-mounted DIY mail holder. This wooden mail sorter is the perfect weekend project to organize your entryway or drop zone. Includes step-by-step plans!
Does your entryway look like a paper tornado hit it? We’ve all been there. The mail pile that starts on the counter and slowly takes over your life.
I wanted a sleek, wooden mail organizer for the wall, but I wanted to make it accessible for everyone.
Whether you live in an apartment with no garage, are a complete beginner, or just don’t want to break out the heavy machinery, this project is for you.
Today, I’m showing you how to build a DIY mail holder using only hand tools. That’s right! No drill, no miter saw, and no noise. Just a simple, beautiful wooden mail sorter you can finish in a single afternoon.
Why you will like this project:
- It is beginner-friendly! This makes a great first project.
- No power tools needed means no loud noises and very little sawdust, making it apartment-friendly.
- It is budget-friendly too because if only needs a couple of inexpensive tools and basic lumber.
I normally use power tools… but I wanted to keep this easy and accessible. Of course, if you have the tools and would rather use them, you can totally pull them out!
Video Tutorial
As always, I have a detailed video showing you how to build this. Seriously, it is so detailed, you could build one with me as I show you how!
***This post contains referral or affiliate links. It is a way for this site to earn advertising fees by advertising or linking to certain products and/or services. Please read my full disclosure here ***
Material Needed
- Lumber per the plans
- Hand Saw and Miter Box (This is the secret to getting those perfectly straight, square cuts!)
- Hammer
- 1 1/4″ Finish Nails
- Wood Glue
- Sandpaper or sanding blocks
- Manual Screwdriver (For the mounting hardware)
- Paint or stain of your choice
- Wall mounting hardware
- Chalkboard labels (optional)
Optional power tools
- Miter Saw – What I use | Beginner Option (instead of a hand saw/ miter box).
- Brad Nailer (instead of hammer/nails).
- Power Drill.
Printable Plans for the DIY Mail Holder
You can download the detailed step-by-step printable plans for this mail organizer, including the cut list, by clicking the button below.
Can I Really Build This Without a Drill?
Yes! Using finish nails and wood glue makes the structure very solid and all it is going to hold are papers, so it is strong enough. For the mounting hardware, use self-tapping screws or anchors that work with a manual screwdriver.
What Is the Best Wood for a DIY Mail Sorter?
I recommend Pine. It’s affordable, widely available at stores like Home Depot or Lowe’s, and is very “friendly” to hand saws.
How to Build a DIY Mail Organizer
Step 1: Prepare the Lumber
- Make all the cuts on the boards per the plans. Be sure to watch the video to see how to make the cuts. You can use a miter box for this. See how to use a miter box.
Or, you can use a circular saw.
Pro Tip: When sawing by hand, let the saw do the work! Don’t press down too hard, just focus on a smooth, rhythmic motion. This prevents the wood from splintering.
- Sand the boards well to remove any splinters and rough surfaces. You can use sanding blocks or sandpaper.
See how to sand wood for the best results.
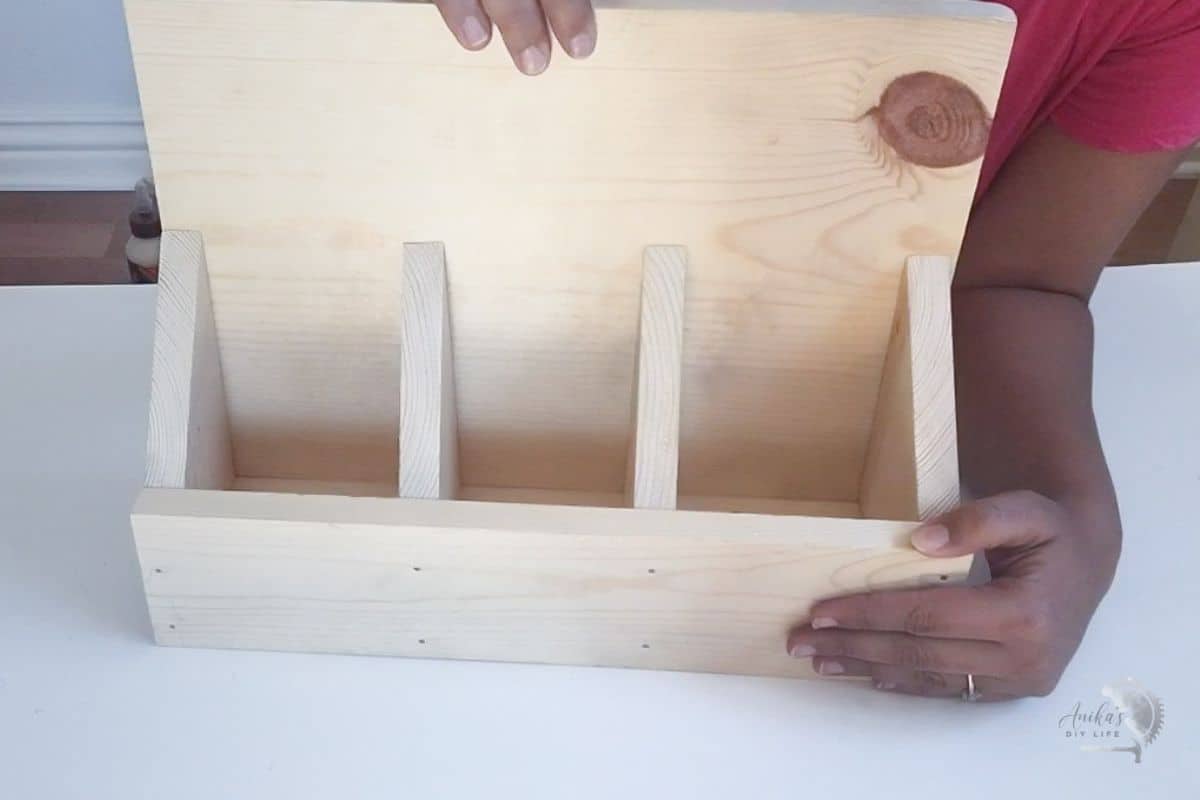
Step 2: Assemble the Frame
- Align the bottom 1×4 board to the back 1×12 board as shown below, and attach using wood glue and finish nails.
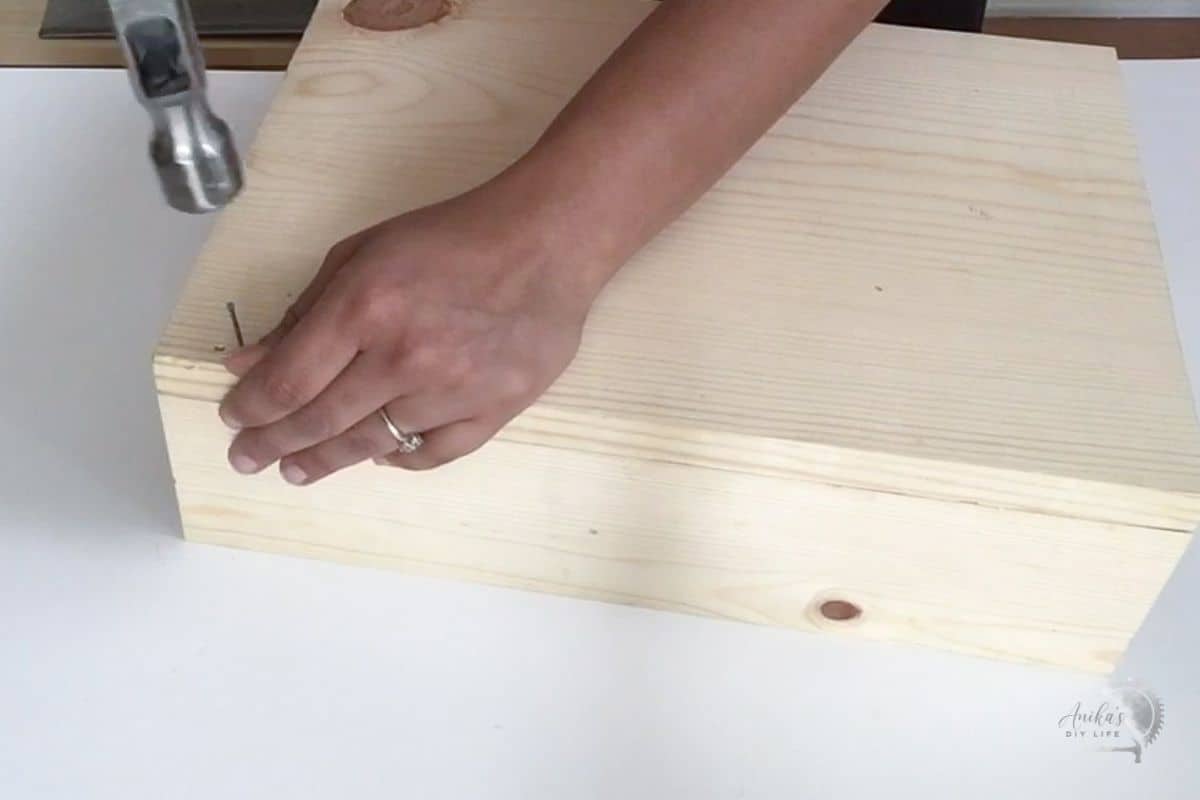
I am showing how to do this with a hammer and nails, but you can also use a brad nailer. Or if you prefer, you can use trim head screws and drill too!
Note: Glue is actually stronger than the nails themselves! The nails act as “clamps” while the glue dries.
- Align and attach the corner pieces using wood glue and finish nails.
- Measure and mark the space between the dividers per the plans, then attach them using wood glue and finish nails.
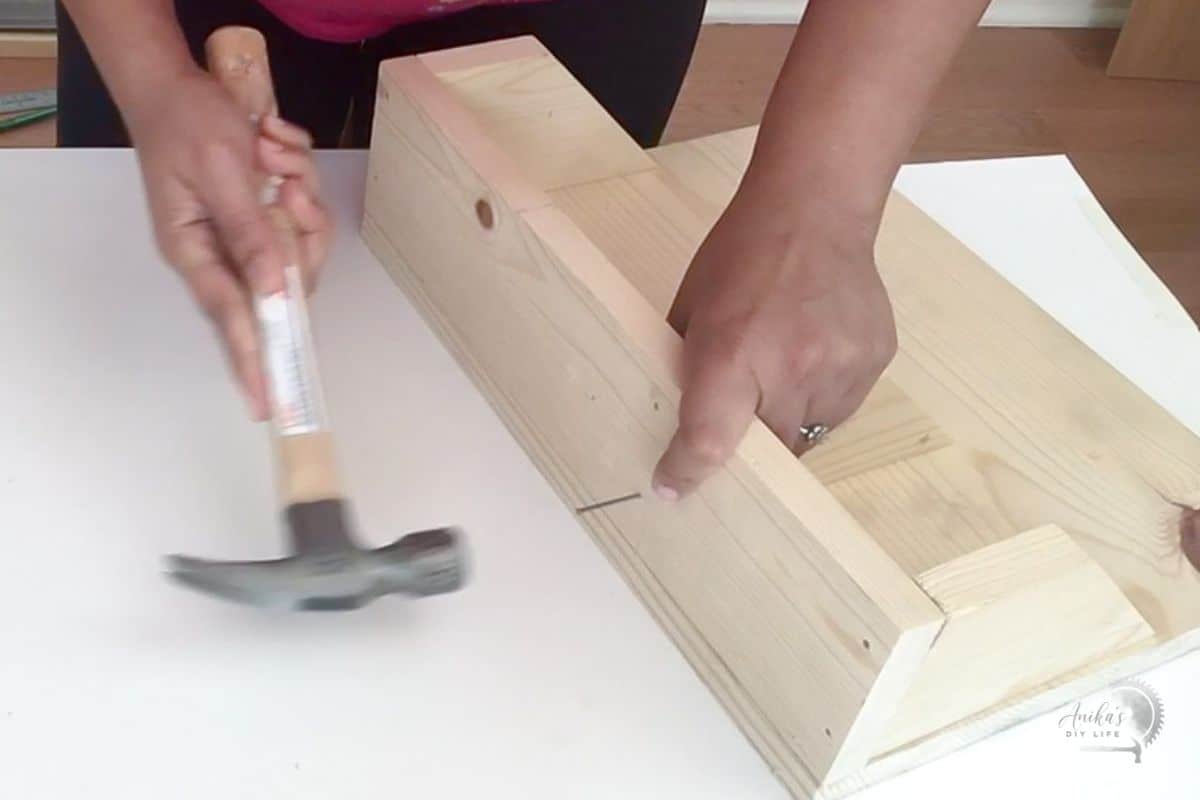
- Attach the front railing with wood glue and finish nails.
Step 3: Fnishing touches
- Add a couple of keyhole hangers to the back. Be sure to pay attention to their alignment.
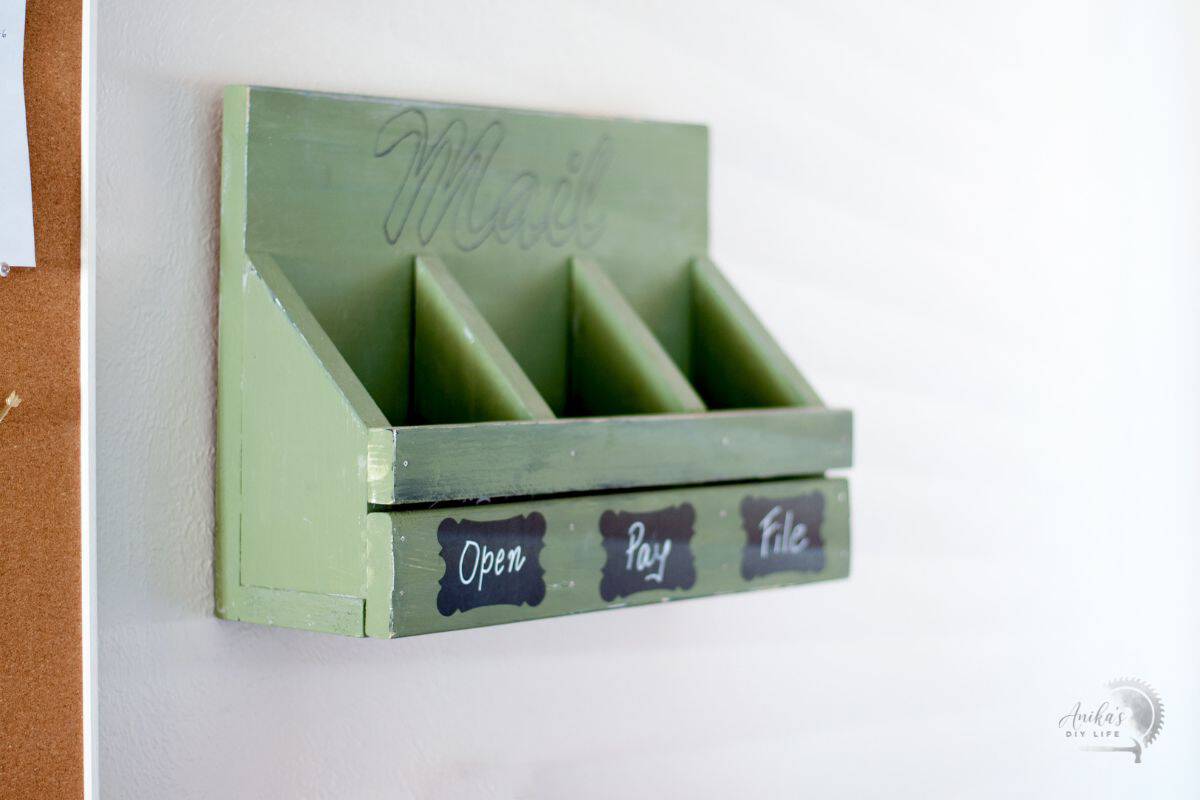
- Clean up any glue squeeze out with sandpaper and stain or paint in the color of your choice.
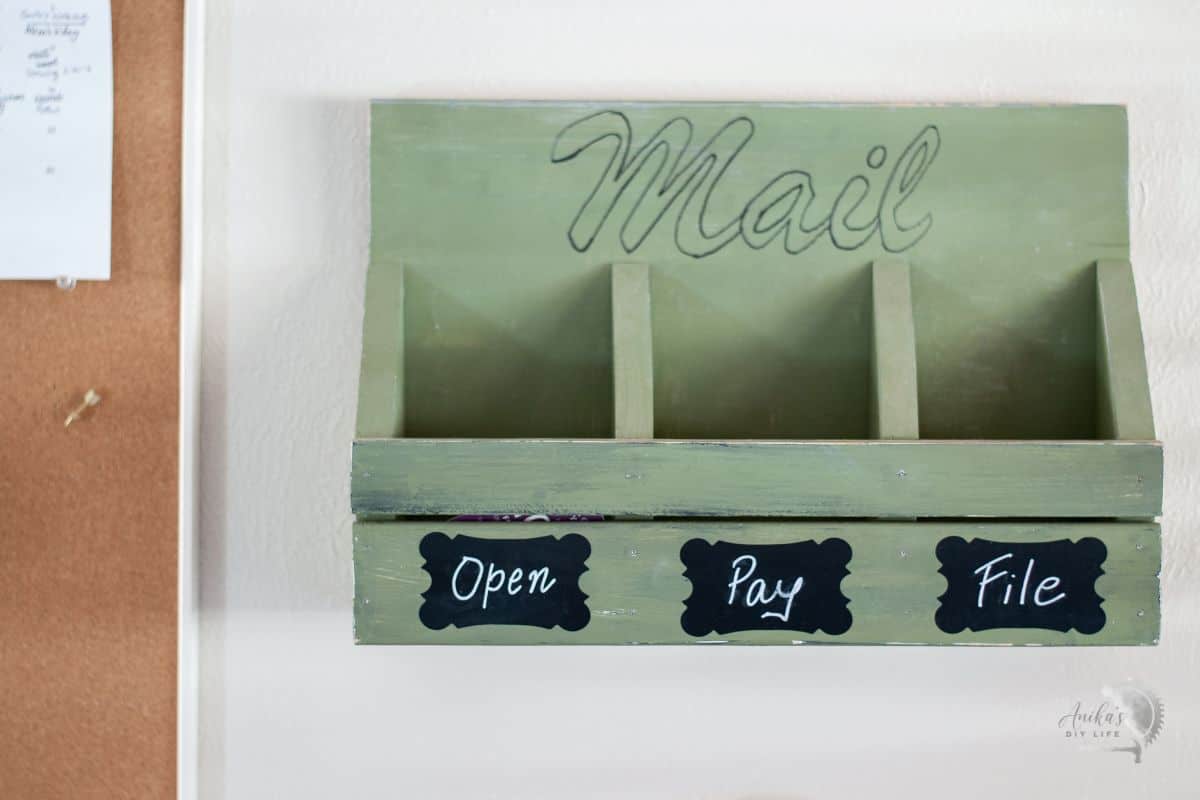
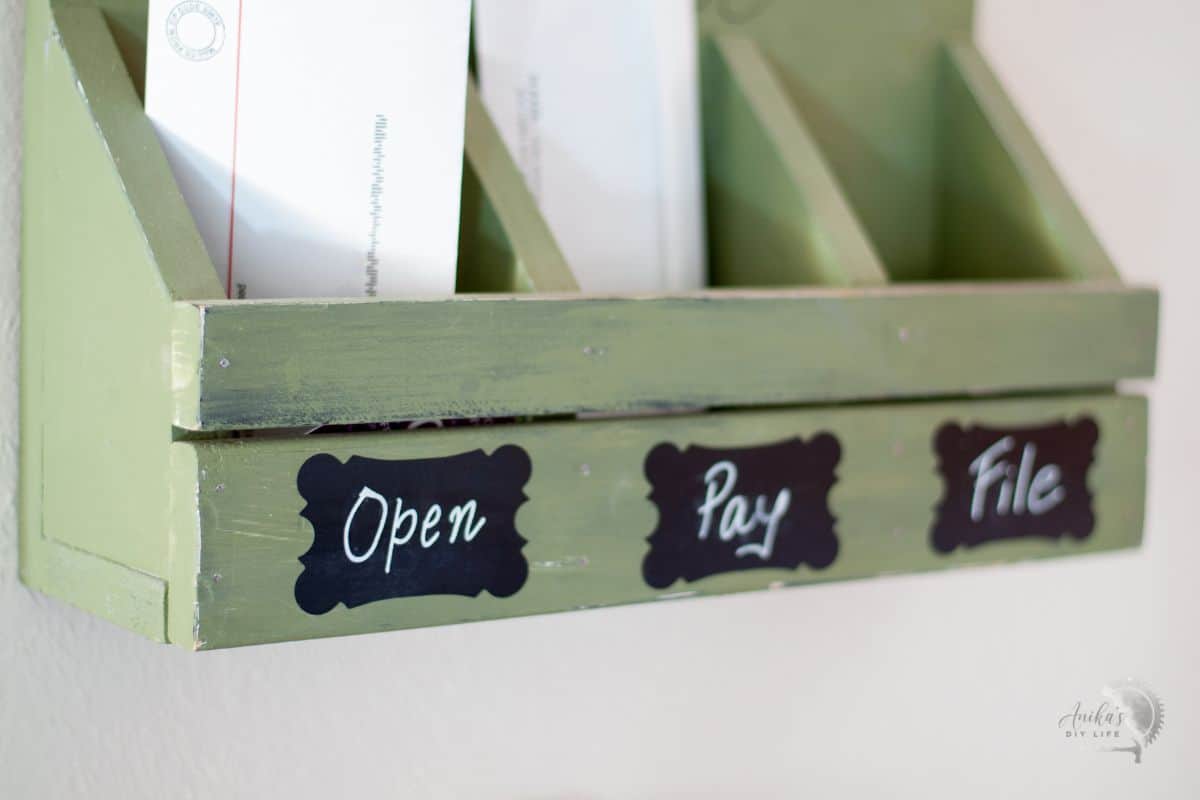
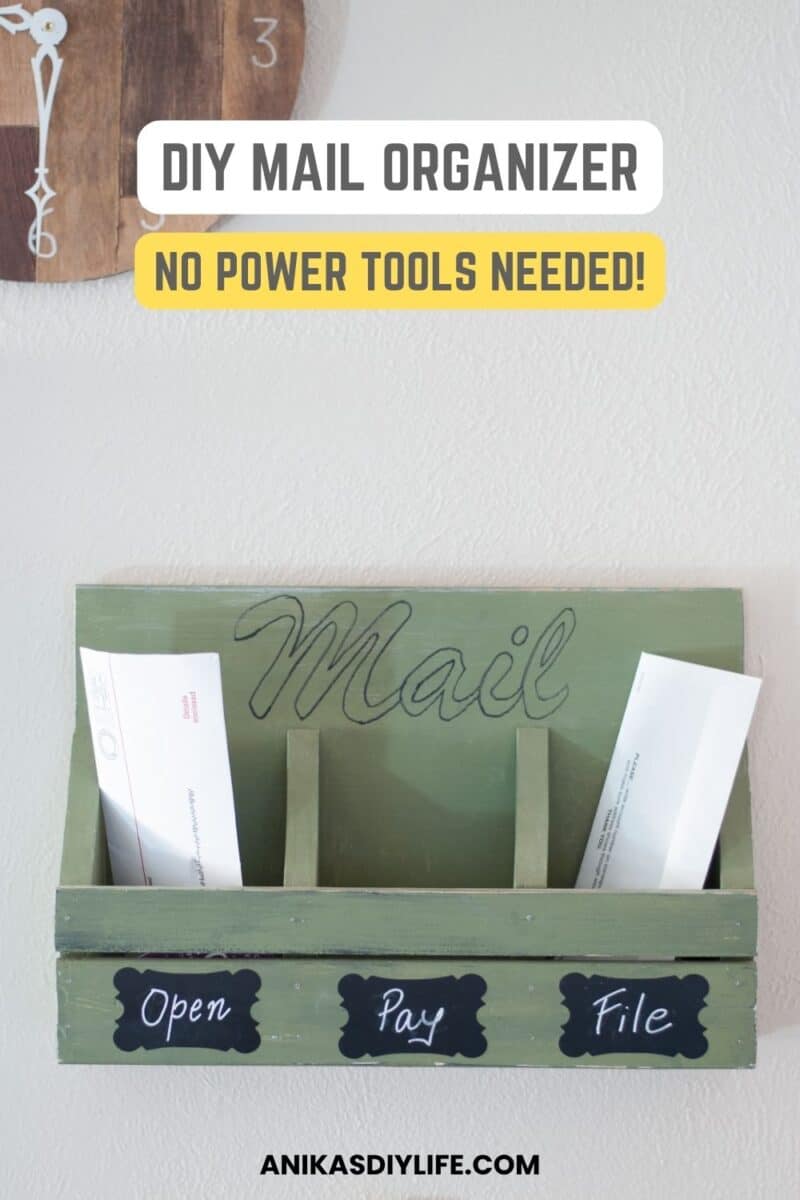
I used homemade chalk paint and distressed it. I also chose to add the word “mail” at the back with a black Sharpie.
A monogram or design cut on the Cricut would work well, too. I added the chalkboard labels to add extra details. You would also add little hooks for keys on the front.
There it is!
Simple and super easy to build. You can also have this sit on a counter or entryway table.
Building your own mail organizer is so satisfying, especially when you realize you don’t need a garage full of tools to get it done. This project takes the “scary” out of woodworking and gives you a functional, beautiful piece.
You might also like:


Anika's goal is to inspire and empower beginners with woodworking, DIY, home improvement, and home decor ideas.
She wants everyone to unlock their creative potential and experience the feeling that comes with making something. Nothing feels better better than seeing something and saying "I can make that!"


I’ve been itching to make something similar for a long time now. Maybe this will be my final motivation!
#shareitonemoretime
Katelynn, hampersandhiccups.com
Functional and adorable. Got to love those combinations. Thanks for linking up at #HomeMattersParty
Great organizer! I was wondering how much did it take you to finish this project? This project seems to be very easy and very practical!
Hi! Anika, do you have a template for the stickers? Thank you.
Hi Nigel,
The stickers are linked to in the post.
Thanks,
Anika
You gave me the perfect idea to create a small shelf and hide the light bellow I will place a mirror, do you like the idea?
Yes! That is a great idea!