How to Paint an IKEA Tarva Dresser
Learn how to paint an Ikea Tarva dresser and create a fun, whimsical, and colorful dresser perfect for a kids room or nursery!

My favorite things about Ikea is how customizable their furniture is.
In fact, they want you to do just that and sell a whole line of unfinished furniture – the Tarva and the Rast line.
I have refinished a larger Tarva dresser in the past – in fact it wasn’t just painted, I added beautiful fabric drawer fronts.
This one was going into my kids’ shared room so it needed to be gender-neutral. But that doesn’t mean it needs to be boring!
Just a little bit of paint turned it into a fun and whimsical dresser perfect for the kid’s room!
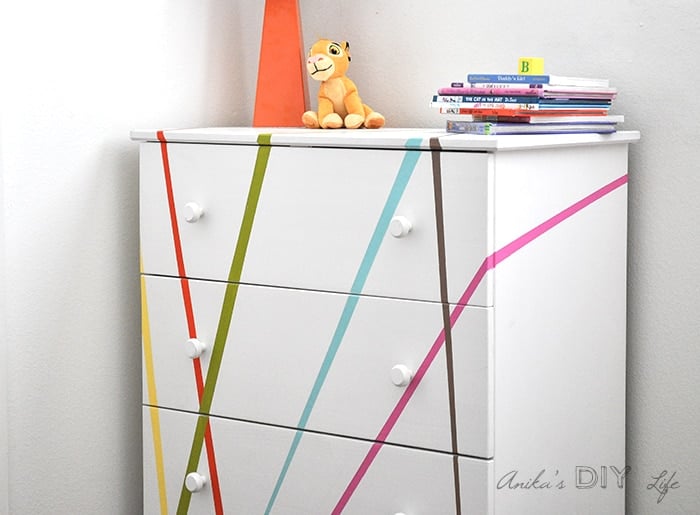
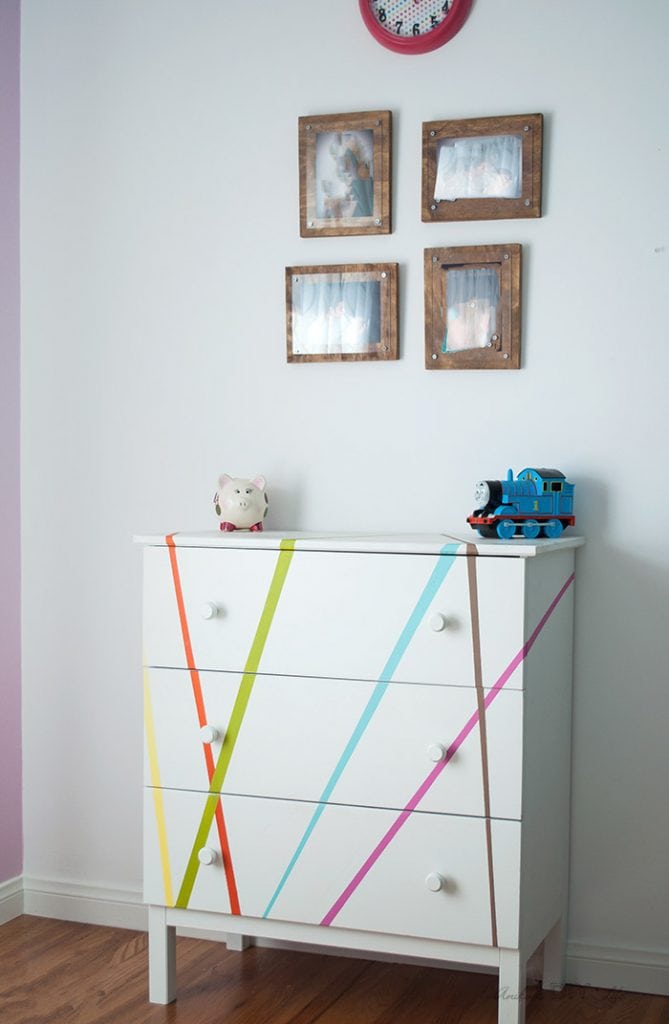
Update – This dresser is from when we were in a rental home. In our new home, it found its place in the colorful boy-girl shared room.
***This post contains affiliate or referral links. It is a way for this site to earn advertising fees by advertising or linking to certain products and/or services. Please read my full disclosure here ***
Materials Needed to Paint IKEA Dressers
- Fine grit sanding block
- Shellac based primer
- White oil-based primer
- Painter’s tape
- Various colors of latex paints. Mine is a collection of oops paints I have gathered over the years.
- Disposable brushes and roller for the shellac and oil-based primers
- Good quality bristle brush for the latex paints. My favorite is this.
- Paint sprayer for the white paint – optional but totally recommended!
- Yardstick and pencil
- Spray shelter (optional too, but it really is so helpful)
How to Paint an IKEA Tarva Dresser
Step 1- Prep
- Give the entire dresser a quick sanding with 180 grit sandpaper.
This not only removes any dirt or gunk (if the dresser is older) but also roughens up the surface and opens up the pores of the wood.
That helps primer and paint stick better and be more durable.
Step 2 – Seal the knots
- Apply shellac based primer to seal the knots with a disposable brush.
This is a very important step! It keeps them from bleeding through the paint and creating brown stains a few months later.
I like to simply apply the shellac-based primer only to the knots. You could definitely cover the entire dresser with this if you like, but it is expensive and I I can’t use it in a paint sprayer.
Plus this works just fine.
Update – This dresser has been painted for almost 5 years now and there are no stains due to knots leaking through.
Read more about my entire process of painting unfinished pine.
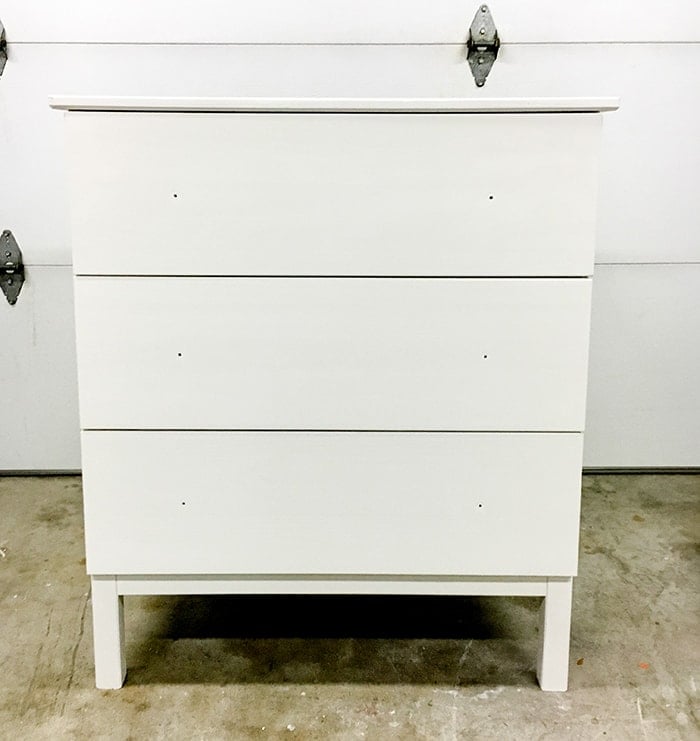
Step 3 – Prime and paint the dresser
- Apply 2 coats of the oil based primer to the entire dresser and drawers (separately) using disposable brushed.
- Once that has dried, apply 3 coats of latex paint.
For the white latex paint, I used my favorite paint sprayer
The 2 coats of primer took me almost 1 hour each to complete. With the paint sprayer, I completed one coat of paint in 20 minutes! Unfortunately, I can’t spray oil-based primer as it makes cleaning the paint sprayer a lot harder!
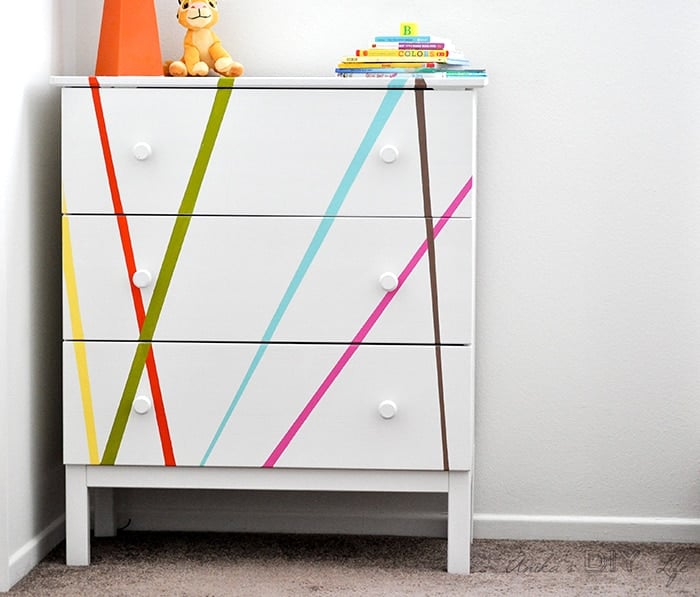
Here it is – all painted.
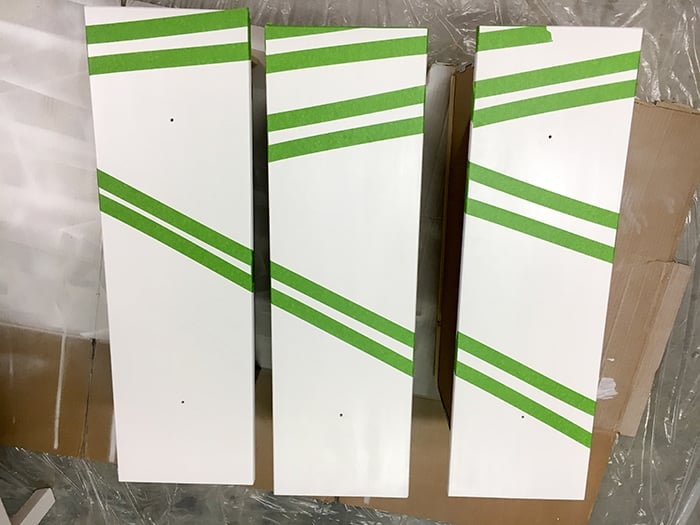
Step 4 – Mark pattern
- Once the paint has dried 24 hours, put the drawers back on the dresser and mark lines using a yardstick.
There is no right or wrong way for this… it is totally up to your imagination.
To add to the whimsy, I also wrapped a few lines onto the top as well.
- Once you are happy with the pattern, take the drawers apart and tape off all the lines.
Step 5 – Paint the stripes
- Paint the stripes in the colors of your choice. I used a range of oops paints and leftover sample pots.
- After one set of colors is painted and dry, tape off and paint overlapping lines.

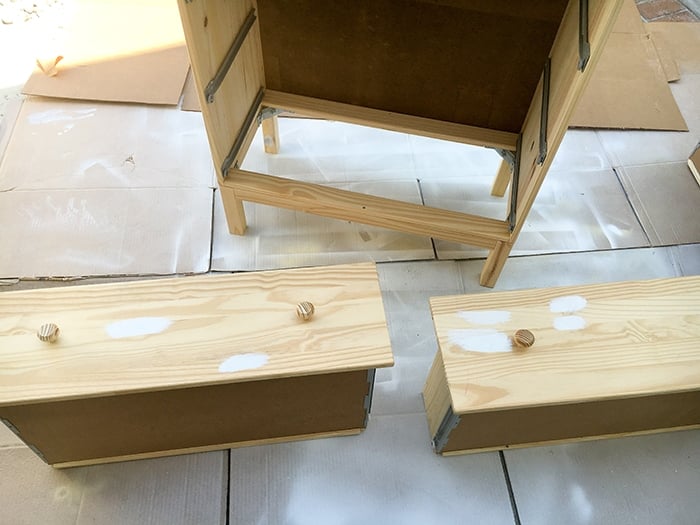
Step 6 – Add knobs
I decided to paint the knobs that came with the dresser white so they did not take the focus away from the fun colorful lines.
Thats it!
A super easy, fun and colorful Ikea Tarva Dresser makeover!
I love the whimsy and touch of happiness it adds to the room.
It is right in front of the door and I love to catch a glimpse of it when I walk by.
Update – 5 years later, this dresser now sits in the kids shared room and is still going strong!
More Like This –
Take a look at lots more easy DIY kids room ideas.
Or, you might like to take a look at all the Ikea hacks!
Anika's goal is to inspire and empower beginners with woodworking, DIY, home improvement, and home decor ideas.
She wants everyone to unlock their creative potential and experience the feeling that comes with making something. Nothing feels better better than seeing something and saying "I can make that!"


Your dresser is really cute, and you were really patient doing all of those steps, but it was definitely worth it!! I also like the additional pop of color with the lamp!
Thank you Melony!!! I got so lucky with finding that perfect lamp 🙂
This came out super, super cute. I have a tween room to do this summer and really want to do a project with him that he can call his own. Maybe something like this with bolder stripes would look cool with his guitar collection.
Thanks for the inspiring post.
Pam
Love any Ikea hack! Great post and I love what you did with your dresser!
Aw this is so fun! The perfect addition for a kid space. Thanks so much for linking up at The DIY Collective! 🙂
Such a great dresser and tutorial. I bought an unfinished set of hutches once but only ended up putting a clear coat of varnish on them. This is far better!