DIY Pottery Barn Inspired Nightstand – Free Plans
Build a Pottery Barn inspired nightstand for a fraction of the cost. A fun take on the Clara lattice bedside table with step by step tutorial and free Plans!

You will also love DIY nightstand with hidden storage and DIY upholstered X-leg bench
Our master bedroom has been in evolution mode for the last few months. We started out with just a mattress and box spring on a bed frame. I built an upholstered headboard, hacked an Ikea Tarva dresser and built the X-base accent table to serve as the nightstand. It was so nice to finally have a real nightstand after 3 years!
I set out to find the perfect mismatched bedside table. When I came across the Clara lattice wide bedside table from Pottery Barn, it was love at first sight! But, it cost only $499… obviously, I was going to be building it!
Once again, the awesome Jamison from Rogue Engineer graciously agreed to draw up plans to build it! His plans were so easy to follow and precise! I am so honored to be able to work with him on this. Check the bottom of the post for the link to download plans.
***This post contains affiliate or referral links. It is a way for this site to earn advertising fees by advertising or linking to certain products and/or services. Please read my full disclosure here ***
Materials and Tools Required –
- Lumber according to the plans
- Kreg Jig
- 1¼” Pocket hole screws
- Circular saw
- Jigsaw
- 1¼” Spax screws
- Wood glue
- Kreg Right angle clamp
- 1¼” finish nails
- Nail gun or Hammer
- 14″ Drawer slides
- Level
- Drill and drill bits
How to Build Pottery Barn Inspired Nightstand –
Please note that I reduced the width of the nightstand to fit the space in my master bedroom. Simply follow Jamison’s directions for the full width.
Step 1 – Start by making all the cuts and pocket holes per the plans.

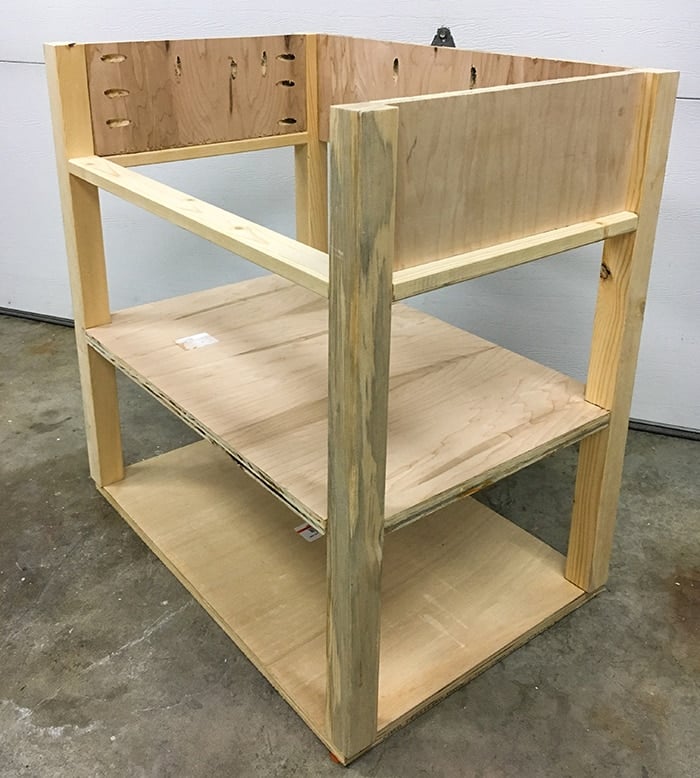
Step 2 – Build the back of the table by attaching the two 2 x 2 legs to the back plywood using wood glue and 1 1/4 pocket hole Kreg screws. I love using Purebond plywood because it is formaldehyde free!

Step 3 – Attach side panels and the front 2 x 2 legs. These right angle clamps are my favorite! It’s like having an extra set of hands!

Step 4 – Prepare the middle shelf. Cut out the corners using the removable spacer of of Kreg jig to make the pocket holes like shown blow. Attach the middle shelf to the legs using the pocket hole screws.

Step 5 – Screw in the bottom shelf to the frame. I used 1 1/4 spax screws. I love these screws because they do not need any pre-drilling.
Step 6 – Add 1 x2 rails around the top where the drawer goes.

Step 7 – Make the X’s. Cut them per specifications in the plans but also do a rough fit before attaching them. I used wood glue and 1 1/4″ finish nails. Then attach1 x 2 molding around the middle and bottom shelves. Use pocket holes on the sides of the 1 x 2’s as well as the pocket holes on the bottom of the shelves to attach the molding.

Step 8 – Time to assemble the top by attaching the plywood to the 1×2’s. This was really straightforward!

Step 9 – Assemble the drawer. I forgot to take a picture of it after the base was attached. You will see why in the next step.

Step 10 – Attaching the drawer slides. This was my first time working with drawer slides. Jamison recommended these ones. They weren’t too hard to install once I got things square. It’s a TOTALLY different story that I had to rebuild the drawer 2 times because it was just so slightly off square. Once I had the drawers figured out, it wasn’t too bad.

Step 11 – Attach the drawer front. Put the table top on and use wood shims to ensure 1/8″ space around the drawer front. Then take the top off and attach the front using wood glue and the 1 1/4″ spax screws from the inside.

Step 12 – Time to attach the feet. Cut up the feet from scrap 1 x 4 boards. Attached them to the bottom molding using 1 1/4″ spax screws.

Step 12 – Attach the top by removing the drawer and using pocket holes on the sides and back.
Step 13 – Fill all visible pocket holes with wood putty and all gaps with caulk and give the entire piece a good sanding.
Finish for the Pottery Barn inspired nightstand – I Sealed all the knots with a shellac based primer followed by primer and paint using my Homeright paint sprayer! I used Behr Marquis color matched to Glidden’s “Mayflower” – same as the DIY X-base accent table. I only needed about 2/3rd of a test pot. The knob is from hobby lobby.

Presenting the Pottery Barn inspired DIY Clara Lattice Bedside table! The best part – cost me $55 in lumber! Not to mention I got to pick the color :).
Sources: Table Lamp | Lamp Shade | Upholstered headboard | Basket | Bedding/Duvet cover

I love it so much! I moved the X-base table to my husband’s side of the bed and this one to mine. Look at those X’s on the sides!
If you want the plans just click here to go to Jamison’s blog by clicking below –


Thanks for reading! If you enjoyed this post, please share with your friends!


Did you enjoy this DIY Clara Lattice Bedside table?
Be sure to check out my five favorite woodworking tools and tricks that make woodworking so much easier!


If you are looking for a beginner project, this DIY Outdoor coffee table is perfect!
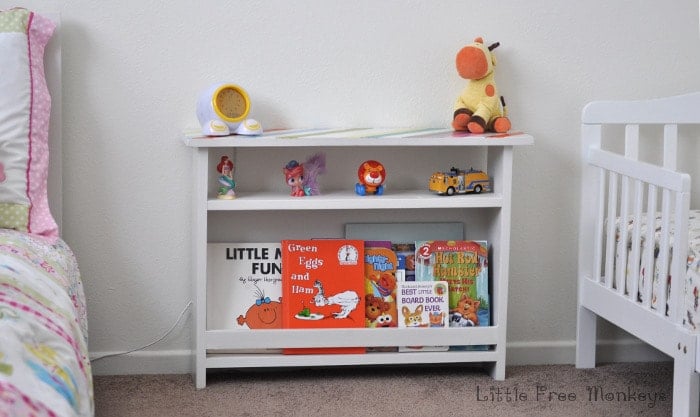
Another super easy and quick woodworking build is this Kids bedside table with book storage –
If you are looking for more fun DIY nightstands, you might also like –
Anika's goal is to inspire and empower beginners with woodworking, DIY, home improvement, and home decor ideas.
She wants everyone to unlock their creative potential and experience the feeling that comes with making something. Nothing feels better better than seeing something and saying "I can make that!"


you’re doing a great job indeed! I envy you..I don’t have that ‘skill’ to create one but always admire those who can creatively make beautiful things :). thanks for joining us and Happy #OMHGWW. cheers
This little side table is so cheerful and bright! I just love it, that is why I featured it this week as my favorite at the Totally Terrific Tuesday Link Party! Please come again and link up with us!
Featured, pinned. Love that you give the plans also. Thanks for joining the What to do Weekends Party. Your friend, Linda @Crafts a la mode
Wow, I was looking at this table (the Pottery Barn version) in Google images and admiring it when I stumbled on to yours. Amazing! I can’t believe you made that. I’m so impressed. I’m always looking at stuff I like and thinking about getting someone to make me the whatever but YOU did it! Looks adorable in the yellow. The other X base one is fantastic, too. Good choice mixing them and not going matchy-matchy.
I’ve subscribed to your blog and look forward to seeing your projects regularly.
Hi Susano! Thank you so much for your little note! You totally made my day! I am so glad that you will be following my blog. You will not be disappointed. I have a ton of fun projects lined up! Have a great day!
I was just looking at this bedside table at pottery barn, and really wishing it wasn’t so expensive so I could buy it! Now I can have it!! Thanks so much for this!
Thats Awesome Gracie!!! I would love to see it when you make one!