Easy DIY Kids Table and Chairs Set
Share this post:
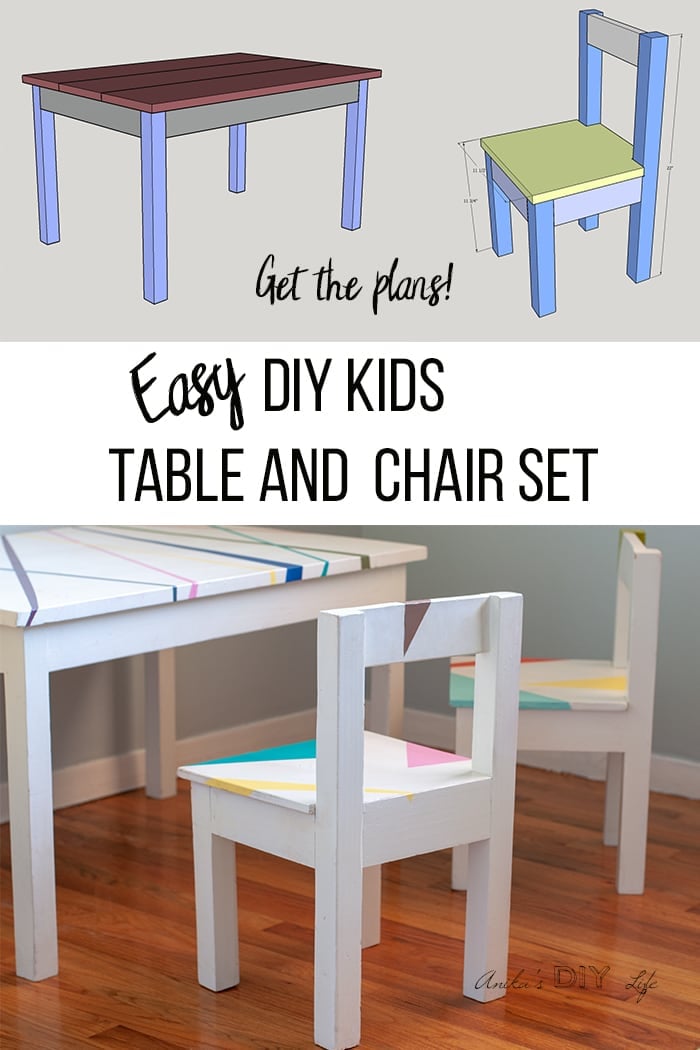
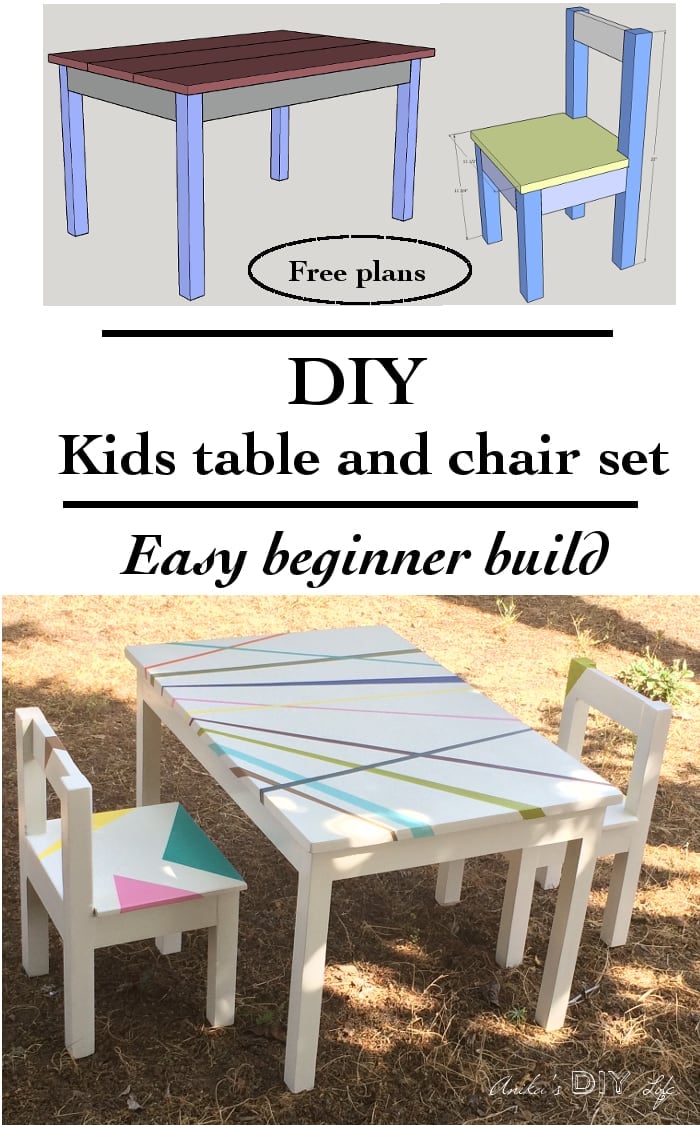
Learn how to build an easy DIY Kids table and chair set. Detailed plans make this a great beginner woodworking build and can be done in a couple of hours!
You will also love 21 DIY Kids table and Chair Ideas, and DIY Kids table with hidden storage
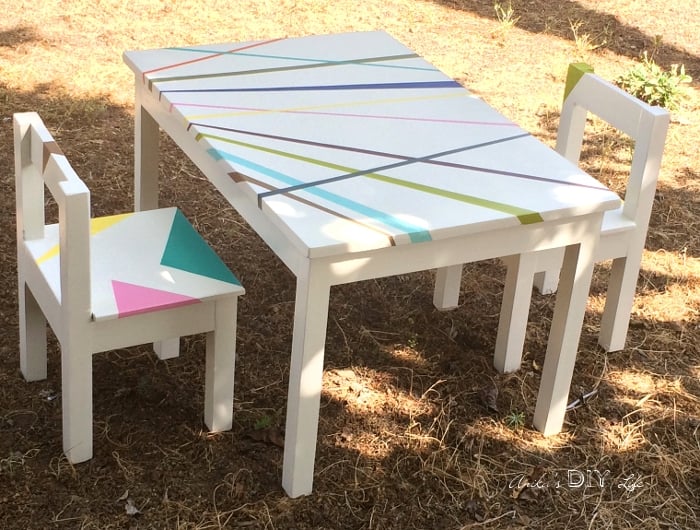
This DIY Kids table and chair set is where it all started!
This one right here! It was the first piece of furniture I ever built! 8 years ago!
So, of course, it is very close to my heart!
I have since built a whole bunch of designs and variations of the table and chair set. But this one is the simplest.
And it is still looking great 8 years later!
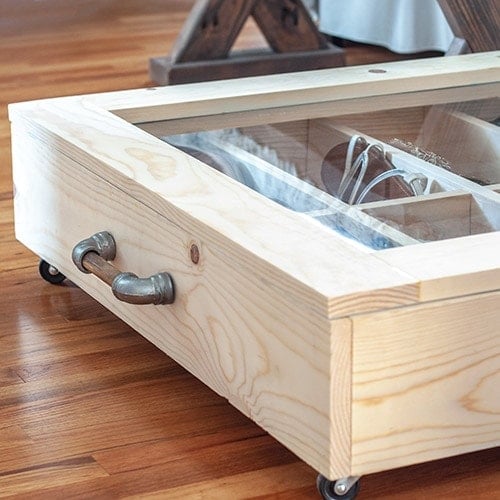
Take a look at the other version – the kid’s table with storage and a few other variations of it.
***This post contains affiliate or referral links. It is a way for this site to earn advertising fees by advertising or linking to certain products and/or services. Please read my full disclosure here ***
DIY Kids Table Instructions-
The table is the Clara Kids table by Ana White. You can get theDIY table step by step instructions there.
I just pretty much followed her plans, except made it a bit shorter. The legs are 17 1/2″.
RELATED: Check out this DIY angled leg kids table
How to Build a Kid’s Chair –
Below is the video showing how to build the kids’ chair and a table with hidden storage to go with it.
Step by step instructions for the chair follow below.
For the chairs – Ana uses countersink screws and no Kreg Jig.
But once you use a Kreg jig, you want to use it to build everything, so here is my version of the basic DIY kid’s chair using a Kreg Jig –

Materials for Building a DIY Kids Chair –
Woodworking Plans for Children’s Chair –

Step 1 – Make all the cuts and pocket holes as shown.


Step 2 – Attach the front apron to the 2 front legs using the pocket hole screws and wood glue.

Step 3 – Attach the side aprons to the front legs using pocket hole screws and wood glue.

Step 4 – Build the back frame – Mark 11″ on the long back legs and attach the back apron at that location. The top support is attached at the top edge. NOTE how the back apron and top support are attached at different edges of the legs.

Step 5 – Attach the side aprons to the back legs by aligning the 11″ mark on the back legs to the top edge of the side aprons.

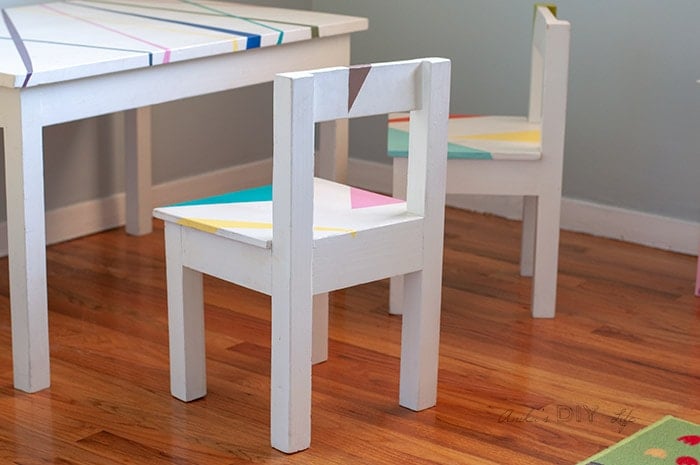
Step 6 – Place the seat on the chair and screw in from the bottom through the pocket holes. use wood glue.

IMPORTANT – The pocket holes will face outward on all the aprons and top support to avoid splitting the 2″x2″ boards.
That’s it the chair is ready!
Fill all the pocket holes using wood filler, sand, prime, and paint.

Check out how to paint unfinished wood.
I am so glad I went with the fun design – it is still one of my most favorite and is now used by my son.
It still looks great 6 years later…

Here is another idea for the finish of the DIY Kids table and chairs set. (I apologize for the bad picture. It is from my pre-blog days.)I used dark walnut stain. The fabric is a Suzani print . I used iron on vinyl to add the vinyl coating and upholstered the plywood for the seat.

If you do this, you will need to cut out the seat a bit more near the back legs to accommodate the upholstery.
If you are a beginning DIYer or woodworker, be sure to check out beginner woodworker starting guide.
Other projects for kids you might like –
See 28 other adorable kids room ideas.
[mv_create key=”6″ type=”diy” title=”DIY Kids Table and Chair Set” thumbnail=”https://www.anikasdiylife.com/wp-content/uploads/2016/12/Easy-DIY-kids-table-and-chair-Anikas-DIY-Life-chair-1_feature.jpg”]
Anika's goal is to inspire and empower beginners with woodworking, DIY, home improvement, and home decor ideas.
She wants everyone to unlock their creative potential and experience the feeling that comes with making something. Nothing feels better better than seeing something and saying "I can make that!"
- Anika Gandhi
- Anika Gandhi
- Anika Gandhi
- Anika Gandhi
- Anika Gandhi
- Anika Gandhi
- Anika Gandhi
- Anika Gandhi
- Anika Gandhi
- Anika Gandhi
- Anika Gandhi
- Anika Gandhi
- Anika Gandhi
- Anika Gandhi
- Anika Gandhi
- Anika Gandhi
- Anika Gandhi
- Anika Gandhi
- Anika Gandhi
- Anika Gandhi
- Anika Gandhi
- Anika Gandhi
- Anika Gandhi
- Anika Gandhi
- Anika Gandhi
- Anika Gandhi
- Anika Gandhi
- Anika Gandhi
- Anika Gandhi
- Anika Gandhi
- Anika Gandhi
- Anika Gandhi
- Anika Gandhi
- Anika Gandhi
- Anika Gandhi
- Anika Gandhi
- Anika Gandhi
- Anika Gandhi
- Anika Gandhi
- Anika Gandhi
- Anika Gandhi
- Anika Gandhi
- Anika Gandhi
- Anika Gandhi
- Anika Gandhi
- Anika Gandhi
- Anika Gandhi
- Anika Gandhi
- Anika Gandhi
- Anika Gandhi
- Anika Gandhi
- Anika Gandhi
- Anika Gandhi
- Anika Gandhi
- Anika Gandhi
- Anika Gandhi
- Anika Gandhi
- Anika Gandhi
- Anika Gandhi
- Anika Gandhi
- Anika Gandhi
- Anika Gandhi
- Anika Gandhi
- Anika Gandhi
- Anika Gandhi
- Anika Gandhi
- Anika Gandhi
- Anika Gandhi
- Anika Gandhi
- Anika Gandhi
- Anika Gandhi
- Anika Gandhi
- Anika Gandhi
- Anika Gandhi
- Anika Gandhi
- Anika Gandhi
- Anika Gandhi
- Anika Gandhi
- Anika Gandhi
- Anika Gandhi
- Anika Gandhi
- Anika Gandhi
- Anika Gandhi
- Anika Gandhi
- Anika Gandhi
- Anika Gandhi
- Anika Gandhi
- Anika Gandhi
- Anika Gandhi
- Anika Gandhi
- Anika Gandhi
- Anika Gandhi
- Anika Gandhi
- Anika Gandhi
- Anika Gandhi
- Anika Gandhi
- Anika Gandhi
- Anika Gandhi
- Anika Gandhi
- Anika Gandhi
- Anika Gandhi
- Anika Gandhi
- Anika Gandhi
- Anika Gandhi
- Anika Gandhi
- Anika Gandhi
- Anika Gandhi
- Anika Gandhi
- Anika Gandhi
- Anika Gandhi
- Anika Gandhi
- Anika Gandhi
- Anika Gandhi
- Anika Gandhi
- Anika Gandhi
- Anika Gandhi
- Anika Gandhi
- Anika Gandhi
- Anika Gandhi
- Anika Gandhi
- Anika Gandhi
- Anika Gandhi
- Anika Gandhi
- Anika Gandhi
- Anika Gandhi
- Anika Gandhi
- Anika Gandhi
- Anika Gandhi
- Anika Gandhi
- Anika Gandhi
- Anika Gandhi
- Anika Gandhi
- Anika Gandhi
- Anika Gandhi
- Anika Gandhi
- Anika Gandhi
- Anika Gandhi
- Anika Gandhi
- Anika Gandhi
- Anika Gandhi
- Anika Gandhi
- Anika Gandhi
- Anika Gandhi
- Anika Gandhi
- Anika Gandhi
- Anika Gandhi
- Anika Gandhi
- Anika Gandhi
- Anika Gandhi
- Anika Gandhi
- Anika Gandhi
- Anika Gandhi
- Anika Gandhi
- Anika Gandhi
- Anika Gandhi
- Anika Gandhi
- Anika Gandhi
- Anika Gandhi
- Anika Gandhi
- Anika Gandhi
- Anika Gandhi
- Anika Gandhi
- Anika Gandhi
- Anika Gandhi
- Anika Gandhi
- Anika Gandhi
- Anika Gandhi
- Anika Gandhi
- Anika Gandhi
- Anika Gandhi
- Anika Gandhi
- Anika Gandhi
- Anika Gandhi
- Anika Gandhi
- Anika Gandhi
- Anika Gandhi
- Anika Gandhi
- Anika Gandhi
- Anika Gandhi
- Anika Gandhi
- Anika Gandhi
- Anika Gandhi
- Anika Gandhi
- Anika Gandhi
- Anika Gandhi
- Anika Gandhi
- Anika Gandhi
- Anika Gandhi
- Anika Gandhi
- Anika Gandhi
- Anika Gandhi
- Anika Gandhi
- Anika Gandhi
- Anika Gandhi
- Anika Gandhi
- Anika Gandhi
- Anika Gandhi
- Anika Gandhi
- Anika Gandhi
- Anika Gandhi
- Anika Gandhi
- Anika Gandhi
- Anika Gandhi
- Anika Gandhi
- Anika Gandhi
- Anika Gandhi
- Anika Gandhi
- Anika Gandhi
- Anika Gandhi
- Anika Gandhi
- Anika Gandhi
- Anika Gandhi
- Anika Gandhi
- Anika Gandhi
- Anika Gandhi
- Anika Gandhi
- Anika Gandhi
- Anika Gandhi
- Anika Gandhi
- Anika Gandhi
- Anika Gandhi
- Anika Gandhi
- Anika Gandhi
- Anika Gandhi
- Anika Gandhi
- Anika Gandhi
- Anika Gandhi
- Anika Gandhi
- Anika Gandhi
- Anika Gandhi
- Anika Gandhi
- Anika Gandhi
- Anika Gandhi
- Anika Gandhi
- Anika Gandhi
- Anika Gandhi
- Anika Gandhi
- Anika Gandhi
- Anika Gandhi
- Anika Gandhi
- Anika Gandhi
- Anika Gandhi
- Anika Gandhi
- Anika Gandhi
- Anika Gandhi
- Anika Gandhi
- Anika Gandhi
- Anika Gandhi
- Anika Gandhi
- Anika Gandhi
- Anika Gandhi
- Anika Gandhi
- Anika Gandhi
- Anika Gandhi
- Anika Gandhi
- Anika Gandhi
- Anika Gandhi
- Anika Gandhi
- Anika Gandhi
- Anika Gandhi
- Anika Gandhi
- Anika Gandhi
- Anika Gandhi
- Anika Gandhi
- Anika Gandhi
- Anika Gandhi
- Anika Gandhi
- Anika Gandhi
- Anika Gandhi
- Anika Gandhi
- Anika Gandhi
- Anika Gandhi
- Anika Gandhi
- Anika Gandhi
- Anika Gandhi
- Anika Gandhi
- Anika Gandhi
- Anika Gandhi
- Anika Gandhi
- Anika Gandhi
- Anika Gandhi
- Anika Gandhi
- Anika Gandhi
- Anika Gandhi
- Anika Gandhi
- Anika Gandhi
- Anika Gandhi
- Anika Gandhi
- Anika Gandhi
- Anika Gandhi
- Anika Gandhi
- Anika Gandhi
- Anika Gandhi
- Anika Gandhi
- Anika Gandhi
- Anika Gandhi
- Anika Gandhi
- Anika Gandhi
- Anika Gandhi
- Anika Gandhi
- Anika Gandhi
- Anika Gandhi
- Anika Gandhi
- Anika Gandhi
- Anika Gandhi
- Anika Gandhi
- Anika Gandhi
- Anika Gandhi
- Anika Gandhi
- Anika Gandhi
- Anika Gandhi
- Anika Gandhi
- Anika Gandhi
- Anika Gandhi
- Anika Gandhi
- Anika Gandhi
- Anika Gandhi
- Anika Gandhi
- Anika Gandhi
- Anika Gandhi
- Anika Gandhi
- Anika Gandhi
- Anika Gandhi
- Anika Gandhi
- Anika Gandhi
- Anika Gandhi
- Anika Gandhi
- Anika Gandhi
- Anika Gandhi
- Anika Gandhi
- Anika Gandhi
- Anika Gandhi
- Anika Gandhi
- Anika Gandhi
- Anika Gandhi
- Anika Gandhi
- Anika Gandhi
- Anika Gandhi
- Anika Gandhi
- Anika Gandhi
- Anika Gandhi
- Anika Gandhi
- Anika Gandhi
- Anika Gandhi
- Anika Gandhi
- Anika Gandhi
- Anika Gandhi
- Anika Gandhi
- Anika Gandhi


Your very clever with your wood working. Great build.
I love this table and the paint job is adorable. I learned some new stuff about you through the links in this article ?
Great table and chairs! You have great woodworking skills. Visiting from BOB Tribe.
Thank you Victoria!!
Am I completely missing the measurements for all the side aprons? Excited to get a pair of these going!
Hi Amy, The side aprons are 8″ each and are detailed in the cut list. Can’t wait to see what you make!
I love the table, and your skills. I’m always looking forward to your next post. They’re great inspiration. Thanks for sharing on Sunday’s Best.