Painting Outdoor Wood Furniture Like a Pro!
Your step-by-step guide to painting outdoor wood furniture like a pro and make it last a long time in the rain and shine! Just follow these simple tips and tricks!
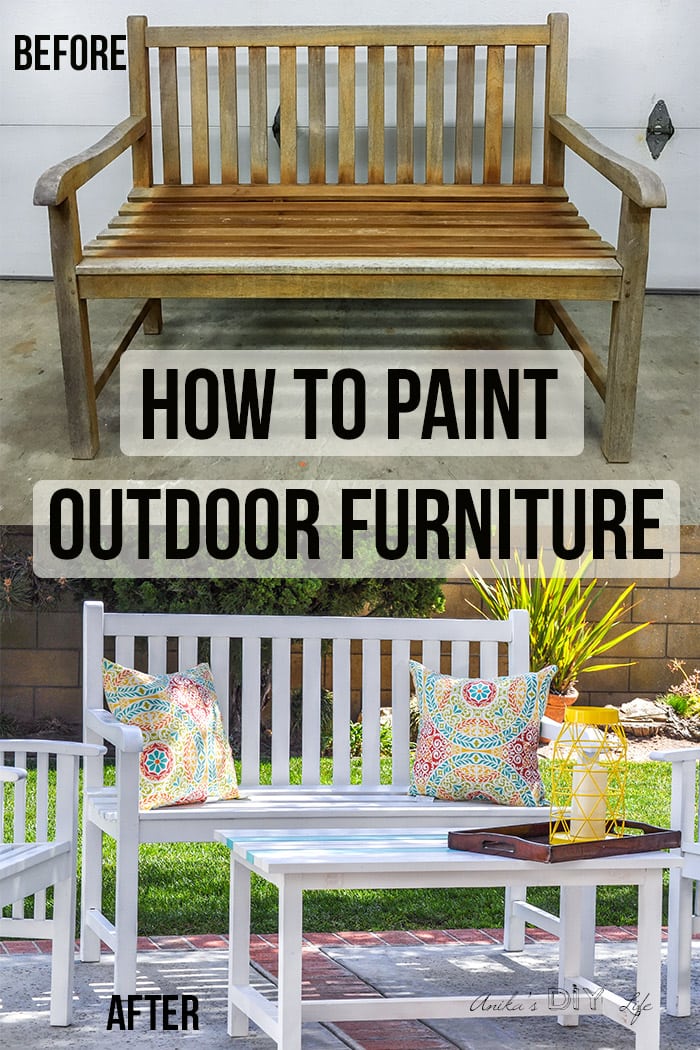
If you have old beaten-up wooden patio furniture, it is super easy to turn them around into gorgeous outdoor furniture that lasts for lots more years!
All you need is a little bit of paint...
And primer and a few other things…
I’ve got you covered with all the details you need to totally take outdoor furniture and turn it into the perfect pieces for your patio!
Painting Outdoor Furniture – The Before
One VERY lucky Saturday morning (which was Valentine’s Day), I found a bench and 2 chairs on the curb at the end of our block!
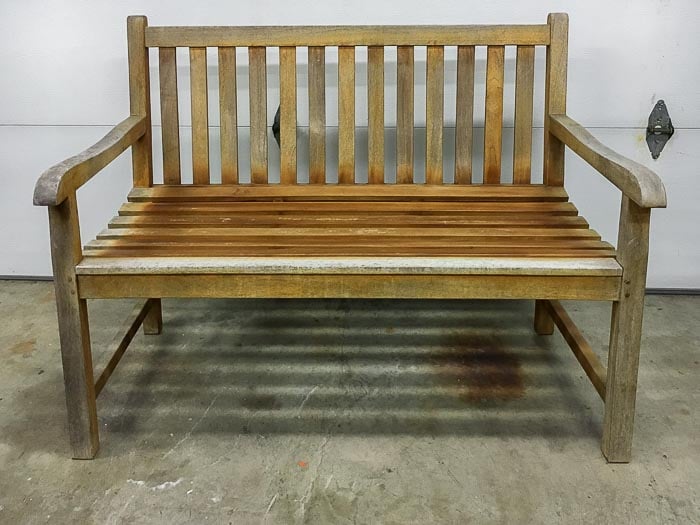
They had excellent bones!

The bench and chairs were very sturdy and strong but looked very beaten up!
There was no way, I wasn’t going to pick them up!
Especially because we had been shopping for patio furniture 🙂
***This post contains affiliate or referral links. It is a way for this site to earn advertising fees by advertising or linking to certain products and/or services. Please read my full disclosure here ***
What kind of paint to use on outdoor furniture?
- I highly recommend starting with a stain-blocking primer to paint outdoor wood furniture, followed by 3 coats of latex outdoor primer and multiple coats of exterior latex paint.
Outdoor latex paint usually has ultraviolet protection that protects the color and finish of the paint in the bright outdoor sun during the summer months. - This technique will work for outdoor metal furniture as well. But in that case, your first coat of primer needs to be rust-inhibiting. Spray paints are a great option for painting outdoor metal furniture.
- However, for plastic furniture, you will need paint specifically designed to stick to plastic.
Supplies needed to paint outdoor furniture
- Soap and scrub brush
- Power Washer or a hose with a pressure attachment
- Fine sanding sponges
- Tack Cloth
- Zinsser oil based primer
- Disposable Paint Brushes
- White Water-Based Primer
- Exterior semigloss paint ( I used Behr Marquee color-matched to “Whisper White” by Glidden)
- Exterior polyurethane in semi gloss
- Homeright finish max paint sprayer
- HomeRight Large Spray Shelter (optional but recommended)
- Drop Cloth or Cardboard to protect the floor
Be sure to download the printable instructions below –
How do you paint outdoor wood furniture
Step 1 – Clean the furniture
Give it a good cleaning to get all the dirt and grime out.
- Start by vacuuming off any old spiderwebs and their inhabitants and any loose dust.
- Use dish soap and a scrub brush to scrub down the entire piece of furniture.
- Finish by washing off the soap with a high-pressure attachment on a hose or a power washer. This is the power washer I have.
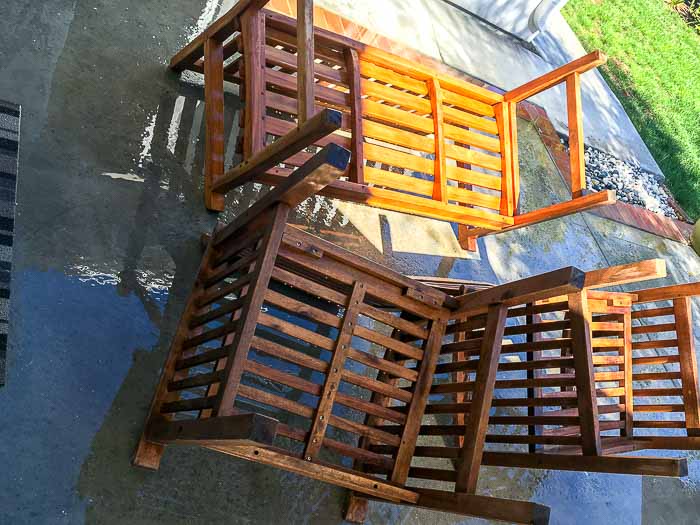
At the end of this step, I could already see that the furniture looked so much better!
It’s amazing what a good clean can do 🙂
But of course, it was pretty worn out to be used.
STEP 2 – Fix and make basic repairs
- Tighten any exposed screws
- If you have dents or holes, you could fill them with wood putty at this time too!
The chairs I had were a little wobbly and were very easily able to locate a couple of screws that needed to be tightened. That made it absolutely solid!
STEP 3 – Sand
- Using a sanding sponge, go over the entire furniture to give it a light sand and remove any old finish.
Depending on the original finish, you might need heavier sanding.
Mine was pretty worn out and a light sanding worked perfectly.
Be sure to remove all the sanding dust using a tack cloth.
Step 4 – Pick the paint color
This might as well be the hardest decision I made!
I got about a dozen paint chips and taped them to the bench and try them in the setting.
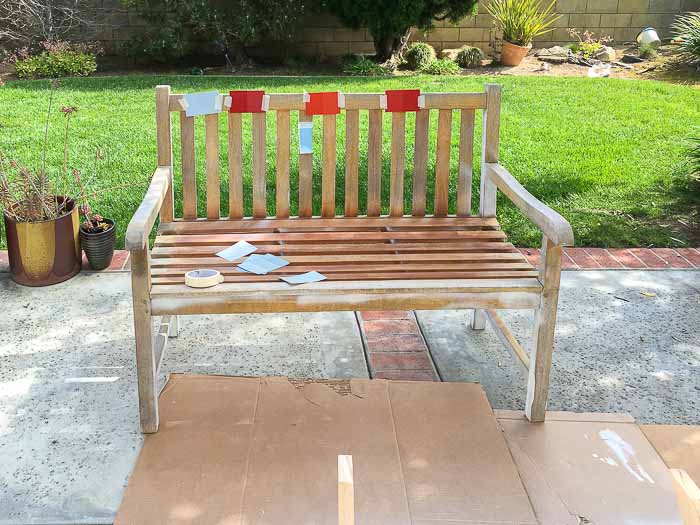
I was leaning more to the red but I was not sure.
While I deferred the decision on the color, I got to work on getting everything ready to be painted.
RELATED: See how I created a cozy and colorful corner in my new patio
Step 5 – Prime outdoor wood furniture
Primer needs to be applied in 2 steps on this old wood furniture –
- Start with applying one coat of Zinsser oil based primer using a disposable chip brush. This is needed to block any old stains seeping through.
- Next, apply 2 coats of White Water-Based Primer.
For the 2 additional coats, you could use the oil-based primer with a brush, but I like to use my paint sprayer to make it faster. Washing out the water-based primer from the paint sprayer is a lot easier.
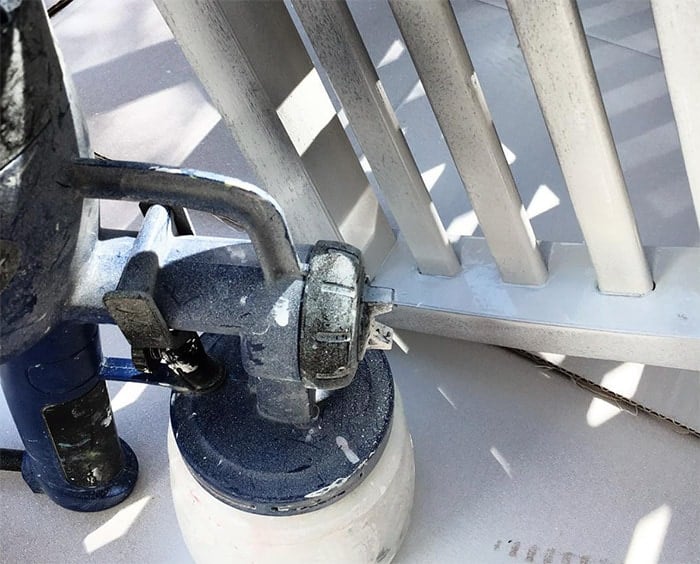
It only took me about 1 hour for one coat of primer using the paint sprayer on all the 3 pieces instead of a whole day to paint the oil-based primer with a brush!
Here is the bench after the first coat of oil-based primer.
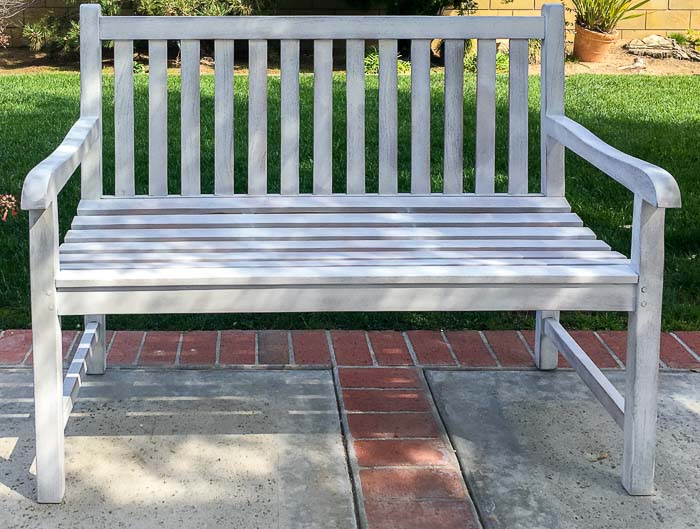
When I saw the white primed bench and chairs in the backyard, I knew I had to go with white paint!
I just loved the freshness of it!
Step 6 – Paint
- Apply 3 coats of paint to the furniture using the paint sprayer. The three coats are essential to achieve a durable finish.
I used Glidden’s “whisper white” color-matched to Behr Marquis Exterior semigloss paint.
Step 7 – Final Finish
- Finish with 2 coats of exterior polyurethane in semi-gloss sanding lightly with a fine sanding sponge between coats.
I like using my paint sprayer for this as well but you can use a good quality brush.
That is it!
Don’t forget! You can download the printable step by step instructions to save and take with you below –
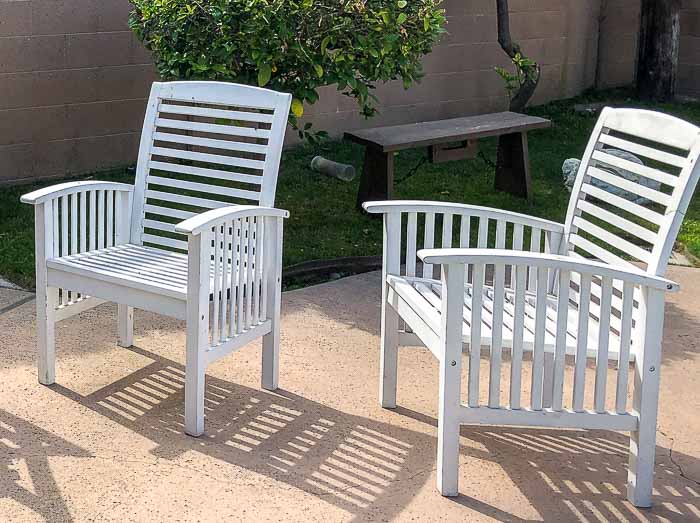
After Painting – The Reveal!
Here is the final patio set.
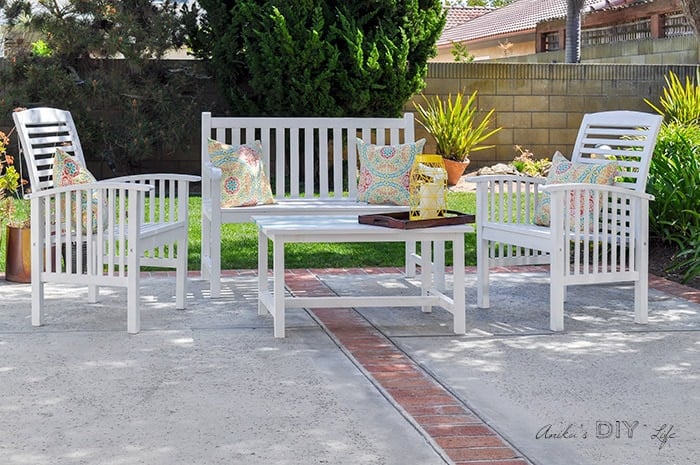
Love the fresh look and having a spot to hang out and enjoy summer evenings!
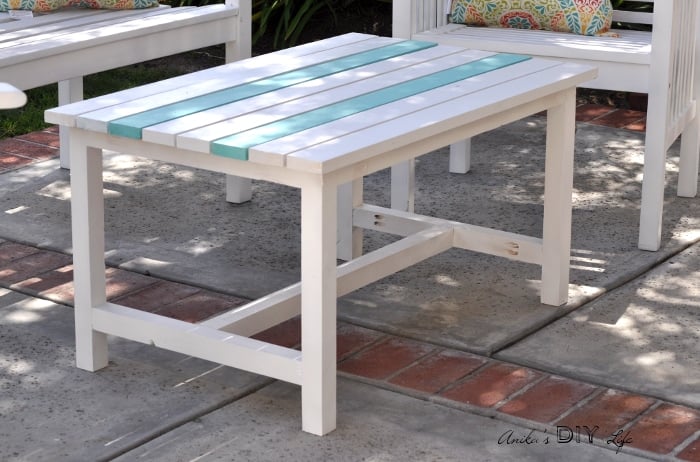
RELATED: How to build a $15 outdoor coffee table
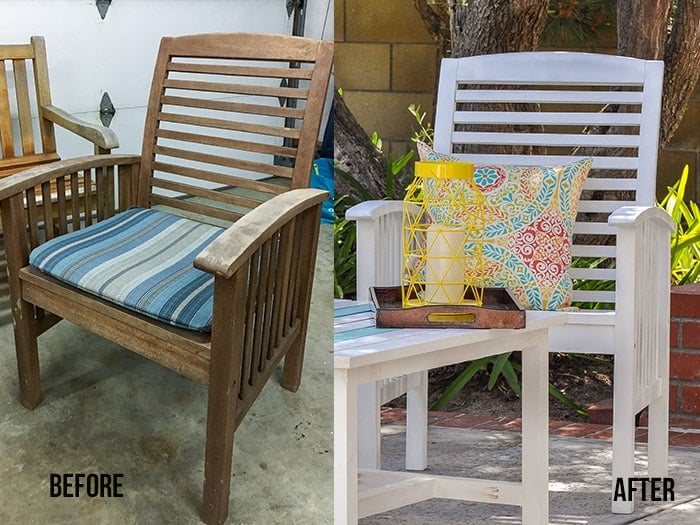
We all love a good before and after so here it is –
How Durable is outdoor painted wood furniture?
In one word – VERY!
We used this patio furniture for almost 4 years before changing it out.
Here is what it looked like the day we replaced it –
This painted patio furniture stood out in the Southern California sun and rain in an uncovered patio for 2.5 years, followed by a covered patio for about 18 months.
Over time, it got washed down many times!
At the end of the 4 years, the back of one of the chairs had a crack, but the paint looked as good as the day it was painted.
Obviously, I had to build a matching outdoor coffee table to go with my patio set. It only cost $15 and I have the plans available for you!
More outdoor projects you will love –
[mv_create key=”10″ type=”diy” title=”Painting Outdoor Wood Furniture Like a Pro!” thumbnail=”https://www.anikasdiylife.com/wp-content/uploads/2016/03/patio-set-makeover-feature.jpg”]
Anika's goal is to inspire and empower beginners with woodworking, DIY, home improvement, and home decor ideas.
She wants everyone to unlock their creative potential and experience the feeling that comes with making something. Nothing feels better better than seeing something and saying "I can make that!"


What a difference white paint makes! It looks like a completely different patio set. What a great curbside find!
Thank you Vineta!
Amazing! What a lucky find! I love the look of the crisp white. And you can easily change the look of it by adding different colored pillows and accessories. Great job. I’m jealous. 🙂
Thanks Christina! I still cant believe I found this on the curb!
What an incredible transformation! The white is so fresh and bright. Love it!
Thank you Leslie!
The makeover looks wonderful! You’ve certainly given new life to that old set. Well done! Pinned and Tweeted. Thanks for sharing at Snickerdoodle Sunday.
Thank you Beverly!
Stopping back by to let you know that I’ll be featuring your patio set makeover at this Saturday’s Snickerdoodle Sunday Party. Hope to see you there!
Thank you Beverly!! That makes my day!!
Oh my Goodness Anika! You are amazing! This is so gorgeous, I can’t believe that you found this on the side of the road, good for you girl! I love that you chose white, it’s fresh and happy for the season and just looks amazing and you can combine it with any kinds of coloured pillows! How great, that it was in good shape already and only needed some screws to be tightened up!
Thank you Katrin!!